

The newest addition to our Gnome collection is the Christmas tree Gnome. But this time, I reworked the pattern to fit 16 oz or 32 oz jars. This way, you can place some goodies inside and turn them into the perfect Christmas gifts for family members and co-workers. So scroll down for the free pattern or buy the inexpensive, ad-free, beautifully formatted PDF file HERE.
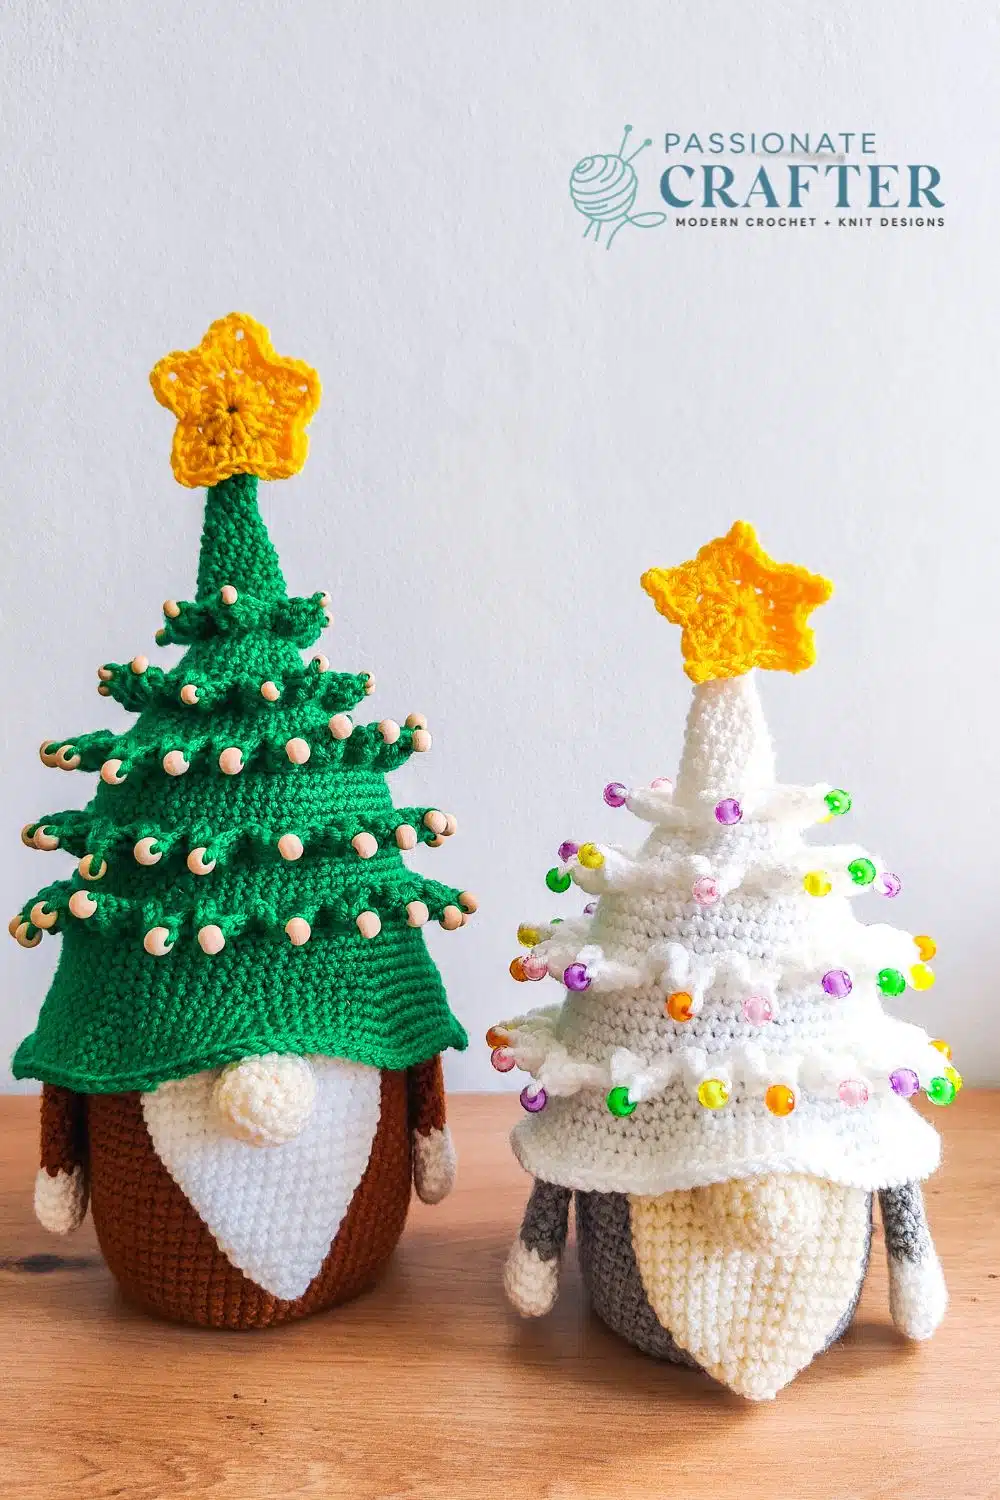
Why the Christmas tree Gnome instead of others?
If you have followed us for a while, you know we have many free crochet gnome patterns on the blog. One of the most loved ones is the original Christmas tree gnome pattern. That’s why, after many requests, we decided to rework the pattern so you can place a jar inside it.
And, to be honest, when I placed them on my kitchen countertop, I realized that they cheered me a lot and brought me the holiday spirit. My friend already wanted one of them as her Christmas gift the first minute she saw it.
Undoubtedly, they will be a hit as Christmas gifts for family members, friends, and co-workers.
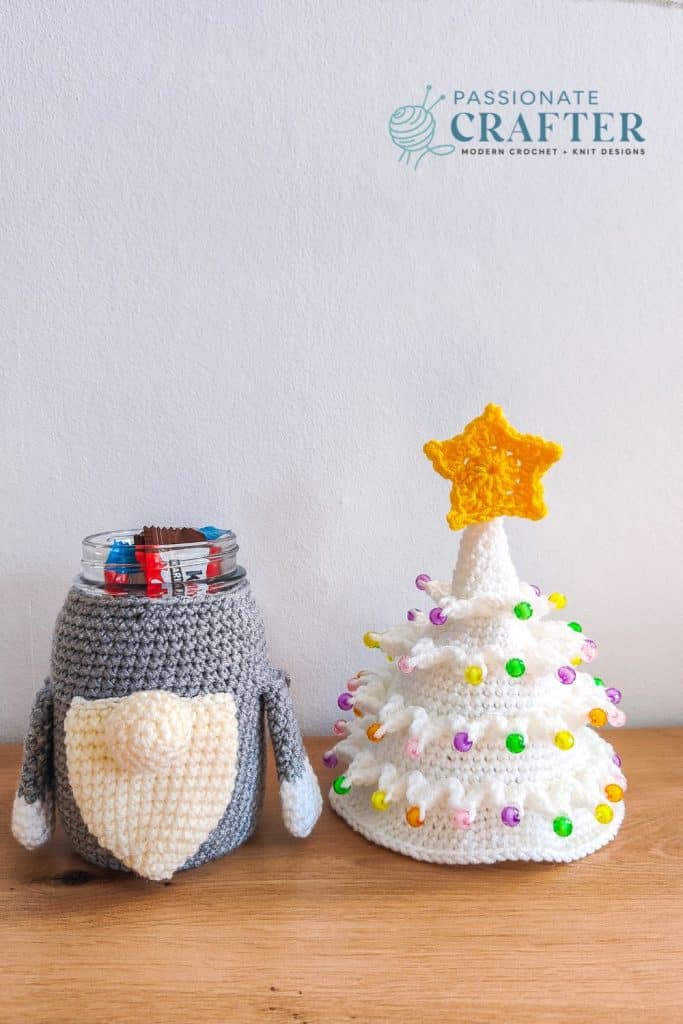
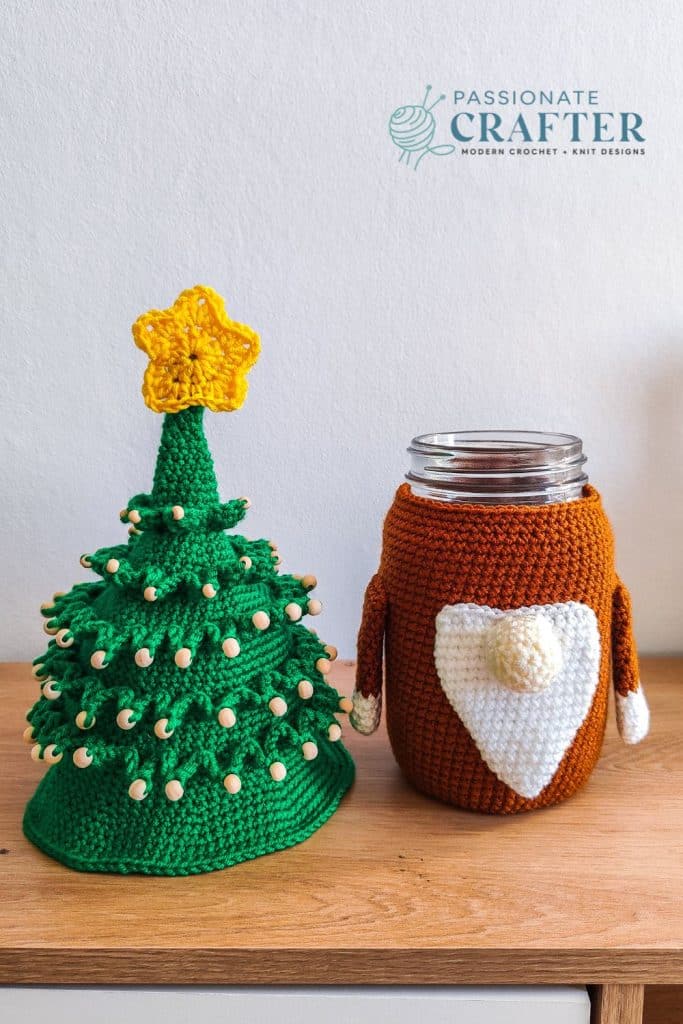
Christmas gift ideas for the jars!
Here are some suggestions if you don’t know what to place inside the jars as a Christmas gift.
- Place some chocolate goodies inside. Everyone loves chocolate.
- Place some homemade jam or sauce jar inside. The best handmade Christmas gift.
- Fill the jar with some makeup stuff.
- Fill the jar with small toys for the children.
- The possibilities are endless.
Or are you planning some Christmas gifts that are different from gnomes? Check out some of the Christmas patterns from last year.
- Easy crochet Christmas gnome keychains– easy to customize, fun to put on your Christmas tree, or use as a bag charm.
- Crochet festive Christmas blanket– Beginner-friendly crochet blanket with adorable crochet reindeer and mini Christmas trees.
- Crochet stocking for kids– Paw Patrol inspired Christmas stocking of the movie characters- Sky, Chase, and Marshall.
- Crochet Alpine stocking– our bestseller and most loved stocking pattern with a full video tutorial.
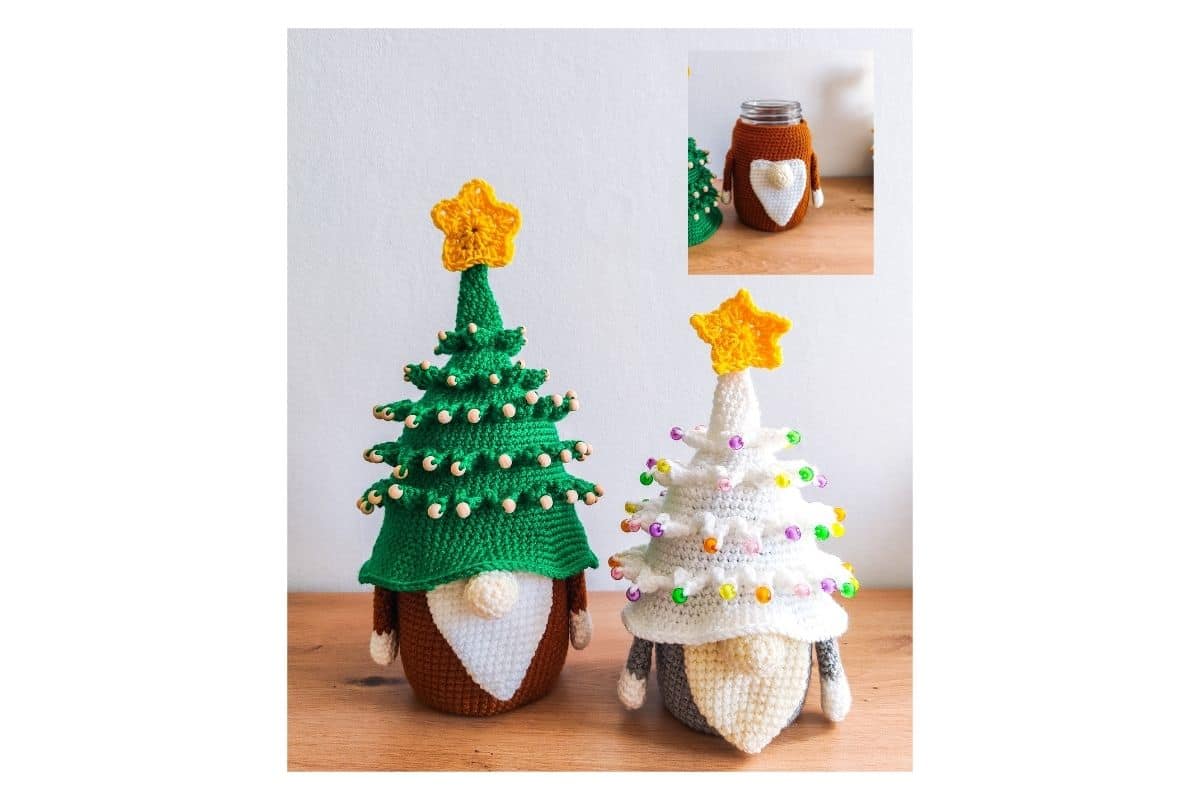
Get The PDF Version
Grab the ad-free, printable PDF pattern.
Download and print at home. View on your mobile device, tablet, or computer.
What is the best yarn for the Christmas Gnome?
As this pattern is made to fit 16-32-oz jars inside, I switched the sport weight yarn to medium/ light worsted weight yarn. Otherwise, crocheting the gnomes will take forever. If you want to use worsted-weight yarn, remember that the base must measure the base of the jar. At the end of the post you will find Information on how to adjust the pattern. So, don’t forget to check it out.
How to crochet a Christmas gnome with a jar inside it?
Before we dive into the pattern, let’s explore the construction of the Christmas tree gnome.
For this Christmas tree gnome, we will crochet all the parts separately. First, we will crochet the base and the body. Then, we will crochet the hands, nose, beard, and the Christmas star. Later, we will crochet the hat.
In the end, we will add the layers with beads to finish the Christmas tree gnome. In this pattern, you will learn how to crochet with beads.
How to crochet with beads?
There are different methods for crocheting with beads. For the Christmas tree gnome pattern, we will first place the beads on a string of yarn and then crochet with them. Here is step-by-step explanation:
- Place the beads on a string of yarn using a tapestry needle.
- Start working the petal and make HDC 1, DC 1 all in next stitch
- Then CH 1, push one bead next to your hook,
- and CH 1 again ( the bead will remain between the first CH 1 and the second CH 1
- Then work DC 1, HDC 1 in the same st.
Here is a short video tutorial on how to crochet with beads. Check it before you start working on the layers.
Don’t forget to pin this for later!
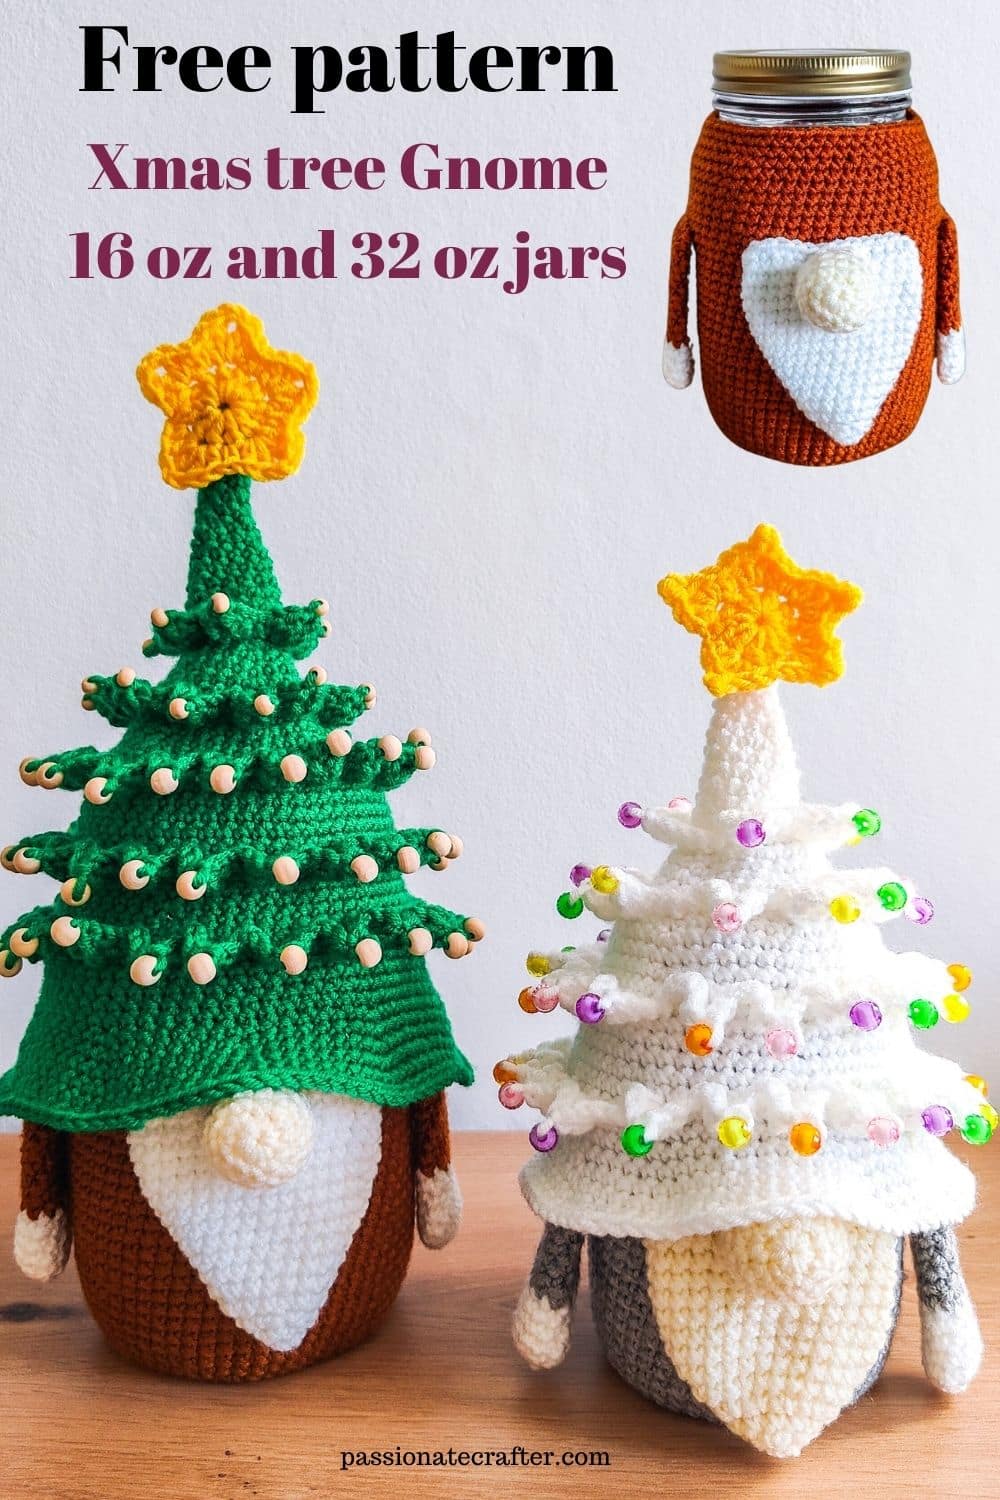
Christmas tree Gnomes pattern
Difficulty: Easy
Crochet Terms:
The pattern is written in US crochet terms
Finished size:
The finished size of the gnome is 24 cm/ 9.4 inches- 16 oz/475 ml jar and 32 cm / 12.5 inches- 32 oz/950 ml jar.
Yarn
Medium weight/ light worsted weight yarn in colors white (20gr), cream (5gr), brown (60gr) and green (50gr) for the 32 oz jar and light grey (35gr), white (45gr) and cream (15gr) color for the 16 oz jar. 5gr yellow for each gnome’ star. I used Hobbii Kind Feather yarn 100gr/3.5 oz, 235m/257yds, 100% anti-pilling acrylic.
Materials
- 16 oz / 475 ml and 32 oz/ 950 ml jars
- tapestry needle
- hook size 4 mm
- stitch marker
- beads ( optional )
Abbreviation
- sc- single crochet
- hdc- half double crochet
- dc- double crochet
- SS- slip stitch
- ch- chain
- inc- increase (make 2 SC in same stitch)
- dec- decrease ( work 2 SC stitch together)- use invisible decrease unless noted
- MR- magic ring
- ()– repeat the stitches in the () indicated times
- FO- fasten off
- BLO- back loop only
Pattern notes:
- The pattern is worked in continuous/ spiral rounds. Do not join your rounds with a SS.
- Use a stitch marker or piece of yarn to mark the first stitch. Move the marker after completing the round.
- For my amigurumis I use the @Yarn Under@ method.
- The body and the hat are worked separately. You can use a hot glue gun to stick the hat to the jar’s lid or you can leave it as it is.
- For this pattern I used the regular mouth mason jars. There are instruction for the wide mouth jars as well.
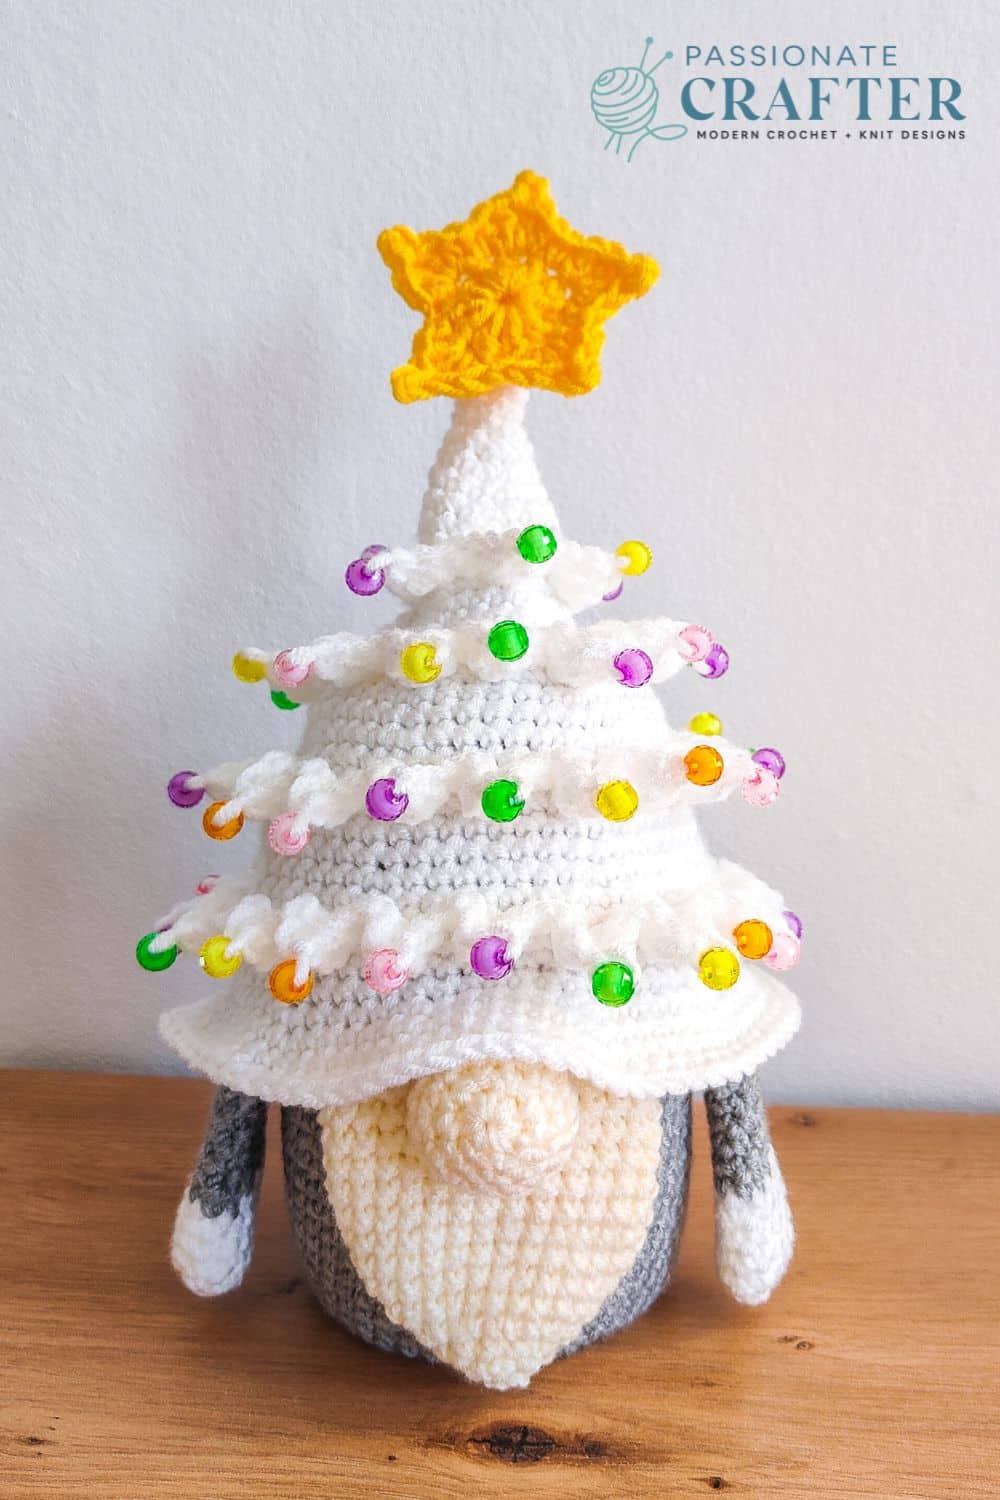
Christmas Tree Gnome Pattern for the 16 oz/ 475 ml jar
BODY: – with light grey yarn
Rnd 1: Start with a MR, and make 7 SC into it. (7)
Rnd 2: * inc 1 * 7 times (14)
Rnd 3: * SC in next, inc 1 * 7 times (21)
Rnd 4: * SC in next 2, inc 1 * 7 times (28)
Rnd 5: * SC in next 3, inc 1 * 7 times (35)
Rnd 6: * SC in next 4, inc 1 * 7 times (42)
Rnd 7: * SC in next 5, inc 1 * 7 times (49)
Here your base must measure around 7-7.5 cm, 2.75- 3 inch. If it is bigger or smaller, switch the hook size.
Rnd 8- 31: SC in each st around (49)
( 24 rnds in total )
Rnd 32: * SC in next 5, dec * 6 times (42) FO.
NOSE: with cream color yarn
Rnd 1: Start with a MR, and make 6 SC into it. (6)
Rnd 2: * inc 1* 6 times (12)
Rnd 3: * SC in next, inc * 6 times (18)
Rnd 4: * SC in next 2, inc * 6 times (24)
Rnd 5-7: SC in each st around (24)
Rnd 8: * SC in next 5, dec * 3 times (21) FO. Leave a longer tail for sewing.
BEARD: with cream color yarn
Rnd 1: Start with a MR and make 5 SC into it (5)
Rnd 2: * inc 1 * 5 times (10)
Rnd 3: SC in each st around (10)
Rnd 4: * inc 1 * 10 times (20)
Rnd 5: * inc 1, SC in next 9 * 2 times (22)
Rnd 6: * SC in next, inc 1, SC 9 * 2 times (24)
Rnd 7: * SC in next 2, inc 1, SC in next 9 * 2 times (26)
Rnd 8- 14: SC in each st around (26)
Fasten off. Leave a longer tail for sewing.
HANDS: with white color yarn
Make to pieces.
Rnd 1: Start with a MR, and make 6 SC into it. (6)
Rnd 2: * inc 1 * 6 times (12)
Rnd 3-6: SC in each st around. (12)
switch to light grey color
Rnd 7: SC in st around (12)
Rnd 8: * dec 1, SC in next 4* 2 times (10)
Rnd 9-16: SC in each st around. (10)
( 8 rnds in total ).FO. Leave a longer tail for sewing.
HAT: with white color yarn.
Rnd 1: Start with a MR, and make 7 SC into it, (7)
Rnd 2-10: SC in each st around (7)
Rnd 11: *SC in first, inc 1* 3 times, SC in last (10)
Rnd 12: SC in each st around (10)
Rnd 13: * inc 1, SC in next 4* 2 times (12) Rnd 14: SC in each st around (12)
Rnd 15: *SC in next 2, inc 1, * 4 times (16)
Rnd 16-17: SC in each st around (16)
Rnd 18: *SC in next 3, inc 1, * 4 times, (20)
The next rnd is worked in BLO! Only the next round!
Rnd 19: SC in next 19, inc 1 (21)
Rnd 20: * SC in next 2, inc 1 * 7 times (28)
Rnd 21: SC in each st around (28)
Rnd 22: * SC in next 3, inc 1 * 7 times (35)
Rnd 23: SC each st around (35)
Rnd 24: * SC in next 4, inc 1 * 7 times (42)
The next rnd is worked in BLO! Only the next rnd!
Rnd 25: SC in each st around (42)
Rnd 26: * SC in next 5, inc 1 * 7 times (49)
Rnd 27: SC in each st around (49)
Rnd 28: * SC in next 6, inc 1 * 7 times (56)
Rnd 29-30: SC in each st around (56)
The next rnd is worked in BLO! Only the next rnd!
Rnd 31: SC in each st around (56)
Rnd 32-33: SC in each st around (56)
Rnd 34: * SC in next 7, inc 1 * 7 times (63)
Rnd 35-36: SC in each st around (63)
The next round is worked in BLO! Only the next rnd!
Rnd 37: SC in each st around (63)
Rnd 38-39: sc in st around.
Rnd 40: * SC in next 5, inc 1 * 10 times, SC in next 3 (73)
Rnd 41: * SC in next 6, inc 1 * 10 times, SC in next 3 (83)
Rnd 42-43: SC in each st around (83) FO.
The process of working with beads is the same for both gnomes. The information isat the end of the post after the written instructions for the 32 oz/ 950 ml jar.
Christmas Tree Gnome Pattern for the 32 oz/ 950 ml jar
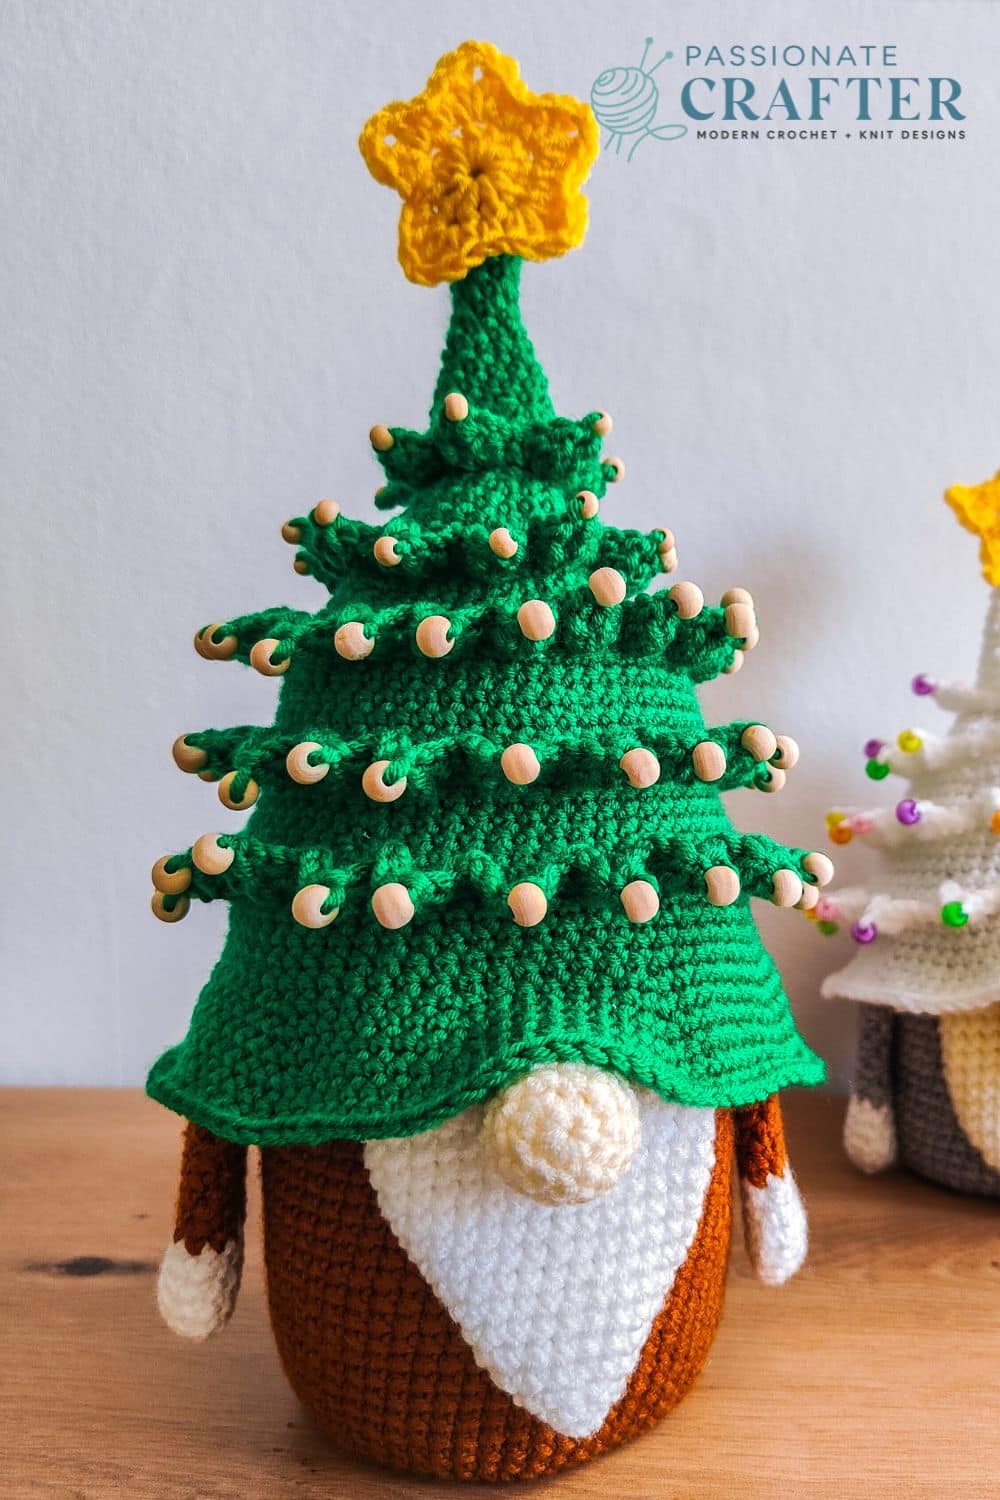
BODY- with brown color yarn
Rnd 1: Start with a MR, and make 7 SC into it. (7)
Rnd 2: * inc 1 * 7 times (14)
Rnd 3: * SC in next, inc 1 * 7 times (21)
Rnd 4: * SC in next 2, inc 1 * 7 times (28)
Rnd 5: * SC in next 3, inc 1 * 7 times (35)
Rnd 6: * SC in next 4, inc 1 * 7 times (42)
Rnd 7: * SC in next 5, inc 1 * 7 times (49)
Rnd 8: * SC in next 6, inc 1 * 7 times (56)
Rnd 9: * SC in next 7, inc 1 * 7 times (63)
Here your base must measure around 9-9.5 cm, 3.5- 3.8 inch. If it is bigger or smaller, switch the hook size.
Rnd 10-38: SC in each st around (63)
Rnd 39: * SC in next 8, dec 1 * 6 times, SC in next 3 (57)
Rnd 40-41: SC in each st around (57)
NOSE: with cream color yarn
Rnd 1: Start with a MR, and make 6 SC into it (6)
Rnd 2: * inc 1 * 6 times (12)
Rnd 3: * SC in next 3, inc * 3 times (15)
Rnd 4-6: SC in each st around (15)
BEARD: with white color yarn
Rnd 1: Start with a MR and make 6 SC into it (6)
Rnd 2: SC in each stitch around (6)
Rnd 3: *inc 1* 6 times (12)
Rnd 4: *inc 1, SC in next 5 * 2 times (14) Rnd 5: * SC in first, inc 1, sc in next 5 * 2 times (16)
Rnd 6: * SC in next 2, inc 1, SC in next 5* 2 times (18)
Rnd 7: * SC in next 3, inc 1, SC in next 5 * 2 times (20)
Rnd 8: * SC in next 4, inc 1, SC in next 5 * 2 times (22)
Rnd 9: * SC in next 5, inc 1, SC in next 5 * 2 times (24)
Rnd 10: * SC in next 6, inc 1, SC in next 5 * 2 times (26)
Rnd 11: * SC in next 7, inc 1, SC in next 5 * 2 times (28)
Rnd 12-17: SC in each st around (28)
HANDS: with white color yarn
Make 2 pieces
Rnd 1: Start with a MR, and make 6 SC into it (6)
Rnd 2: * inc 1 * 6 times (12)
Rnd 3-6: SC in each st around (12)
switch to brown color yarn
Rnd 7-17: SC in each st around (12)
HAT: with green color yarn
Rnd 1: Start with a MR, and make 7 SC into it, (7)
Rnd 2-10: SC in each st around (7)
Rnd 11: *SC in first, inc 1* 3 times, SC in last (10)
Rnd 12: SC in each st around (10)
Rnd 13: * inc 1, SC in next 4* 2 times (12) Rnd 14: SC in each st around (12)
Rnd 15: *SC in next 2, inc 1, * 4 times (16)
Rnd 16-17: SC in each st around (16)
Rnd 18: *SC in next 3, inc 1, * 4 times, (20)
The next rnd is worked in BLO! Only the next round!
Rnd 19: sc in next 19 sts, inc in next ( 21 )
Rnd 20: * SC in next 2, inc 1 * 7 times (28)
Rnd 21 : SC in each st around (28)
Rnd 22: * SC in next 3, inc 1 * 7 times (35)
Rnd 23: SC in each st around (35)
Rnd 24: * SC in next 4, inc 1 * 7 times (42)
The Next round is worked in BLO! Only the next round!
Rnd 25: SC in each st around (42)
Rnd 26: * SC in next 5, inc 1 * 7 times (49)
Rnd 27: SC in each st around (49)
Rnd 28 * SC in next 6, inc 1 * 7 times (56)
Rnd 29: SC in each st around (56)
Rnd 30: * SC in next 7, inc 1 * 7 times (63)
The Next round is worked in BLO! Only the next round!
Rnd 31: SC around
Rnd 32-36: SC in each st around ( 5 rnds in total )
The next round is worked in BLO! Only the next round!
Rnd 37: SC in each st around
Rnd 38-39: SC in each st around (63)
Rnd 40: * SC in next 20, inc 1 * 3 times (66)
Rnd 41: SC in each st around (66)
Rnd 42: * SC in next 21, inc 1 * 3 times (69)
Rnd 43: SC in each st around (69)
Next round is worked in the BLO. Only the next round!
Rnd 44: SC in each st around (69)
Rnd 45-48: SC in next 68, inc 1 (70)
Rnd 49: * SC in next 6, inc 1 * 10 times (80)
Rnd 50: * SC in next 7, inc 1 * 10 times (90)
Rnd 51: SC in each st around (90)
Rnd 52: * SC in next 8, inc 1 * 10 times (100)
Rnd 53-54: SC in each st around (100)
Fasten off.
Get The PDF Version
Grab the ad-free, printable PDF pattern.
Download and print at home. View on your mobile device, tablet, or computer.
CROCHET STAR PATTERN: with yellow color. Same for both sizes
Rnd 1: CH 3, 10 DC in 3rd ch from your hook, SS to join. (10)
Rnd 2: *CH 1, SC in first, (HDC 1, DC 1, CH 2, DC 1, HDC 1 all in next)* 5 times, SS to join. FO. (you will have 5 points in the end)


How to crochet leaves for the Christmas tree
Every layer is worked in the same way. We have 4 layers for the 16 oz / 475 ml jar and 5 layers for the 32 oz / 950 ml jar.
The only difference is the petal’s count in each layer.
First layer from top (working in the front loop of rnd 19)
Insert your hook in the front loop of first stitch and pull up a loop, CH 1, SC in base of initial chain, *(HDC 1, DC 1, CH 1, place one bead after the chain and CH 1 again, DC 1, HDC 1 all in next stitch), SC in next 2* repeat till you have 2 or 3 sts left and work 1 SC in each of them.
How to add beads (optional):
- Take your beads and put them on the string using a tapestry needle.
- Pull the yarn a bit and start your layers.
Here is a step-by-step photo tutorial.
Insert your hook in the front loop of rnd 19.

Make CH1, SC 1 in the base of initial ch, then HDC 1, DC 1, CH 1 in the next st, push the bead next to your hook,

After pushing the bead to your hook, CH 1, leaving the bead between the first and the second CH 1,

Now make DC 1, HDC 1 in the same stitch.

Repeat these steps for each petal and each layer.
At the end of each layer, you will have 2 or 3 sts left. Work one SC in each st.
Start each layer by adding a new piece of yarn. And then again, insert your hook into the front loop of the first st of the next layer and work the petals. At the end, weave all the ends.

Disclamer: Some of the photos are from the original Christmas tree Gnome because the working process is the same. Only the number count are different. Please follow the written instruction for the color changes.
For the 32 oz / 950 ml jar, I used 85 wooden beads, and for the 16 oz / 475 ml jar, I used 57 colorful beads. I don’t know exactly how big the beads are. Just keep in mind that they must be big enough to pull through your needle into the string of yarn so you can easily work the petals.
How to sew the parts together
First place the jar into the the body. Then place the hat on top. Take some safety pins and place all the parts the way you like your gnome.
Here is how I placed mine. Place the beard in the middle of the front side of the jar, under round 26. Place the nose on top of the beard. Stuff the nose with some yarn tails or a little polyfiber filling. Place the hands on both sides leaving 5 stitches between the beard.
At the end, place the hat. You can stick the hat to the jar’s lid with a hot glue gun or leave it as it is. Repeat the same for the 32 oz/ 475 ml jar. But place the beard under round 33. Again leave 5 stitches between the beard and the hands.
You can use the gnome body without any jar. But it will not be sturdy enough without any filling or jar placed inside it.
How to adjust the pattern for different jar types
How to adjust the pattern for the regular-mouth jars.
The most important part of this pattern is that the crocheted base measures the jar’s base. For example, if you have an 8-oz jar and the base is 2 inches / 5 cm, you will increase it until the circle is 5 cm in diameter. As you can see, for the 16 oz/ 475 ml jar, we increased until* SC in the next 5, inc 1 * 7 times (49), and for the 32 oz/ 950 ml jar, we increased until * SC in next 7, inc 1 * 7 times (63).
So, to make it smaller or bigger, you will follow the increase rnds until you meet your desired diameter. Then you will crochet SC rnds without any increases until you get enough height for your jar.
The nose and the beard have the same logic. Follow the increase rnds until the desired look and then work SC rnd without any increases.
The hands will fit most of the jars. Just crochet more or less SC rnds to adjust their height.
If you want to make the hat smaller or bigger, add or subtract some rounds from the pattern repeat. For example, Let’s say you continue with an 8 oz jar, and you need to make the hat smaller. In this case, follow the written instructions for the 16 oz / 475 ml jar until rnd 35 and then continue with rnd 40. Skipping the rnds from 35 to 40 will shorten the hat’s height. If you want to make it bigger, follow the written instructions for the 32 oz/ 950 ml jar’s hat. Here, you will add only some SC rounds after round 43. This way, you will make the hat taller.
How to adjust the pattern for the wide-mouth jars.
For the wide-mouth jars, follow the same written instructions as for the regular jars. The only difference here is that you will skip the decrease rnds at the end of the jar’s body. For the 16 oz/ 475 ml jar, it is round 32, and for the 32 oz/ 950 ml jar, it is round 39.
The hat, hands, beard, and nose will fit both. You don’t need to make any adjustments here.
Invitation to our Facebook group
You are welcome to share your projects made by our patterns with the community and us. Moreover, we are thrilled to see your creations, and you are very welcome to share them on our FACEBOOK PAGE HERE or our FACEBOOK GROUP or on INSTAGRAM by using the hashtag #passionatecrafterr.
Save this tutorial to your Pinterest boards so that you can come back to it later.
We’d love to hear your feedback. Drop a comment below and tell us your thoughts! And don’t forget to follow us on your favorite social platform!




Your site is fantastic. Can’t make up my mind on what to work on first. Kudos to you. Thank you for the free patterns and easy instructions. God bless.
Thank you very much! We highly appreciate you.
Love the jar-size gift idea; thanks for sharing.