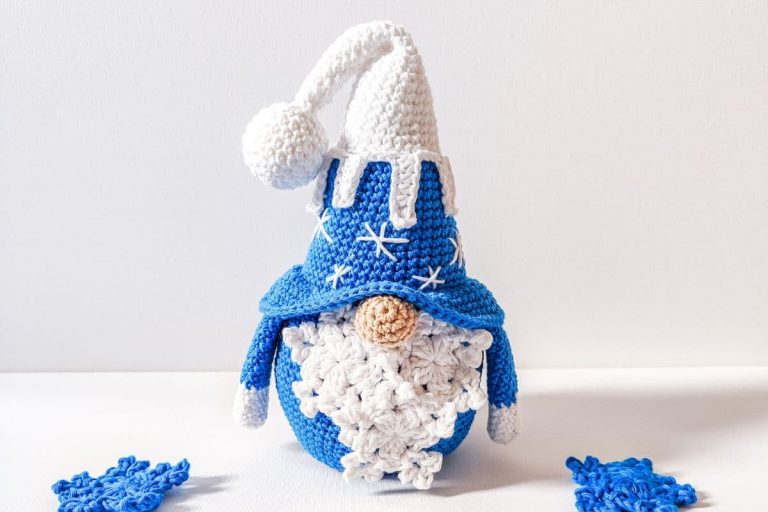
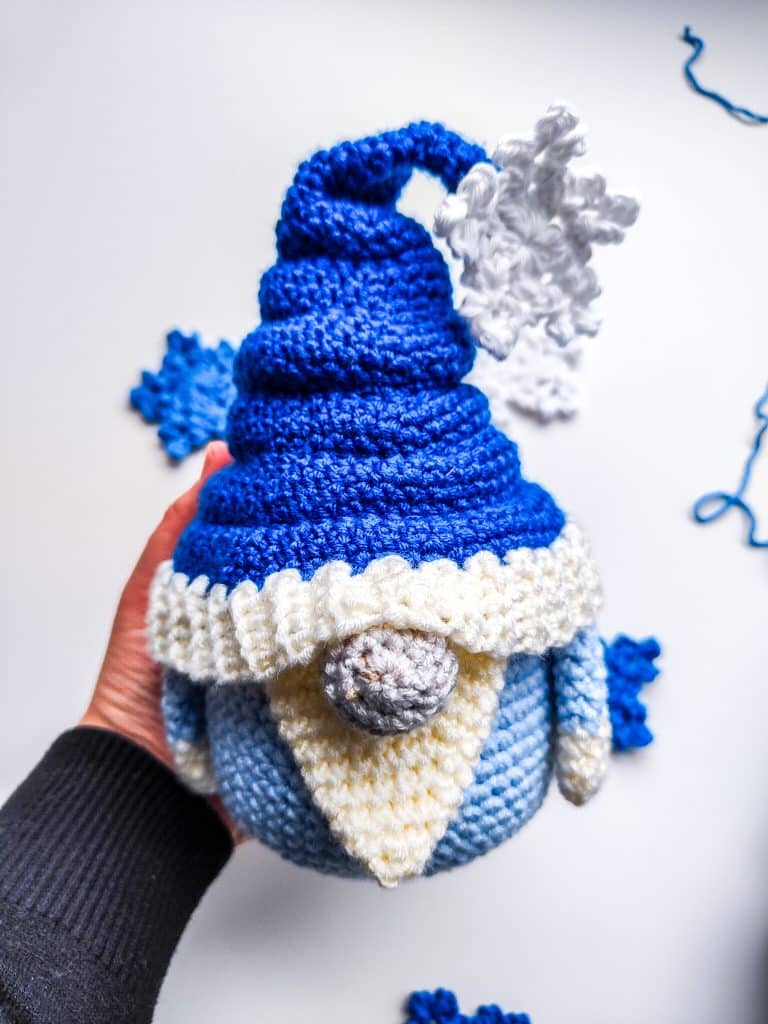
The Crochet Winter Gnome is the newest addition to our blog. It is worked top-down without sewing the hat to the body. Scroll down for the free version, or buy the ad-free, printable PDF Here.

Crochet Winter Gnome Pattern Again, but with a new twist!
Two years ago, when we started sharing our gnome patterns (NJ’s ones), we couldn’t believe the love we had received from you. And now as NJ decided to follow a path of an Etsy seller is my turn to takeover and share some gnome designs I had in my mind.
The first one is the Winter Gnome. It is similar to the old Winter gnome pattern but with a new twist.

The Design Process of The Winter Gnome
As I was searching the Internet for inspiration, I saw so many beautiful gnome photos with this exact hat. That’s why I decided to try to make a crochet version of it. The final look is gorgeous. And with one more hat design in your pocket, you can also give a new life to the old version.
I love that this is one of the simplest gnome designs we have shared throughout the years. It gives you a base from which to crochet different kinds of gnomes by just switching the colors.
For example, by just switching the colors you can crochet the Valentine Gnome set using the Winter Gnome pattern.
What is the best yarn to crochet the Winter Gnome Pattern
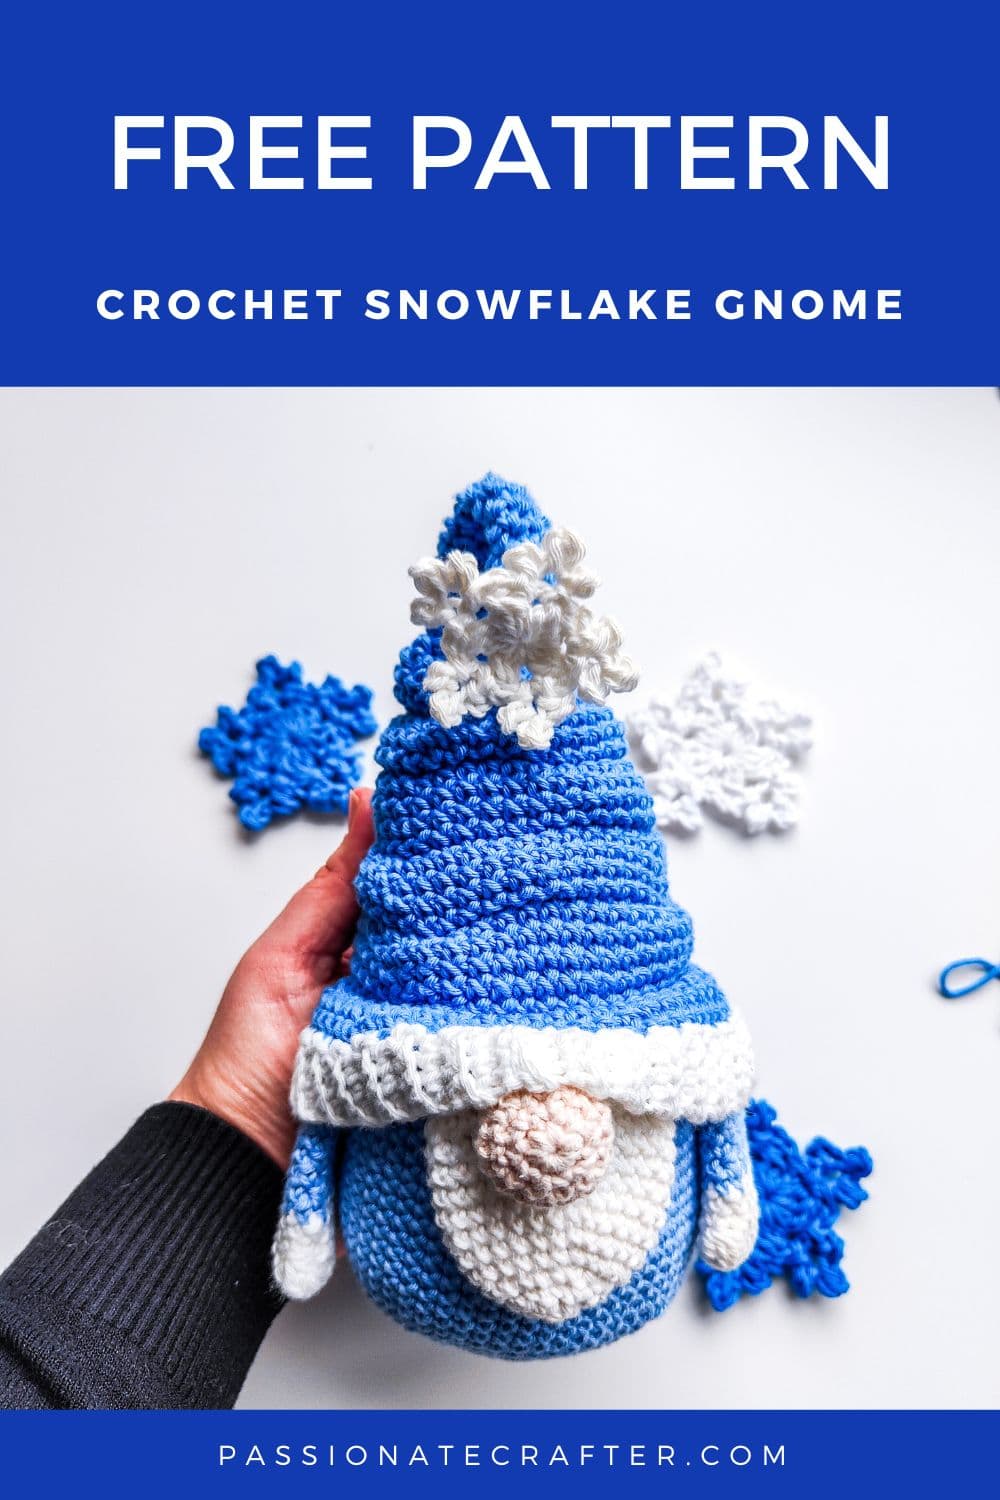
I really love that the gnomes can be made with any yarn you have in your stash, from sport, DK, worsted weight, to bulky weight yarn, depending on the final measurements you want to make your gnome.
For this pattern, I mainly used two different yarns. The dark blue hat gnome is made with Hobbi Kind Feather and the other one using their cotton yarn. In size they are almost identical.
Print this pattern
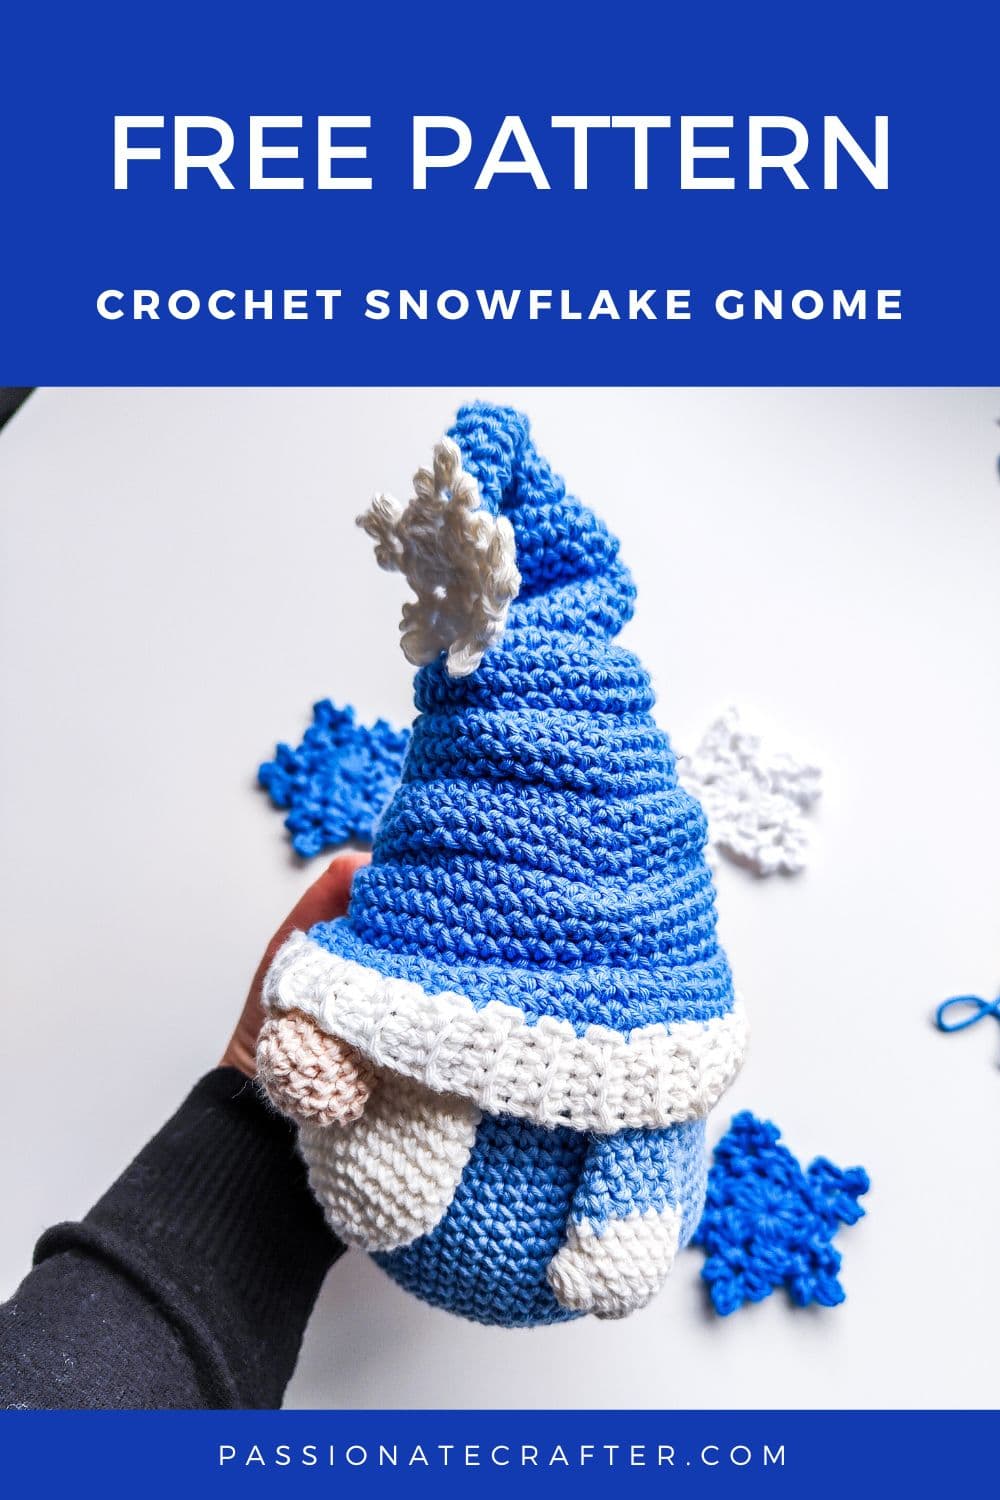
Below you will find the free crochet pattern of the crochet snowman amigurumi. But I know some of you prefer a hard copy instead of using a screen.
If so the Premium PDF pattern is just for you!
You can buy the ad-free, beautifully formatted, print-friendly PDF pattern from our Ravelry shop here or our Etsy shop here!
We are grateful to those of you who support our small business by buying the Premium printable PDFs. The PDF pattern includes all the instructions and photo tutorials from this post without the ads!
Don’t forget to pin this for later!
Finished size:
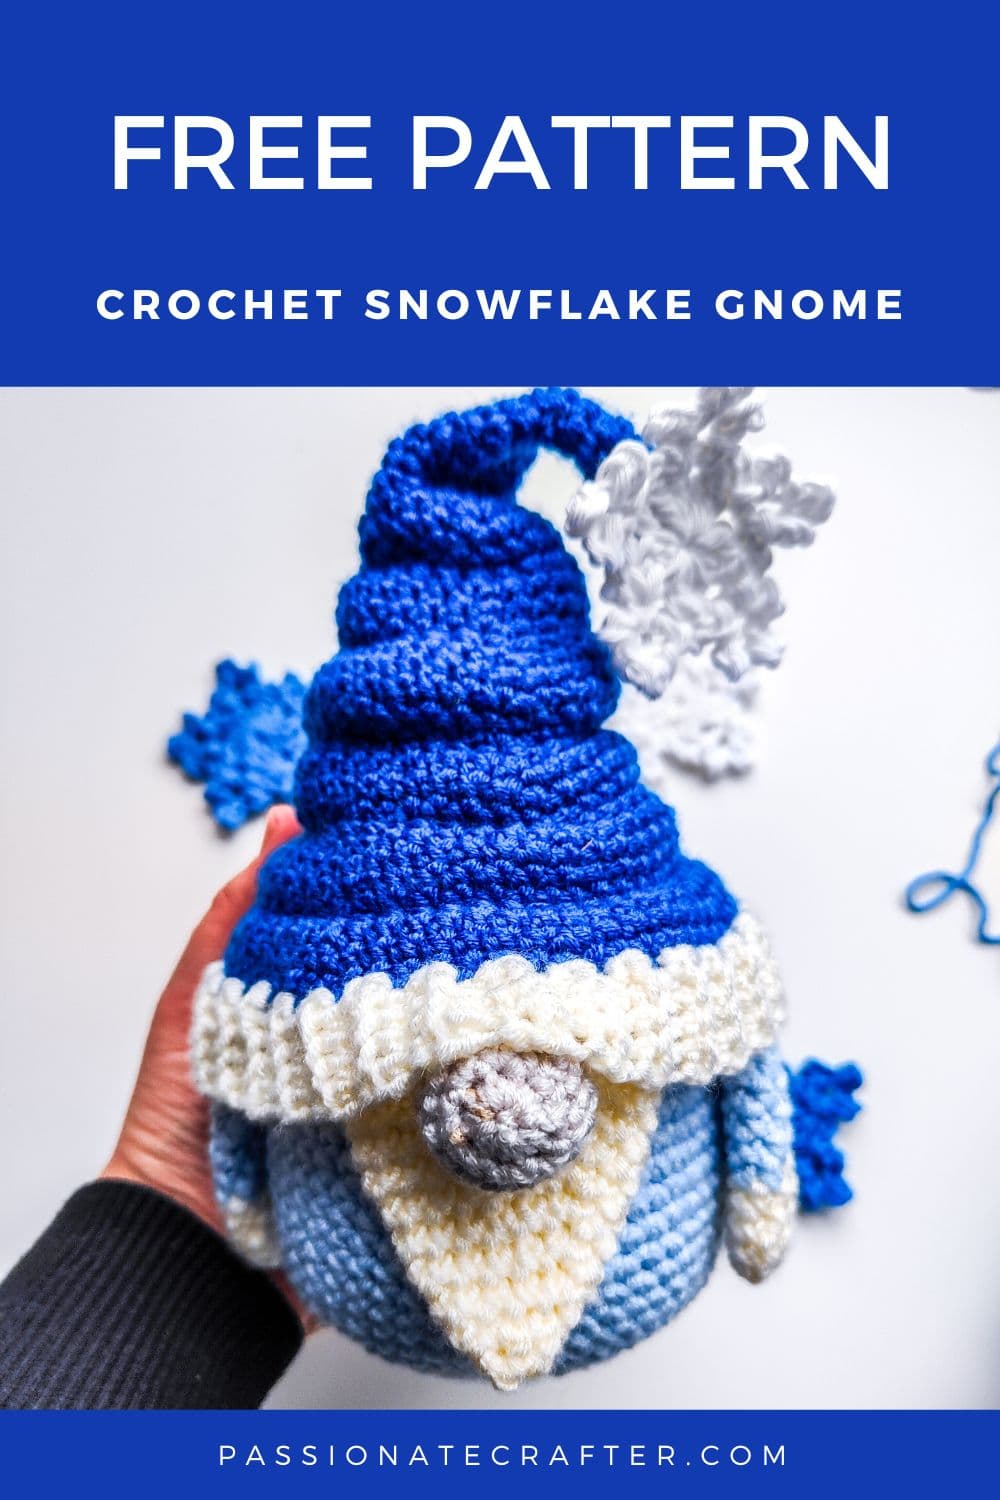
Finished size of the gnome is 21 cm/ 8.5 inches
Crochet Terms:
The pattern is written in US crochet terms
Yarn
Sport/ fine weight yarn- Kind Feather by Hobbii 100% Acrylic 100 g, 235 m in colors light blue, dark blue, beige, cream and white.
Materials
- poly fiberfill for stuffing
- tapestry needle
- hook size 3.75mm
- hook size 4 mm
- stitch marker
Pattern notes:
- The pattern is worked in continuous/ spiral rounds. Do not join your rounds with a sl st.
- Use a stitch marker or piece of yarn to mark the first stitch. Move the marker after completing the round.
- For my amigurumis I use the @Yarn Under@ method. (see TIPS section below)
- Use safety pins to secure your pieces before sewing.
- For my amigurumis I am using the magic ring/circle to start. See tips below.
Abbreviations:
sc- single crochet
sl st- slip stitch
ss- slip stitch
ch- chain
inc- increase (make 2 SC in same stitch)
dec- decrease ( work 2 SC stitch together)- use invisible decrease unless noted
MR- magic ring
()– repeat the stitches in the () indicated times
FO- fasten off
FLO- front loop only
BLO- back loop only
Get The PDF Version
Grab the ad-free, printable PDF pattern.
Download and print at home. View on your mobile device, tablet, or computer.
Winter Gnome pattern written instructions
Starting from the hat
-with dark blue color and 4 mm hook
Rnd 1: MR of 5 sc (5)
Rnd 2-8: 5 sc (5)
Rnd 9: ( inc ) x 2, 3 sc (7)
Rnd 10: ( sc, inc ) x3, 1 sc (10)
Rnd 11: ( 4 sc, inc ) x2 (12)
Rnd 12: 12 sc (12)
Rnd 13: ( 3 sc, inc ) x3 (15)
Rnd 14: 15 sc (15)
The next rnd is worked in FLO. Only the next rnd!
Rnd 15: 15 sc (15)
Rnd 16: ( 4 sc, inc ) x3 (18)
Rnd 17: 18 sc (18)
Rnd 18: ( 5 sc, inc ) x3 (21)
Rnd 19: 21 sc ( 21)
The next rnd is worked in FLO. Only the next rnd!
Rnd 20: 21 sc (21)
Rnd 21: ( 6 sc, inc ) x3 (24)
Rnd 22: 24 sc (24)
Rnd 23: ( 7 sc, inc ) x3 (27)
Rnd 24: 27 sc (27)
The next rnd is worked in FLO. Only the next rnd!
Rnd 25: 27 sc (27)
Rnd 26: ( 8 sc, inc ) x3 (30)
Rnd 27: 30 sc (30)
Rnd 28: ( 9 sc, inc ) x3 (33)
Rnd 29: 33 sc (33)
Rnd 30: ( 10 sc, inc ) x3 (36)
Rnd 31: 36 sc (36)
The next rnd is worked in FLO. Only the next rnd!
Rnd 32: 36 sc (36)
Rnd 33: ( 11 sc, inc ) x3 (39)
Rnd 34: 39 sc (39)
Rnd 35: ( 12 sc, inc ) x3 (42)
Rnd 36: 42 sc (42)
The next rnd is worked in FLO. Only the next rnd!
Rnd 37: 42 sc (42)
Rnd 38: ( 13 sc, inc ) x3 (45)
Rnd 39: 45 sc (45)
Rnd 40: ( 14 sc, inc ) x3 (48)
Rnd 41: ( 11 sc, inc ) x4 (52)
The next rnd is worked in FLO. Only the next rnd!
Rnd 42: 52 sc (52)
Rnd 43: ( 12 sc , inc ) x4 (56)
Rnd 44: ( 6 sc, inc ) x8 (64)
Rnd 45: 64 sc (64) FO.
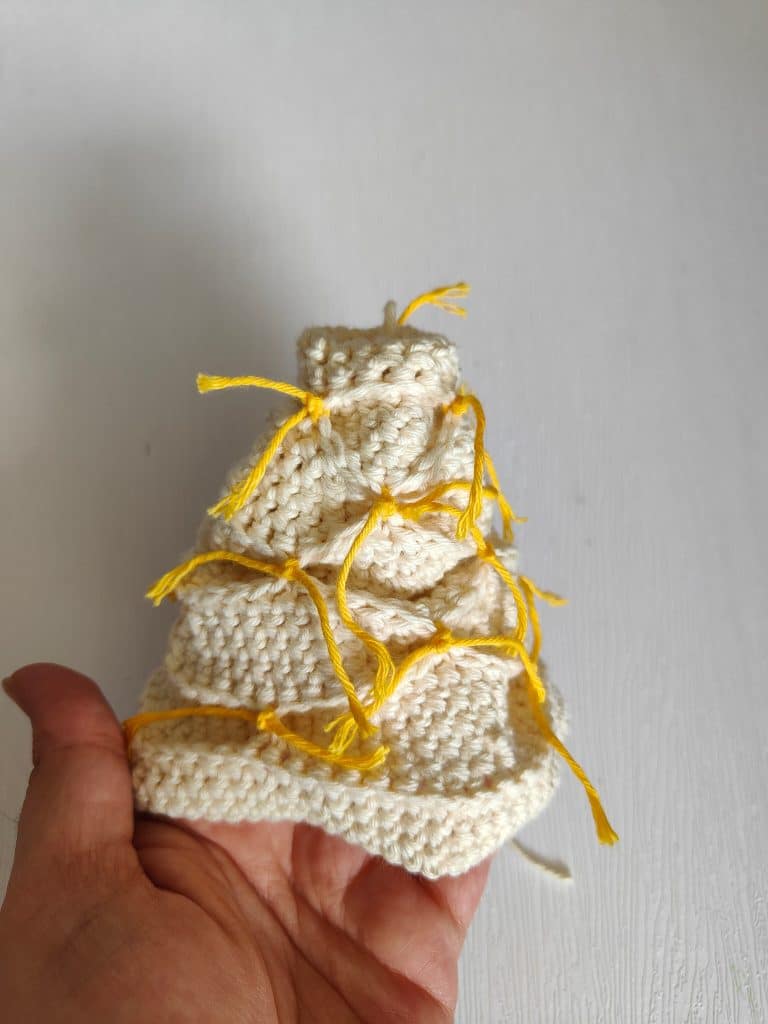
Now take your hat and turn it with the wrong side facing you. Rnd 15, 20,25, 32,37 and 43. Take a piece of yarn and using a tapestry needle insert it in any front loop stitch of rnd 15 through any stitch of rnd 20. Tie a knot. FO. Repeat this process 4 or 5 times.
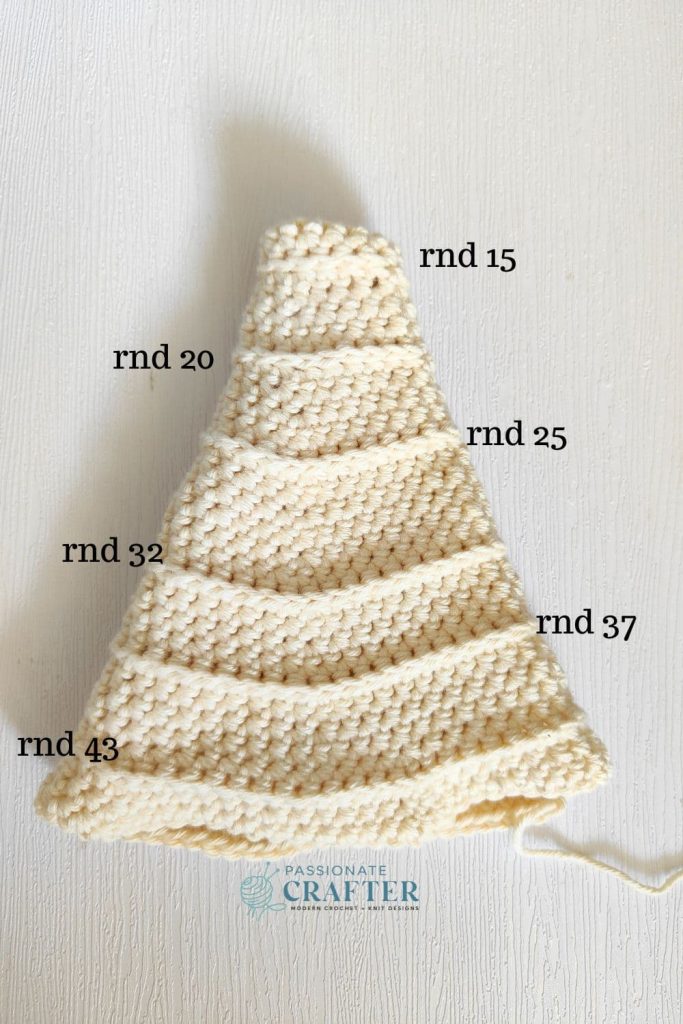
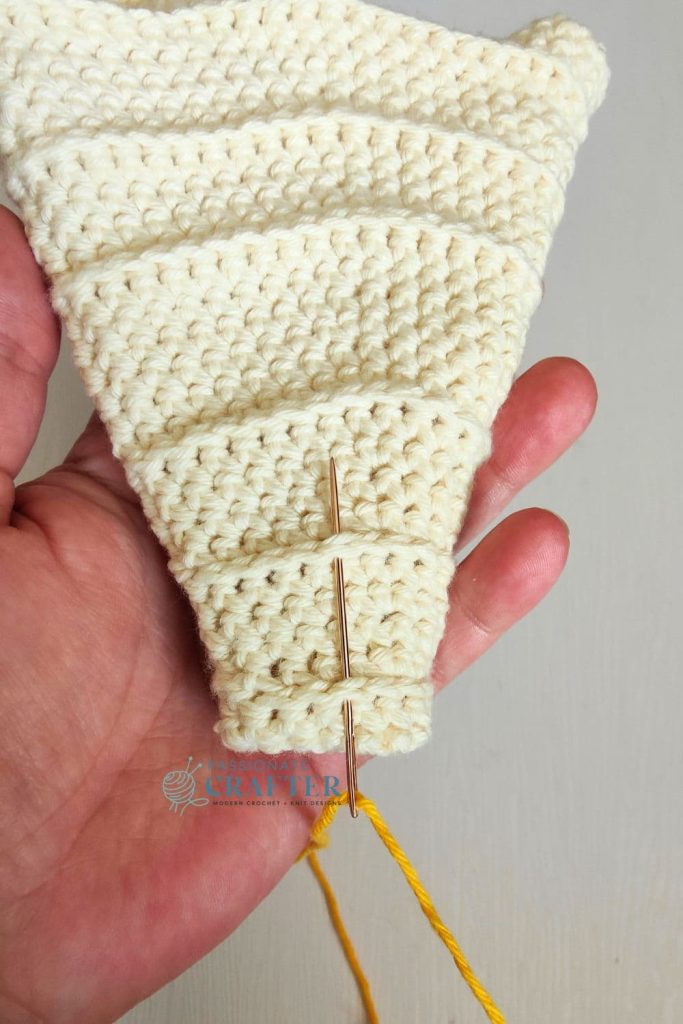
Then, using the same method, join rnds 20 with 25 and rnd 25 with 37. Try to make the knots in different places on each round. Leave rnd 43 as it is. For this round, we will crochet the body and tie it later. Here is a mini video tutorial.
GNOME’S BODY: with light blue yarn
Rnd 44: Go back to round 43 and insert your hook in any back loop stitch, pull a loop, sc in same, 51 sc (52) Here is a mini video tutorial.
Rnd 45: (12 sc, inc) x4 (56)
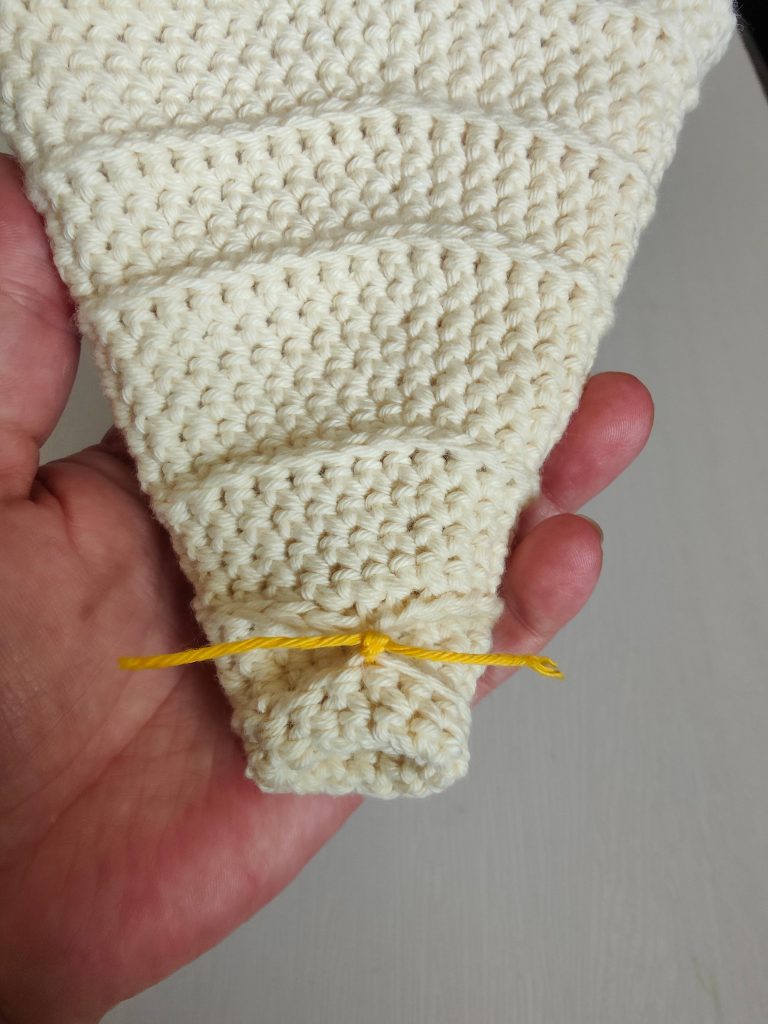
Now leave the body as it is. Turn your gnome with the wrong side facing you and using a piece of yarn and a tapestry needle tie rounds 37 and 43. See pic below. When inserting the yarn needle in rnd 43, make sure that you insert it through the back side of the stitches. So it will not be visible at the front side of the gnome’s hat.
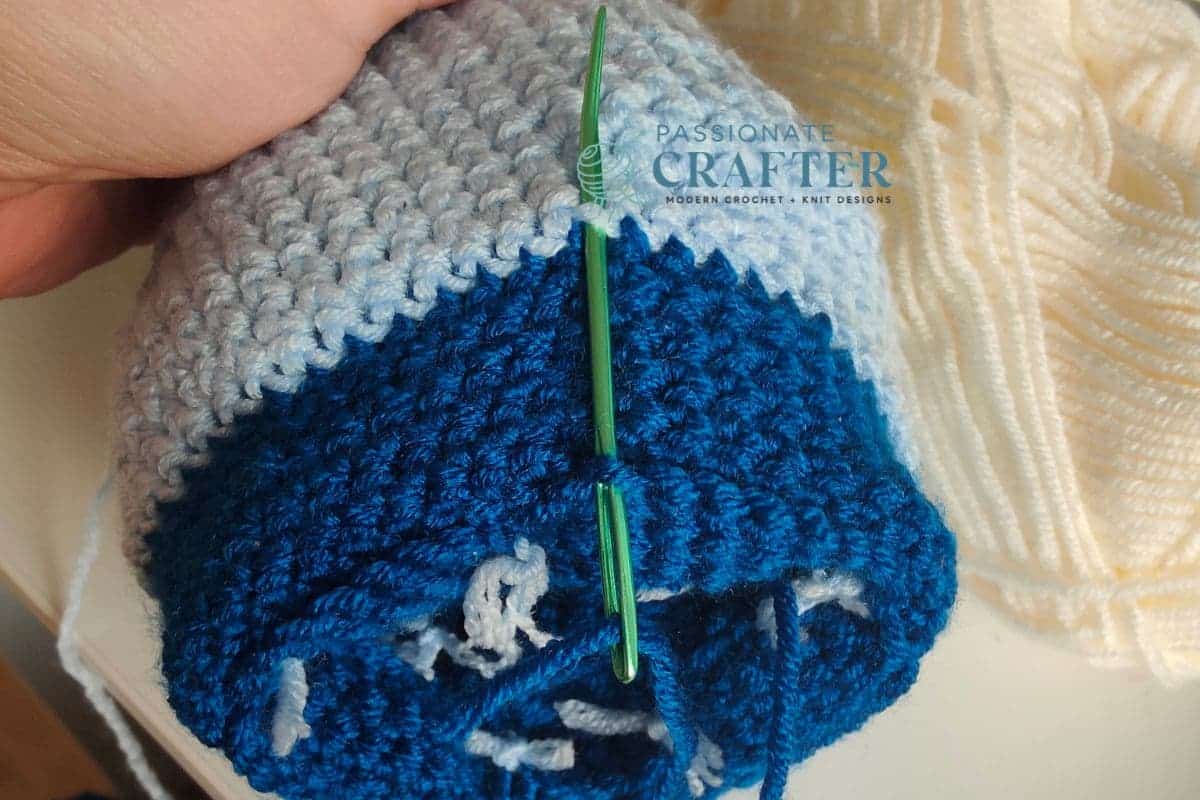
After that, turn your gnome with the right side facing and continue to crochet the body.
Start stuffing it and continue as we crochet along. For the hat I didn’t put a lot stuffing.
Rnd 46-61: 56 sc (56) [16 rounds]
Rnd 62: (12 sc, dec) x4 (52)
Rnd 63: (11 sc, dec) x4 (48)
The next round is worked in BLO. Only next round!
Rnd 64: (4 sc, dec) x8 (40)
Rnd 65: (3 sc, dec) x8 (32)
Rnd 66: (2 sc, dec) x8 (24)
Rnd 67: (1 sc, dec) x8 (16)
Rnd 68: 8 dec (8) FO.
Close the gap with a tapestry needle.
Hat’s brim of the Winter Gnome
with white/cream color, and 3.75 mm hook
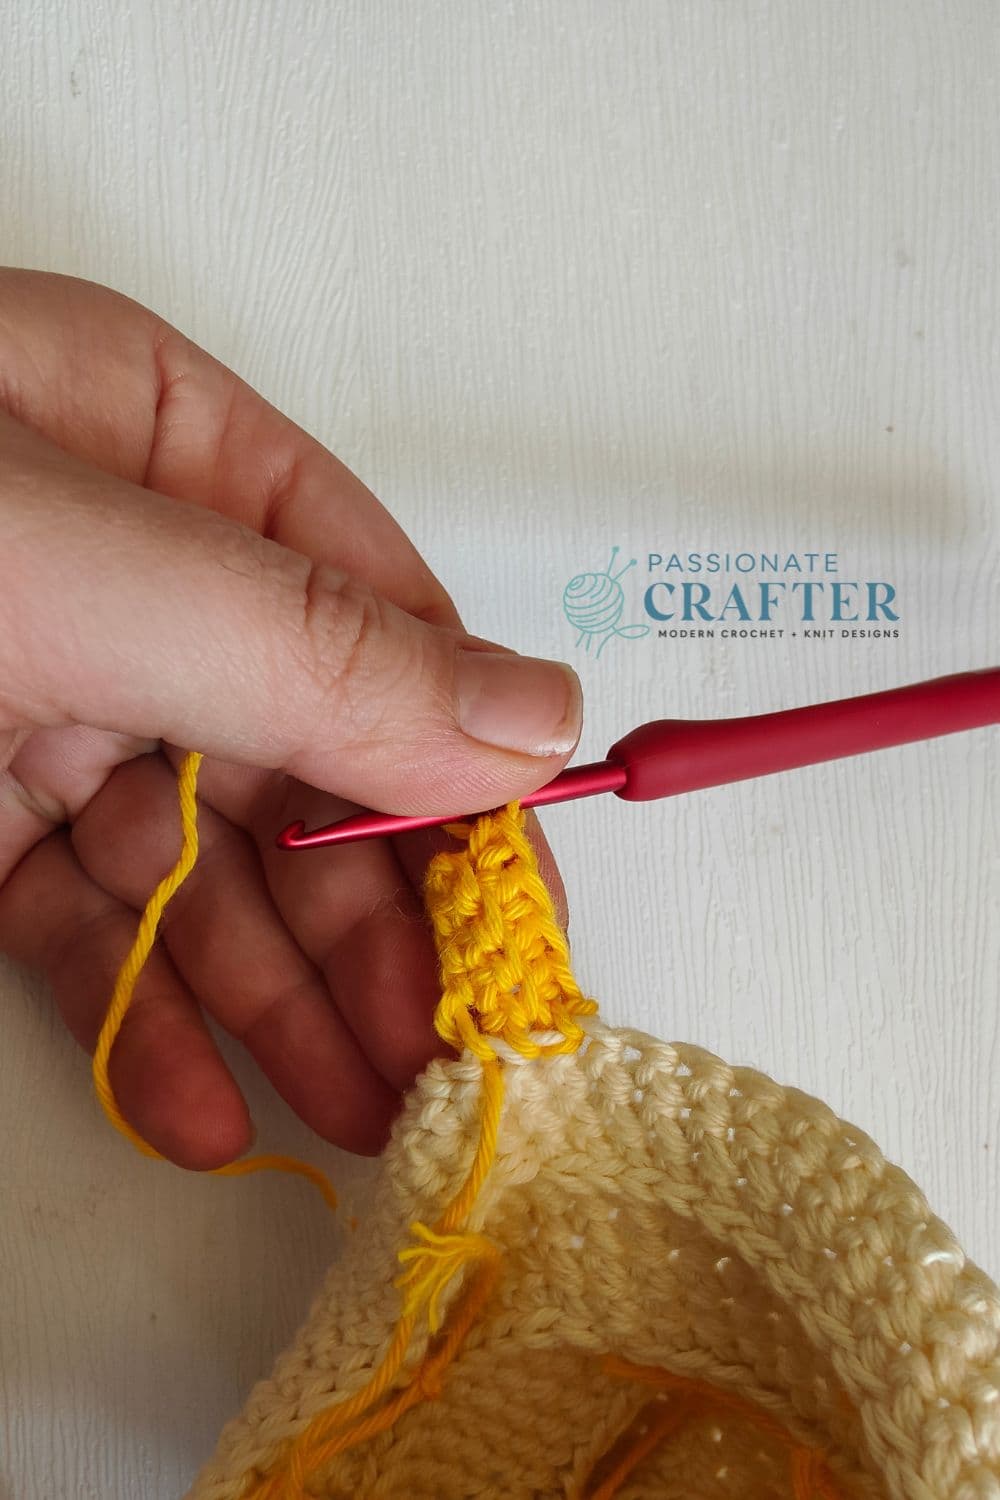
Row 1: Insert your hook in any st of rnd 45, ch5, sc in 2nd ch from the hook, sc in next 3, sl st in next 2 sts, ch1, turn
From now on work the sts in the BLO.
Row 2: sk 2 chs, sc in next 4 sts, ch1,turn,
Row 3: sc in next 4 sts, sl st in next 2 sts, ch1 turn,
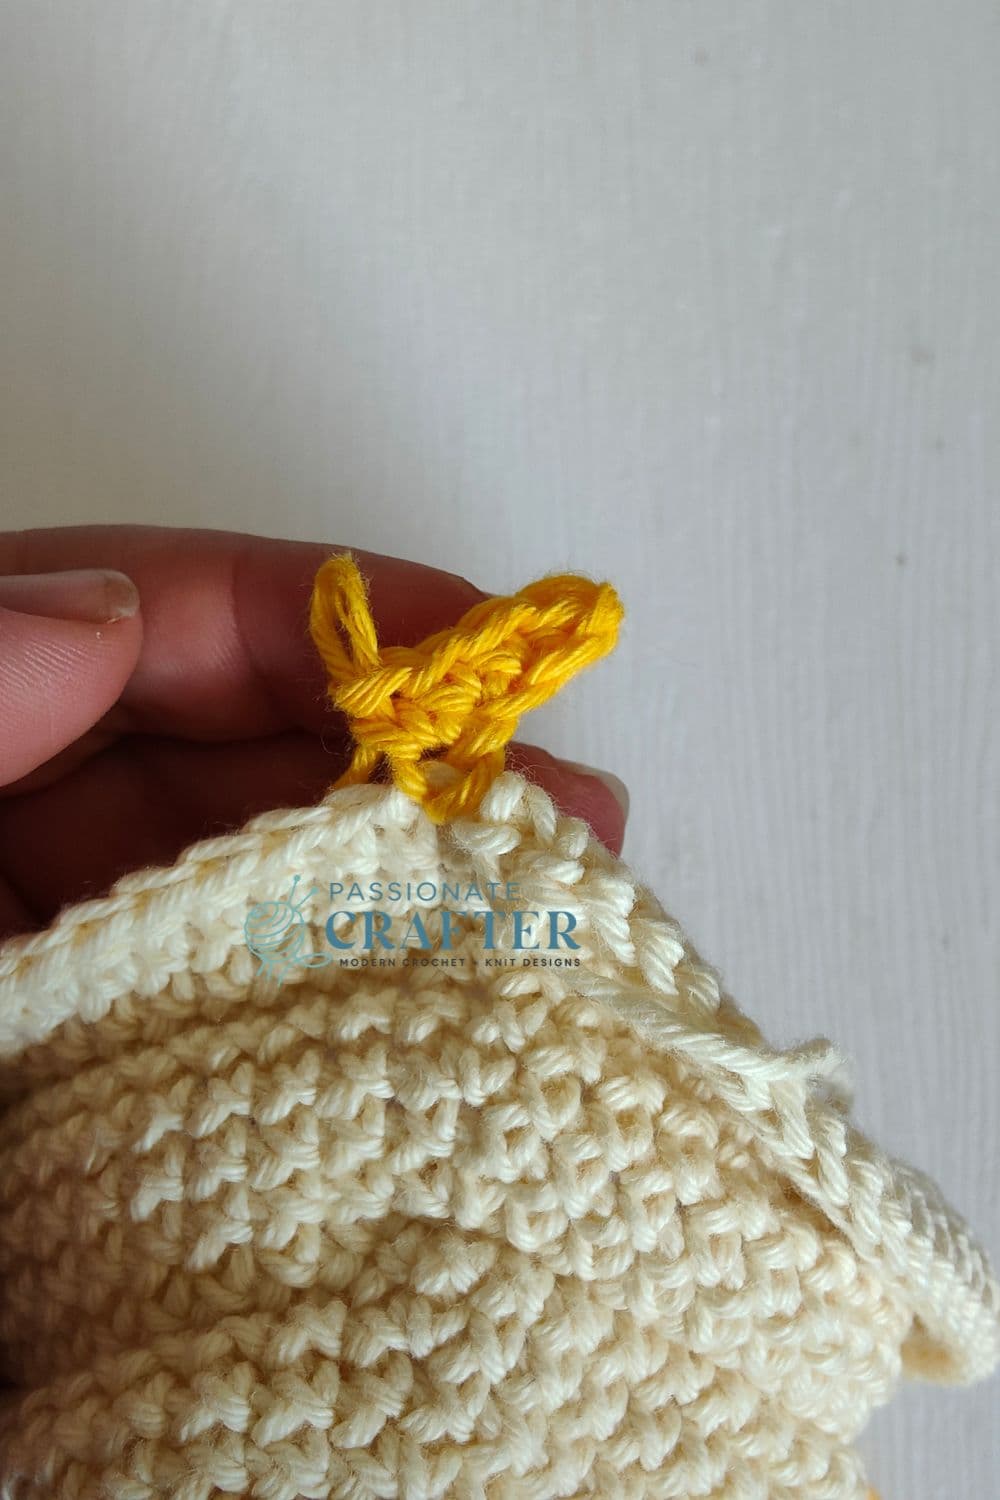
Rep rows 2 and 3 all around. At the end take your tapestry needle and sew the both sides of the brim. To do so: Turn the brim with the wrong side facing you, insert your hook through the front loop of the first st and through the loop on the other side, repeat it 3 more times and FO.
Here are the video tutorials for the hat and the brim. See pics. Here is a mini video tutorial.
Winter gnome’s beard
Related post: 40+ Crochet Gnome patterns for every occasion and holiday
-with white colour
Rnd 1: MR of 6 sc (6)
Rnd 2: 6 sc (6)
Rnd 3: 6 inc (12)
Rnd 4: (5 sc, inc) x2 (12)
Rnd 5: (6 sc, inc) x2 (14)
Rnd 6: (7 sc, inc) x2 (16)
Rnd 7: (8 sc, inc) x2 (18)
Rnd 8: (9 sc, inc) x2 (20)
Rnd 9: (10 sc, inc) x2 (22)
Rnd 10-16: 24 sc (24) [6 rounds]
FO. Leave a longer tail for sewing.
Winter Gnome’s nose
-with beige colour
Rnd 1: MR of 8 sc (8)
Rnd 2: 8 inc (16)
Rnd 3-6: 16 sc (16) [4 rounds]
Stuff the nose a little.
Rnd 7: 8 dec (8)
FO. Close the gap opening using a tapestry needle.
Winter Gnome’s hands
-with white colour
Rnd 1: MR of 5 sc (5)
Rnd 2: 5 inc (10)
Rnd 3-5: 10 sc (10) [3 rounds]
FO beige colour, attach light blue color
Rnd 6-16: 10 sc (10) [11 rounds]
FO. Leave long tail for sewing.
Winter Gnome’s snowflake
-with white colour
Rnd 1: Start with a MR, CH 2(count as dc), dc2tog, CH 2, *dc3tog, CH 2* rep from * to * 3 more times, SS to join (5 clusters)
Rnd 2: *CH 2, SS in first chain space, make three picots, SS into the same chain space* rep from * to * 4 more times, SS to join.
Here is a full video tutorial for the snowflake.
How to assembly your gnome
Use safety pins to place your pieces. Once you like the placement sew them onto the body.
First take the beard and sew it right below the brim.
Secondly, take the nose and sew it onto the beard.
Now take the hands and sew them on both sides. Leave 4-5 stitches between the beard and the hands.
Sew the snowflake on top of the hat’s point.
Happy crocheting! Your Winter Gnome is done!
Save this tutorial to your Pinterest boards so that you can come back to it later.
We’d love to hear your feedback. Drop a comment below and tell us your thoughts! And don’t forget to follow us on your favorite social platform!
Invitation to our Facebook group
You are welcome to share your projects made by our patterns with the community and us. Moreover, we are thrilled to see your creations, and you are very welcome to share them on our FACEBOOK PAGE HERE or our FACEBOOK GROUP or on INSTAGRAM by using the hashtag #passionatecrafterr.