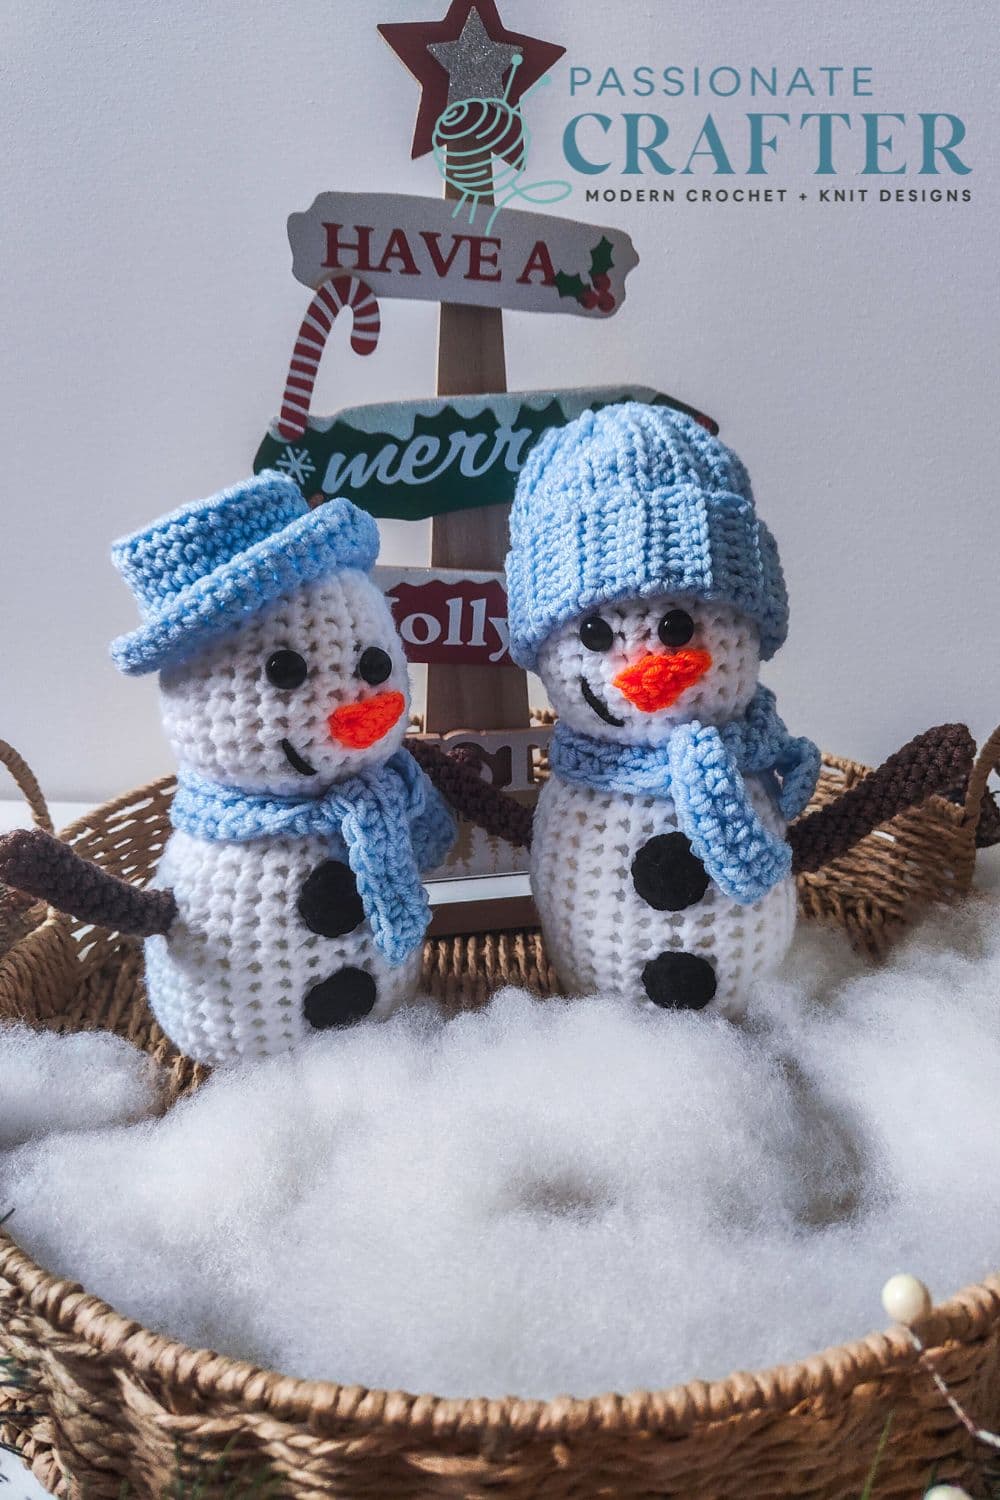
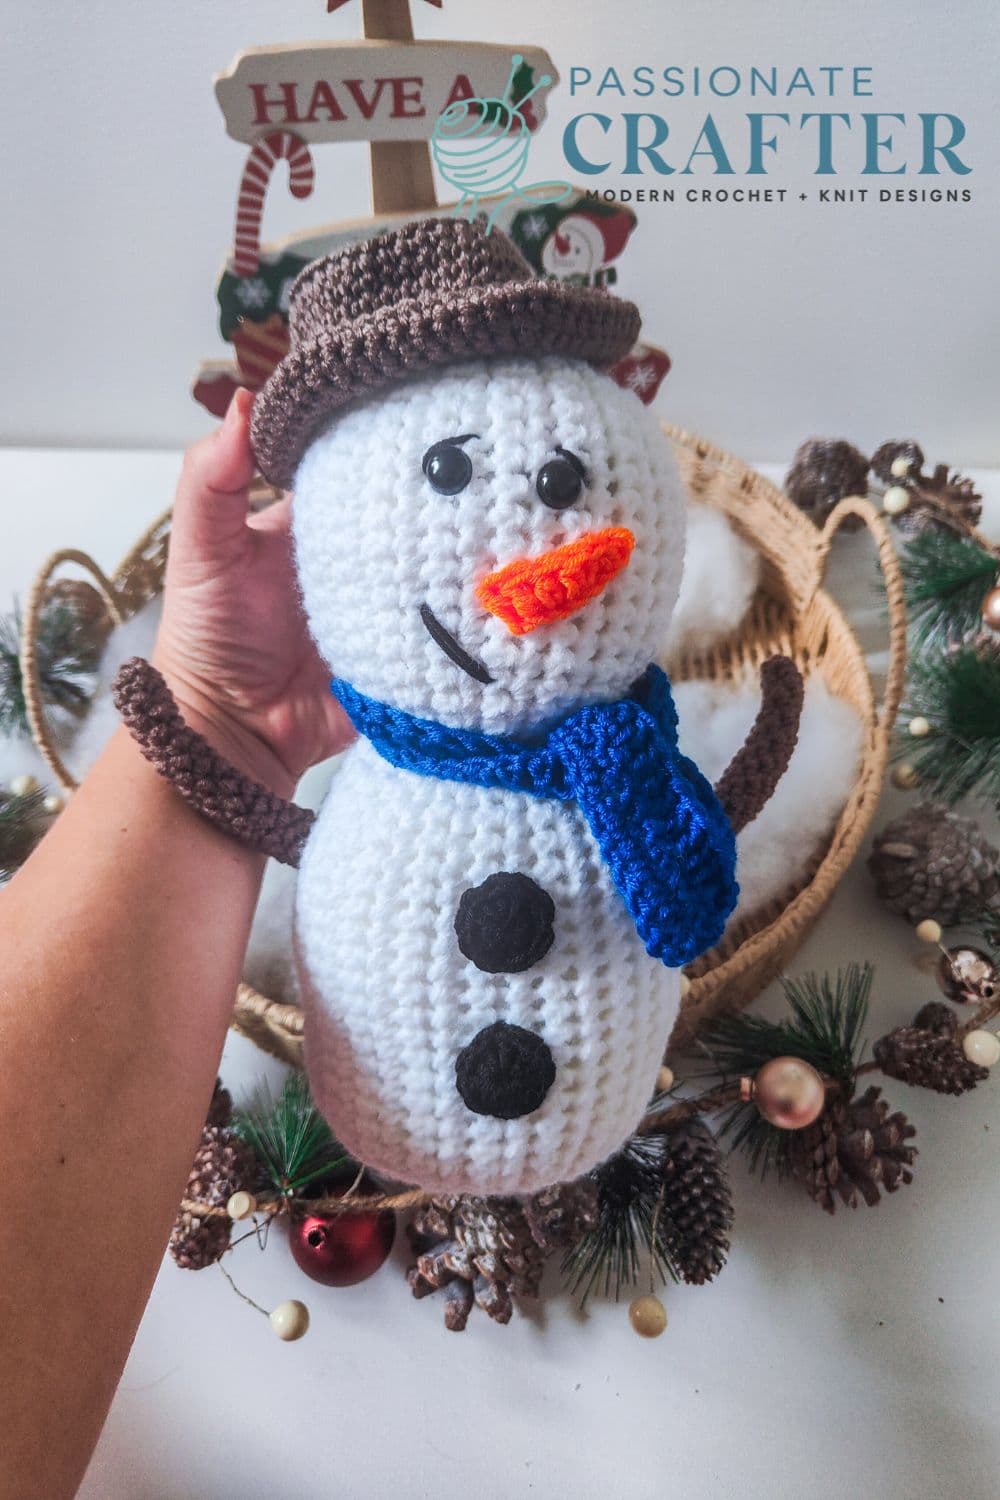
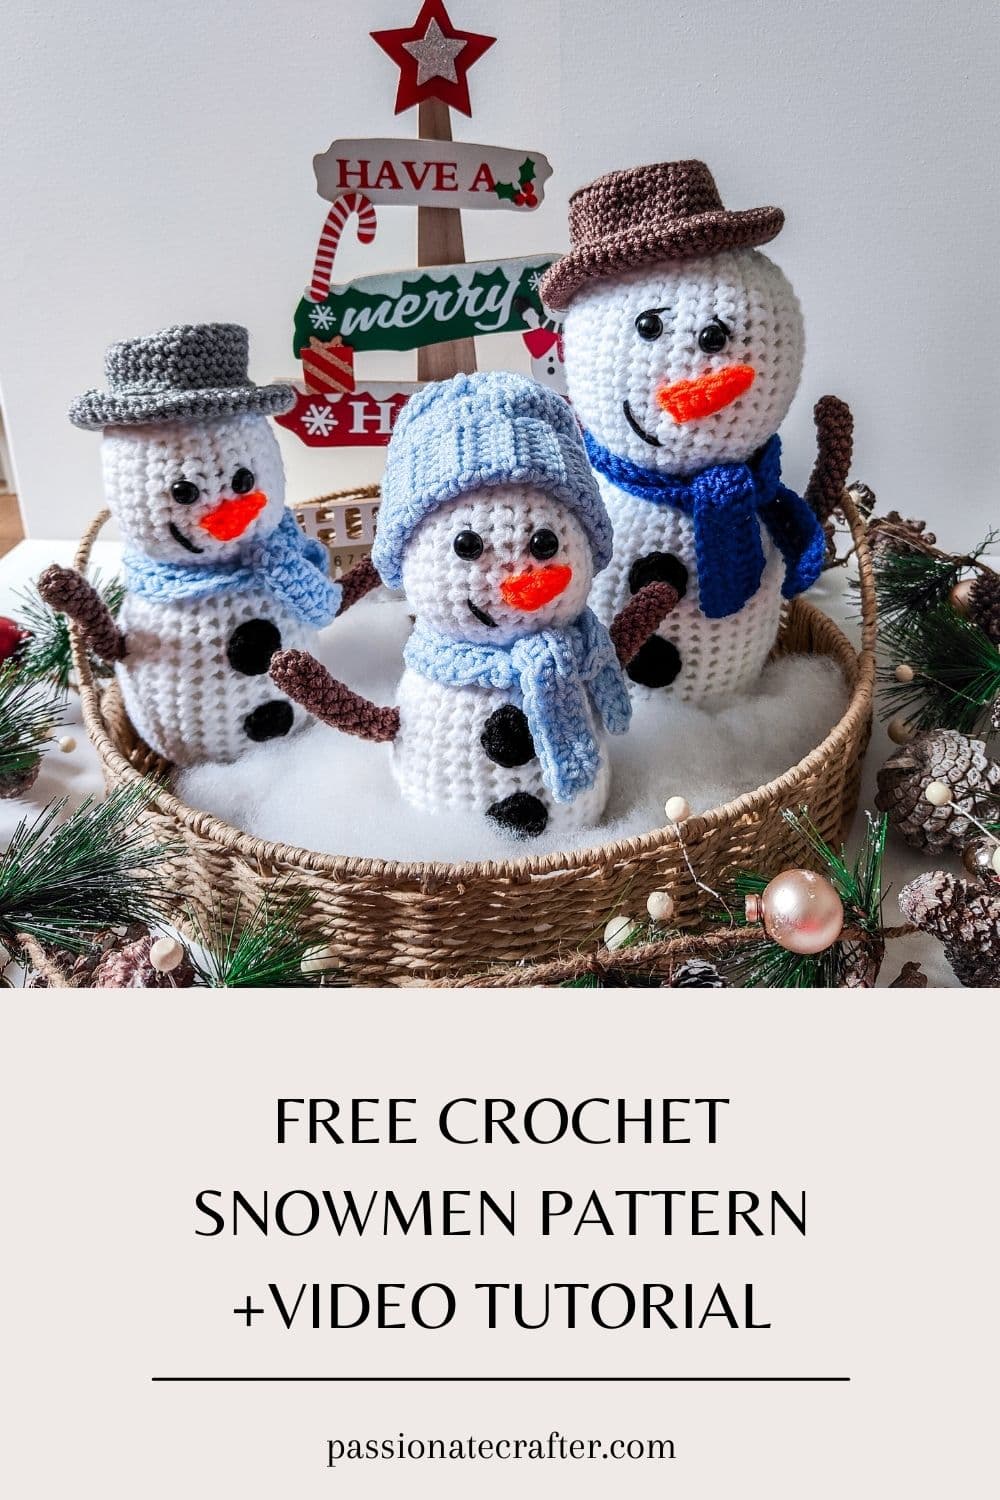
This is a super easy and quick Snowman amigurumi pattern for beginners. It is made from one rectangle, so if you can crochet a rectangle, you can also rock this Snowman in no time. The pattern comes with a step-by-step video tutorial and two size options. Also, there are more beginner-friendly instructions for the hat, buttons and the arms.

Between me and Nj, she is the amigurumi designer. But sometimes, I come up with some ideas and love to release them. Of course, mine are mostly patterns for beginners, like this Snowman pattern I am sharing with you today.
Honestly, it is far from perfect, but this is the best part of being a beginner, right? For me, the main goal is to feel the satisfaction of finishing something rather than the perfect Snowman amigurumi. So, if you are a beginner, let’s crochet some cute snowmen together.
Why this Snowman amigurumi is perfect for beginners?
The Snowman pattern uses simple stitches like single crochet, half double crochet, and double crochet, the main stitches we learn at the beginning of our crochet journey. For this pattern, we will first crochet a flat rectangle and then, using simple techniques, will shape it into the final look of our Snowman.
Also, there are two options for the hat. One is crocheted in continuous rounds, and the second, more beginner-friendly option, is crocheted flat in rows. For the buttons, you can use actual buttons instead of crochet ones. For the arms, you can use wood sticks. Lastly, you can use a hot glue gun to glue all the embellishments instead of sewing them.
What is the best yarn to crochet a snowman?
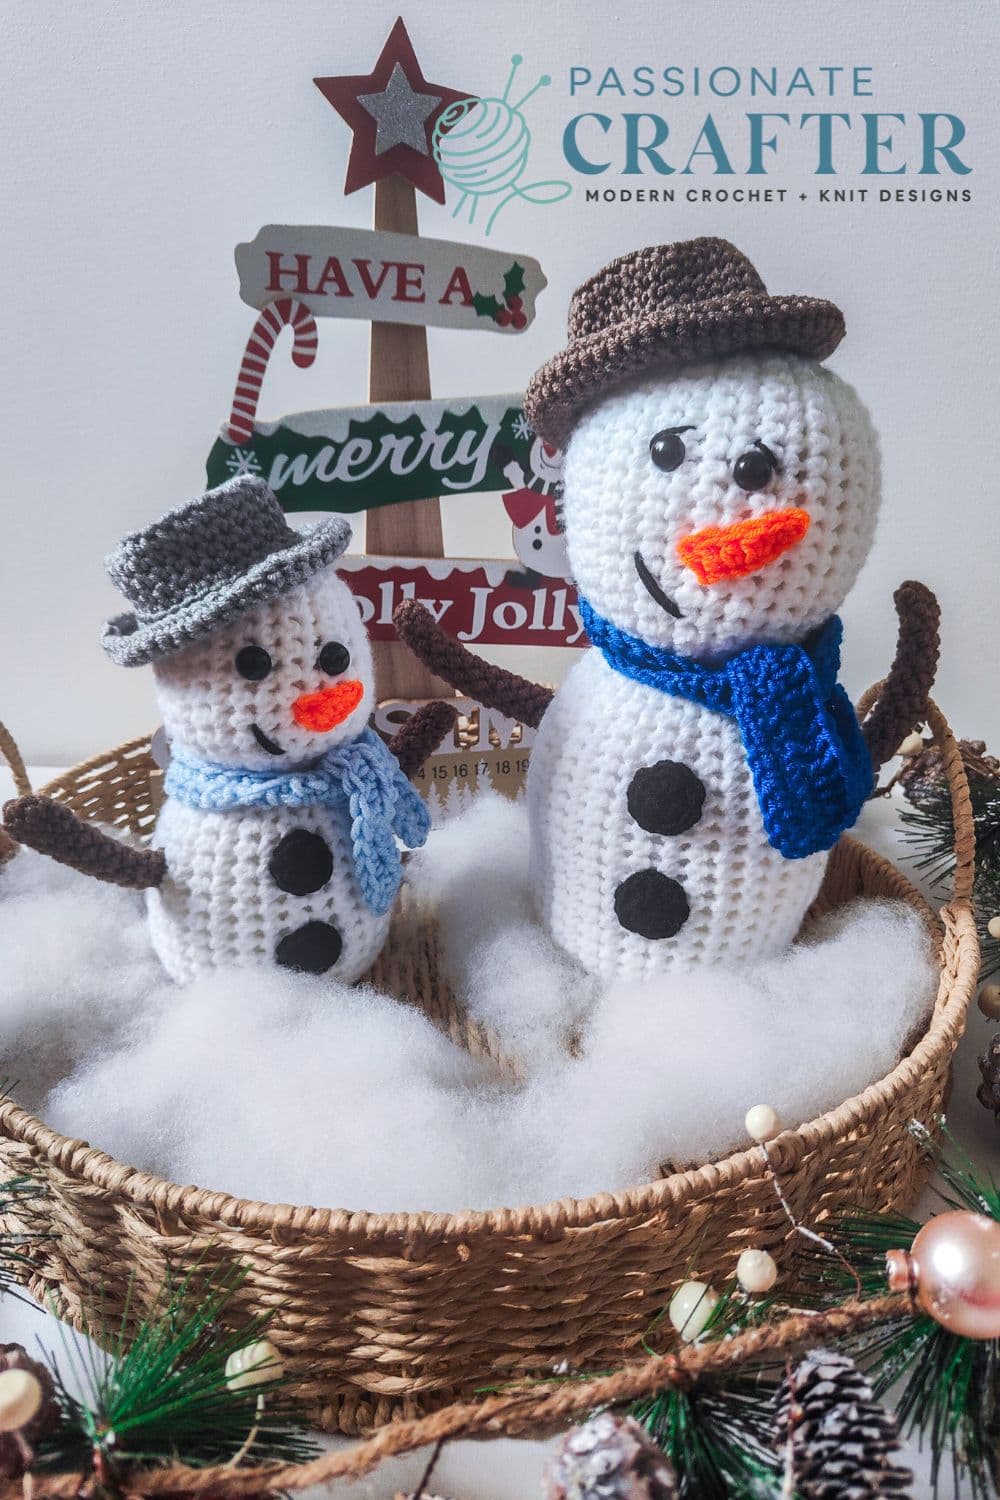
If you want to finish your snowman quicker, the best yarn to use is worsted-weight or bulky-weight yarn from your stash. For this pattern, I used worsted-weight yarn, so if you switch it with bulky-weight, the yarn quantity needed will change, as will the final size. The yarn I used for the snowman’s body is Lion Brand Pound of Love yarn in white color and thinner yarn for the rest of the snowman.
Yarn substitution
Here are some yarn suggestions if you decide to substitute it.
- KNIT PICKS / WE CROCHET Brava Worsted
- PATONS (UK) Baby Smiles Fairytale Fab Aran
- BIG TWIST YARNS Value
- PREMIER YARNS Just Yarn Worsted Value
Snowman Amigurumi Construction
The snowman body is worked in rows as a flat piece of fabric. After that, we will turn it into a tube, close the upper part of the head, stuff it, and close the bottom. Then, we will add all the parts.
How to customize your snowman
As I said, my main goal is to make the Snowman pattern as beginner-friendly as possible. That’s why here are some suggestions on how to make it easier and how to customize it to your liking and home decor.
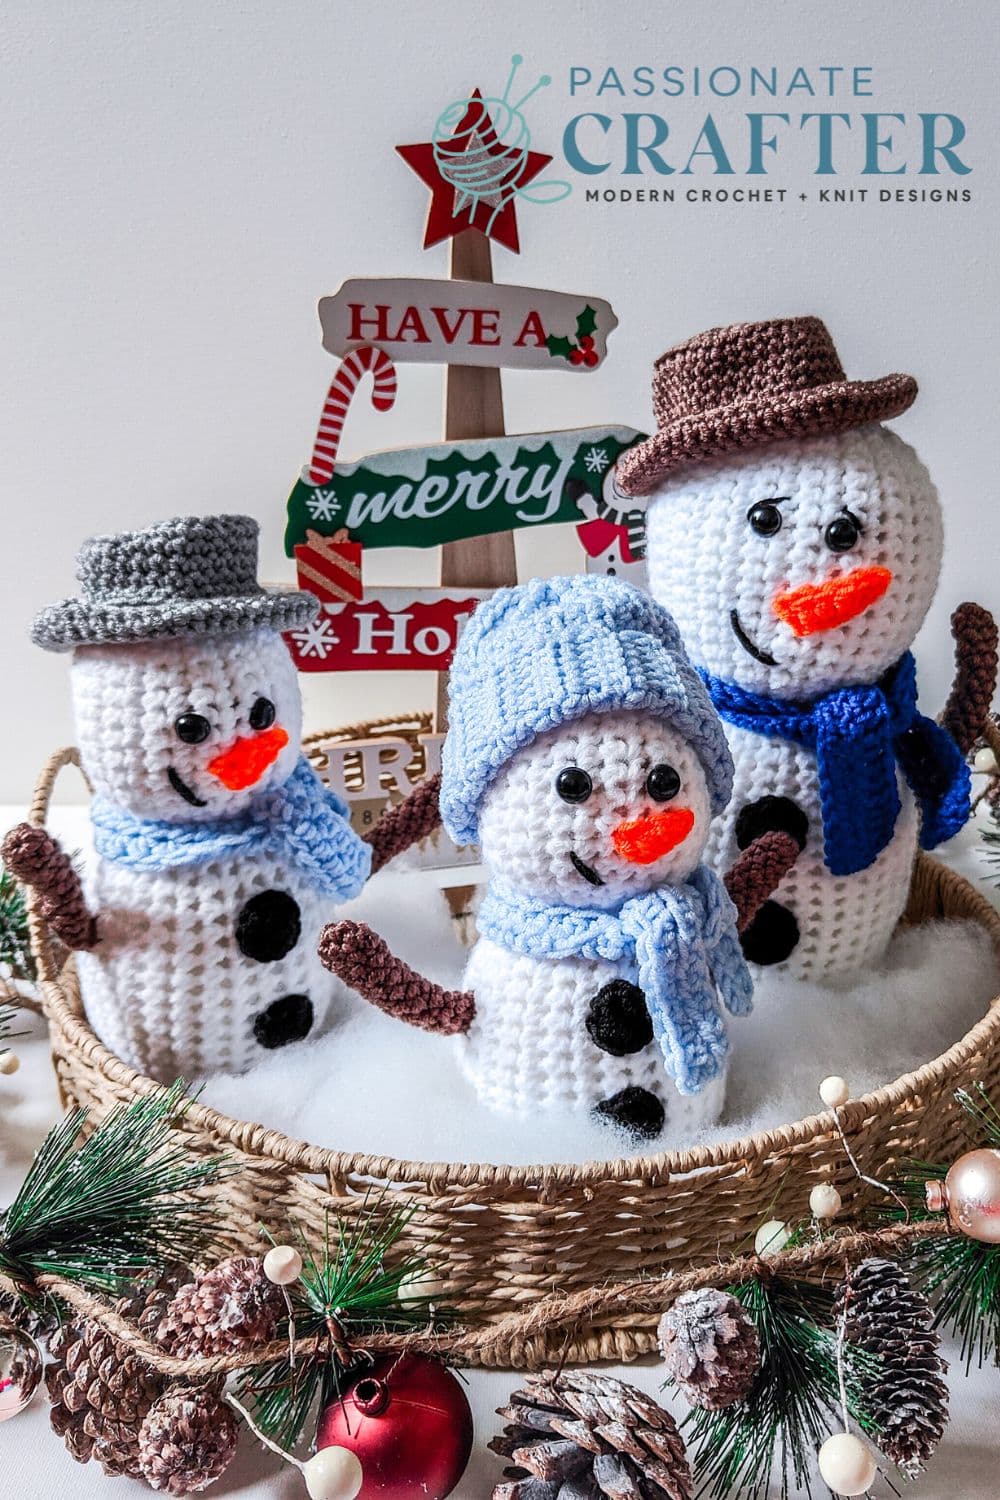
First, choose the hat option that is easier for you to crochet. There are two options: worked flat and seamed later or worked in continuous rounds. Second, instead of crocheting the arms, use wood sticks or black pipe cleaners for the arms. Third, instead of crocheting the buttons, use actual buttons. Lastly, use a hot glue gun to glue all the parts instead of sewing them. Changing colors to match your home decor is a great option, too.
Video tutorial- step-by-step instructions
For those who prefer to follow a video tutorial along with the written instructions, here is the full step-by-step tutorial for the Snowman.
The latest on Youtube:
Crochet Snowman Pattern
Finished size:
- Small- 23 cm/ 9 inch
- Large- 30.5 cm/ 12 inch
Crochet Terms:
- The pattern is written in US crochet terms
Yarn
For the Snowman’s body- worsted weight yarn, I used Lion Brand Pound of Love in white color. Around 30 gr for the small one and 50 gr for the Large one.
For the rest – medium/ Light worsted weight yarn, I used Hobbii Kind Feather, 100% Anti-pilling Acrylic , 100gr/ 3.5 oz, 235m in colors: light and dark blue, grey, dark brown, orange and black.
Materials
- – tapestry needle ( smaller and larger one )
- – hook size 4mm, 4.5 mm, 5.5 mm
- – safety eyes- 12mm (two pairs)
- buttons (optional )
- polyfiber filling
- hot glue gun ( optional )
- stitch marker
Abbreviations:
sc- single crochet
ch- chain
inc- increase (make 2 SC in same stitch)
MR- magic ring
– repeat the stitches in the () indicated times
FO- fasten off
dc- double crochet
hdc- half double crochet
BLO- back loop only
SCBL- single crochet in the back loop only
rep- repeat
Pattern notes:
First, we will crochet a flat rectangle, then turn it into a tube, and finally shape it into a snowman. At the end, we will add the hands, hat, and face embellishments.
If you decide to add some weights, reverse the process for the body. First, close the bottom, add the weights, place the eyes, and close the upper part ( the head ) of the Snowman.
To adjust the scarf size, add more chains at the beginning.
For the hat which is worked flat, your piece must measure the head circumference of the snowman. If needed, add or subtract some rows.
When working in rounds, use a stitch marker to indicate your first stitch and move it along with each round.
Due to the stuffing, your Snowman can turn a little bit different than mine, as we tend to stuff each piece differently. I crocheted five snowmen for this pattern, and all of them are one of a kind.
If you want to tighten your stitches, use a smaller crochet hook than the recommended ones.
Don’t forget to pin this for later!
Snowman body
with a white color and 5.5 mm crochet hook
Row 1: For size small, ch31; for size large, ch46: SC in second ch from hook, SC in each st across, ch1, turn.
Here, you will have 30 sts for small, 45 sts for the large size.
Row 2: SC in each st across.
For size small, repeat row 2, 25 more times. (27 rows in total). Your rectangle will measure- 14.5 cm in width x 20 cm in height.
For size large, repeat row 2, 35 more times. (37 rows in total). Your rectangle will measure- 22 cm in width x 32 cm in height. Do not Fasten off.
Now we will turn the rectangle into a tube. To do so: Fold the rectangle in a half lenghtwice and start joining both sides using the slip stitch method.
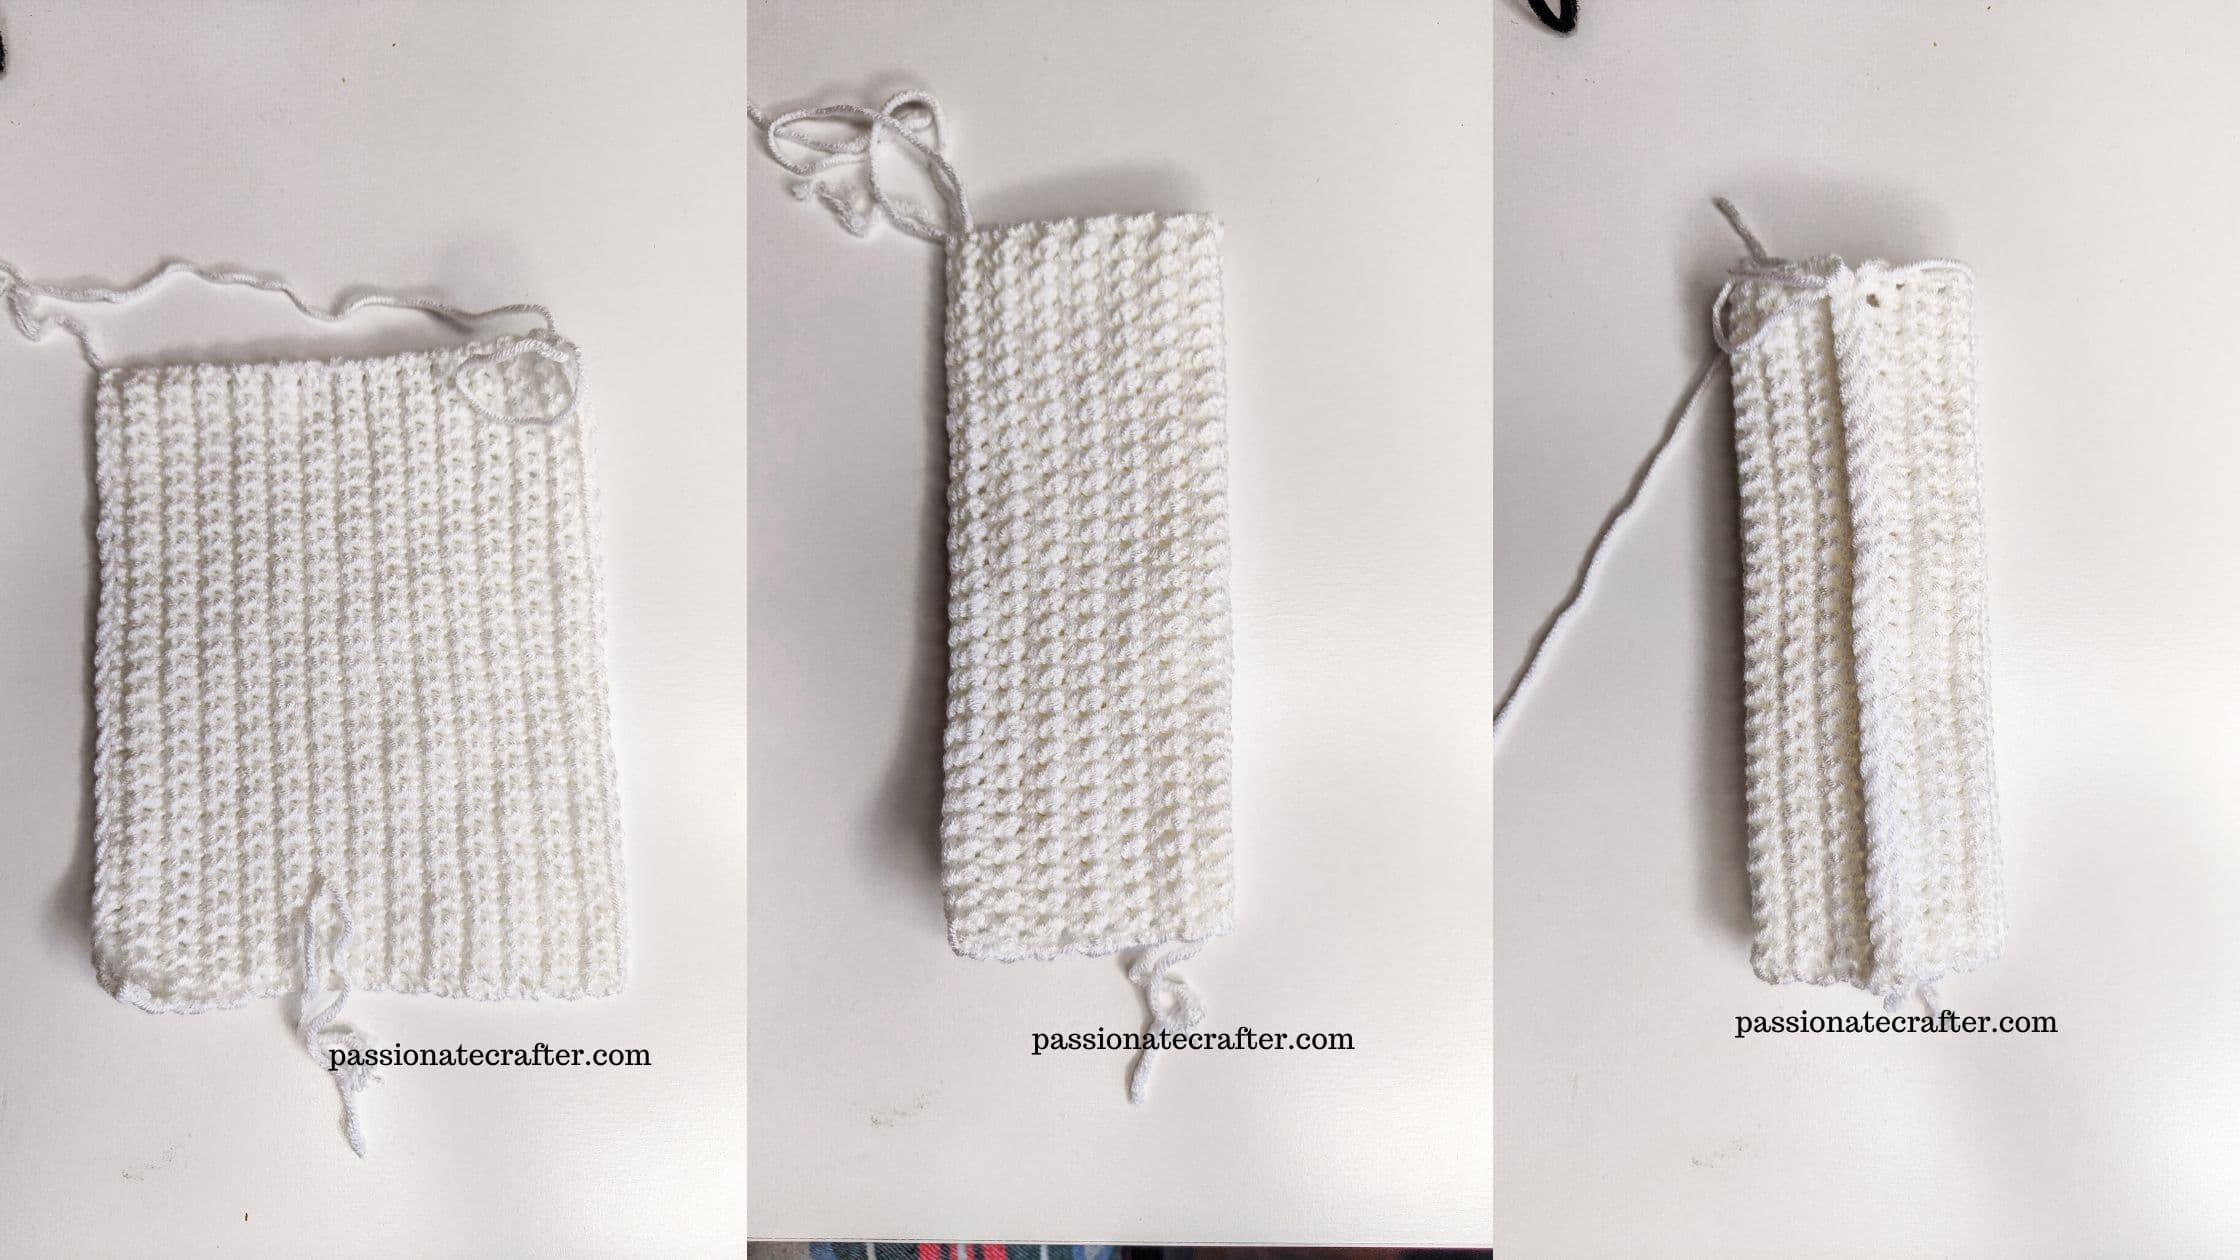
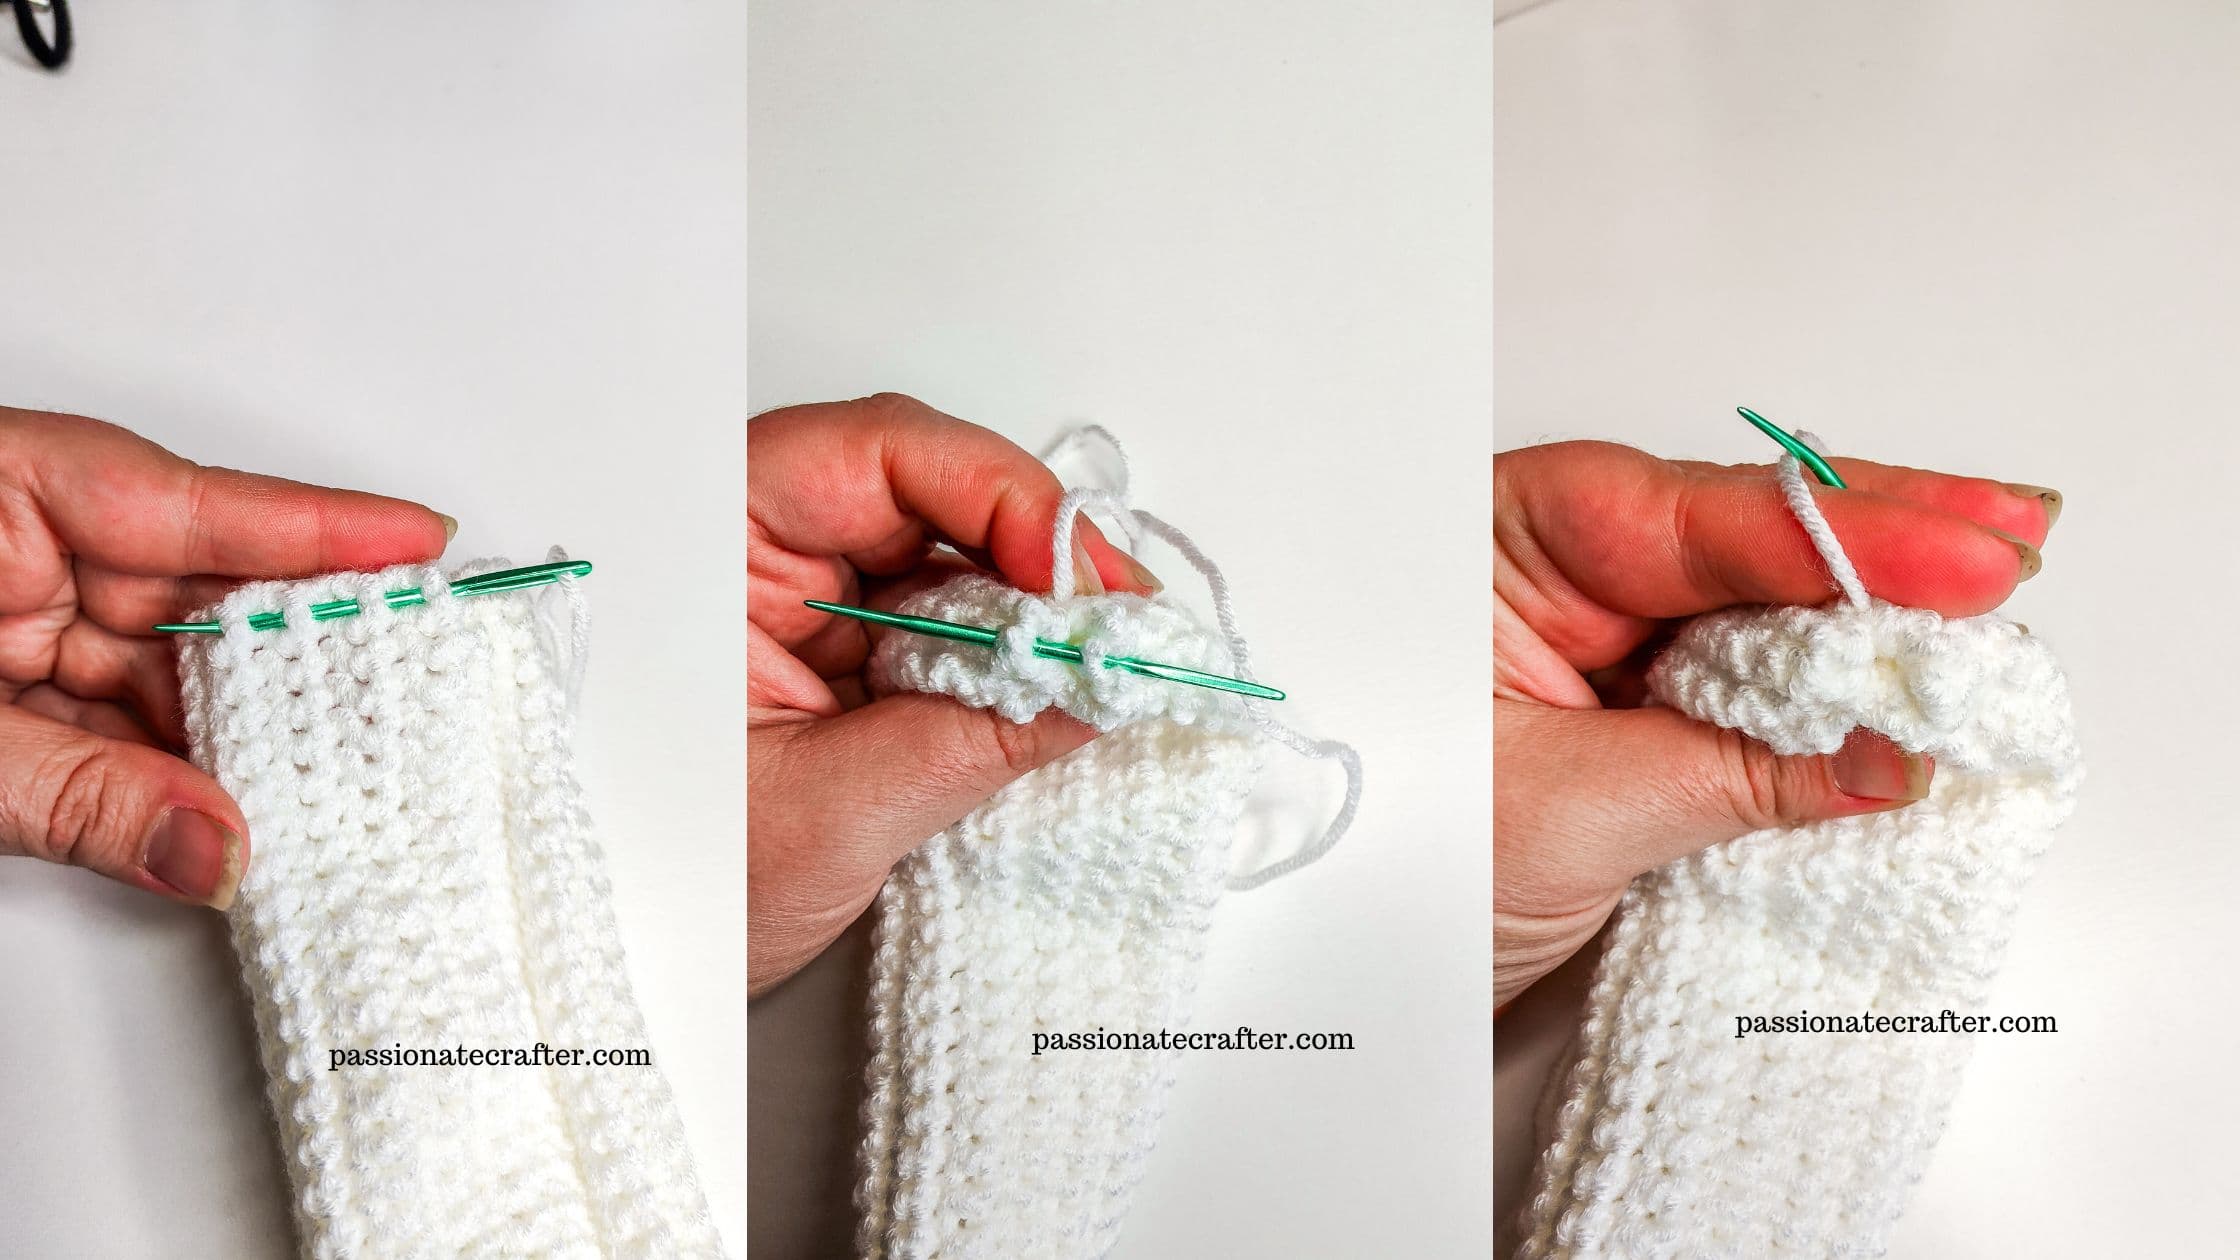
Do not fasten off. Turn the tube with the right side facing you. Take a tapestry needle and close the short side. See pics below.
How to shape the snowman
To shape the snowman, place your piece on a flat surface. The joining row must be in the middle on the backside. Take the safety eyes and insert them as follows: small size 6-7 sts , large size 8-9 sts from the top.
Then, start filling the tube. Try not to overstuff it. When you fill the tube, close the bottom of the snowman.
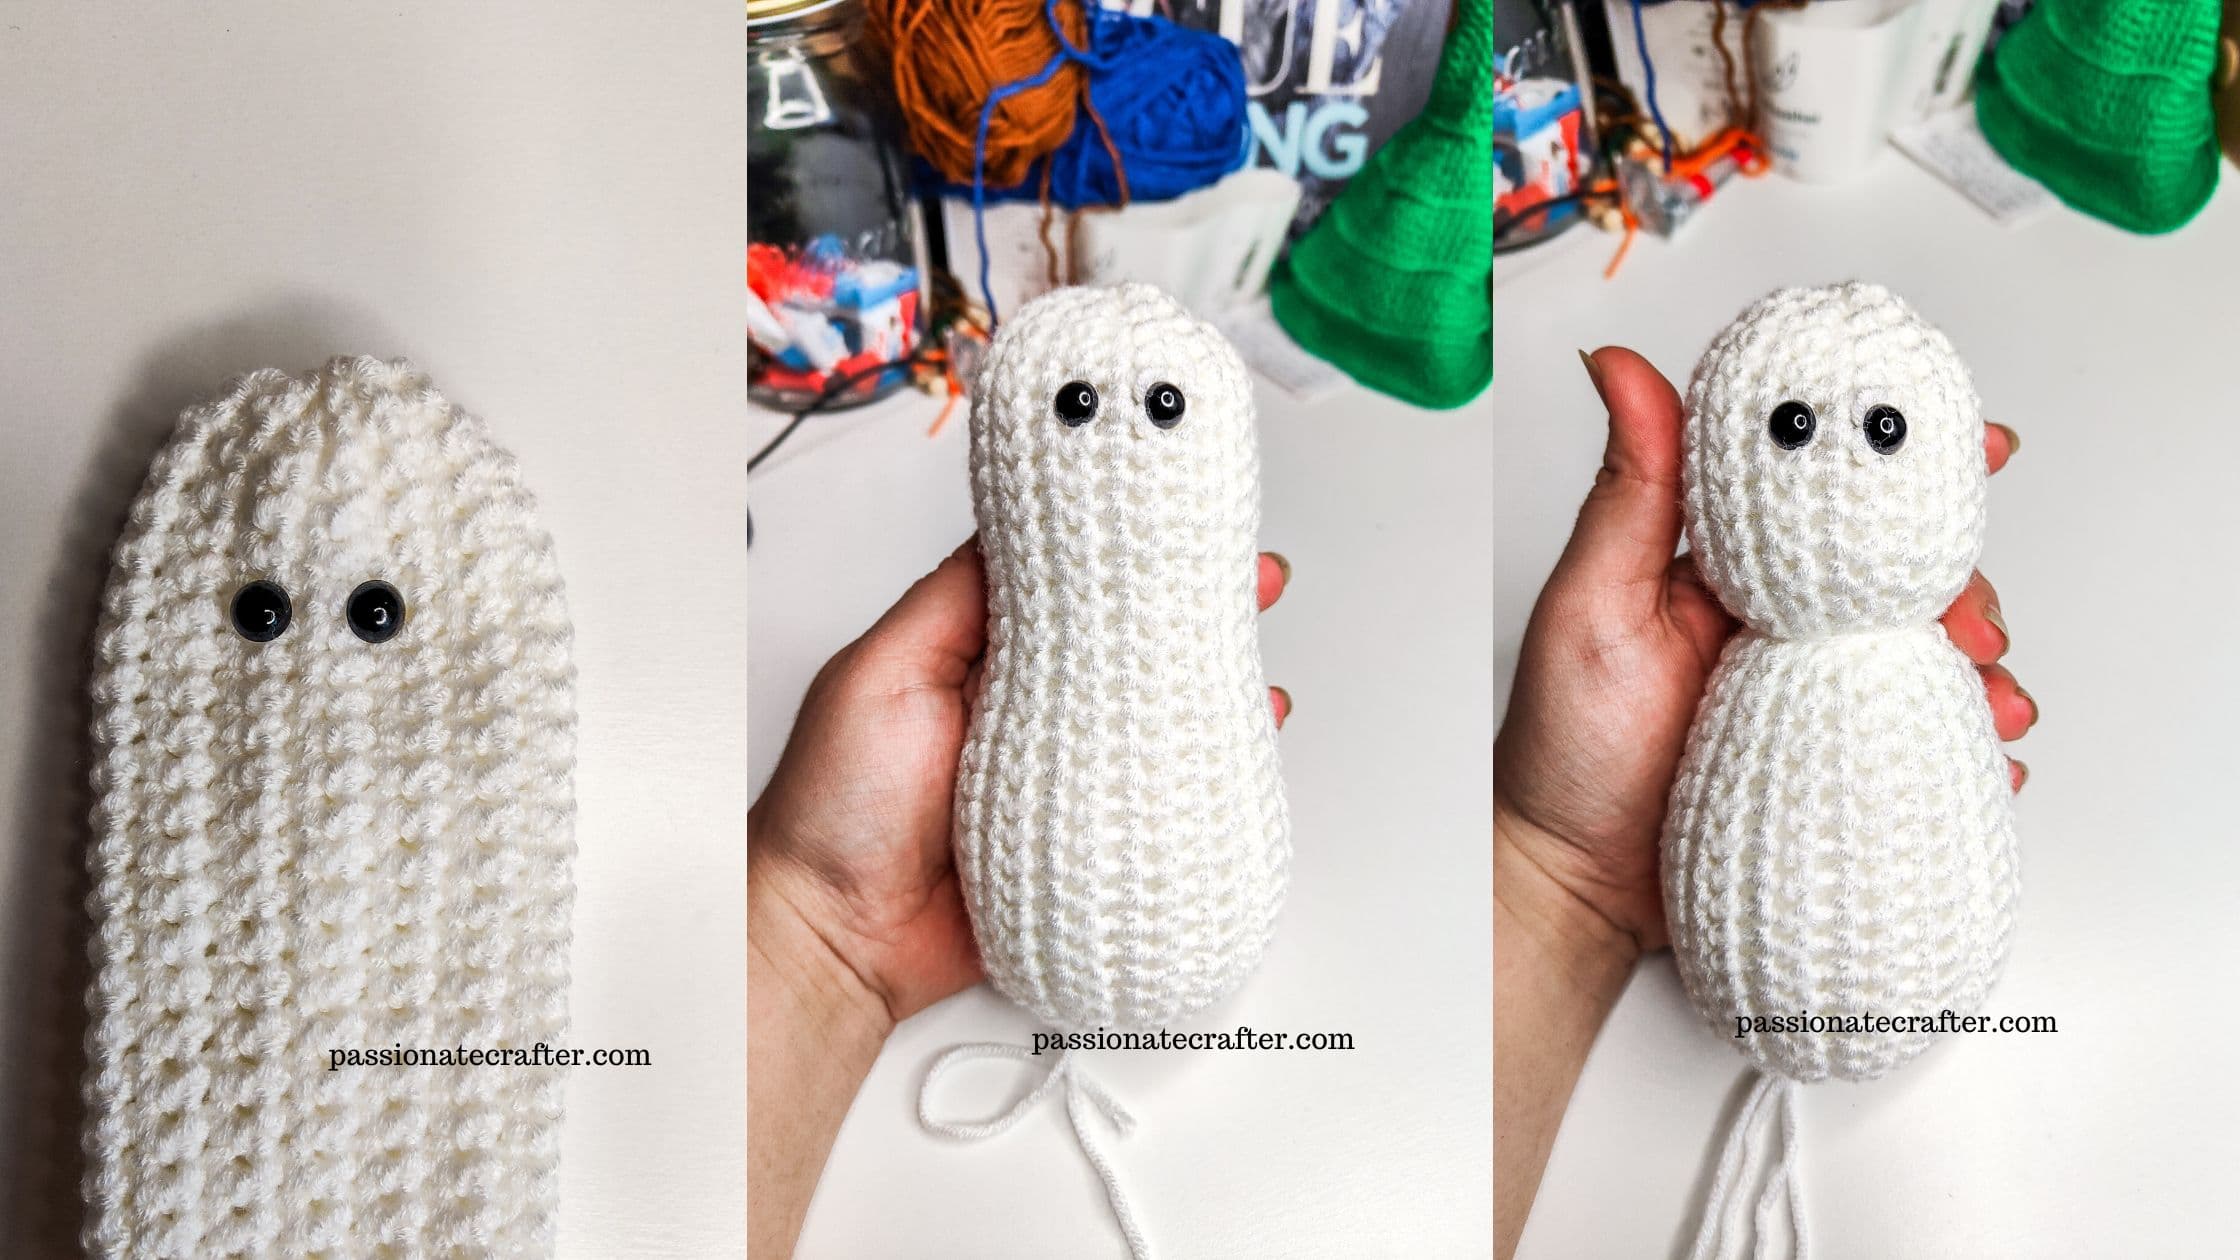
Now, tie a long piece of white yarn around the snowman. Divide the body as follows- 40% for the head and 60 % for the body. Tie the yarn around tightly till the head is shaped.
Scarf: any shade of blue color yarn with a 5.5 mm crochet hook
For size small: Row 1: ch 46, HDC in 2nd ch from the hook, HDC in each st across, ch1, turn
Row 2: HDC in each st across. Fasten off.
For size large: Row 1: ch 57, DC in 3rd ch from the hook, DC in each st across, ch2, turn
Row 2: DC in each st across. Fasten off.
HAT OPTION 1- worked in continuous rounds
We have two options for the hat. The first is worked in continues rounds, and the second option is worked flat and then seamed with a crochet hook. Follow the instructions for the one you prefer.
HAT: size small with grey color yarn 4.5 mm crochet hook
Rnd 1: SC 6 into a MR.(6)
Rnd 2: * inc * 6 times (12)
Rnd 3: * SC 1, inc * 6 times (18)
Rnd 4: * SC 2, inc * 6 times (24)
Rnd 5: * SC 3, inc * 6 times (30)
The next round is worked in BLO. Only the next round!
Rnd 6: SC in each st around.(30)
Rnd 7-10: SC in each st around (30) ( 4 rnds in total )
The next round is worked in BLO. Only the next round!
Rnd 11: * SC 4, inc * 6 times (36)
Rnd 12: * SC 5, inc * 6 times (42)
Rnd 13: SC in each st around (36)
Rnd 14: * SC 6, inc * 6 times (48)
Rnd 15: SC in each st around. Fasten off.
HAT: size large with dark brown color yarn 4.5 mm crochet hook
Rnd 1: SC 6 into a MR.(6)
Rnd 2: * inc * 6 times (12)
Rnd 3: * SC 1, inc * 6 times (18)
Rnd 4: * SC 2, inc * 6 times (24)
Rnd 5: * SC 3, inc * 6 times (30)
Rnd 6: * SC 4, inc * 6 times (36)
The next round is worked in BLO. Only the next round!
Rnd 7: SC in each st around (36)
Rnd 8-12: SC in each st around (36) ( 5 rnds in total )
The next round is worked in BLO. Only the next round!
Rnd 13: * SC 5, inc * 6 times (42)
Rnd 14: SC in each st around (42)
Rnd 15: * SC 6, inc * 6 times (48)
Rnd 16: * SC 7, inc * 6 times (54)
Rnd 17: SC in each st around(54)
Rnd 18: * SC 8, inc * 6 times (60)
Rnd 19: SC in each st around. (60). Fasten off.
HAT option 2 – worked flat
Small size with 4.5 mm crochet hook
Row 1: ch19, 1 HDC into the 2nd ch from the hook, 1 HDC in next 10 sts, sc in next 7 sts, ch1 turn
From row 2 till the end, we will work all the SC sts into the BLO. Only the SC sts!
Row 2: 1 BLSC in next 7 sts, 1 HDC in next 11 sts, ch1, turn
Row 3: 1 HDC in next 11 sts, 1 BLSC in next 7 sts, ch1, turn
Repeat rows 2 and 3, till your rectangle measures the circumference of the Snowman’s head. If you need, you can add or subtract some rows. ( My hat has 27 rows in total )
Large size with 4.5 mm crochet hook
Row 1: ch23, 1 HDC into the 2nd ch from the hook, 1 HDC in next 12 sts, sc in next 9 sts, ch1 turn
From row 2 till the end, we will work all the SC sts into the BLO. Only the SC sts!
Row 2: 1 BLSC in next 9 sts, 1 HDC in next 13 sts, ch1, turn
Row 3: 1 HDC in next 13 sts, 1 BLSC in next 9 sts, ch1, turn
Repeat rows 2 and 3, till your rectangle measures the circumference of the Snowman’s head. If you need, you can add or subtract some rows. ( My hat has 34 rows in total )
Here, you will have a rectangular piece. Using the slip stitch method, join both sides lengthwise. Take the tapestry needle and close the upper side of the hat. Fold the part with the SC sts as it is the hat’s brim.
HANDS for sizes medium and large (optional) with brown color yarn and 4.5 mm crochet hook
Here, we will work in spiral/continuous rounds. Do not join with slip stitch.
Make two pieces.
Rnd 1: SC 6 into a MR (6)
Rnd 2: SC in each st.
Repeat round 2 till it measures 7 cm for size small and 9 cm for size large. Make 2 pieces.
Carrot nose: with orange color and 4.5 mm crochet hook
Size small: ch5, SS in first ch, SC in next, HDC in next, DC in next. Fasten off.
Size Large: ch7, SS in first, SC in next, HDC in next 2, DC in next 2. Fasten off.
Leave a longer tail for sewing, or use a hot glue gun to stick it.
BUTTONS: with black color yarn and 4.5 mm crochet hook.
For the buttons, you can use actual buttons and sew them, or you can make crochet ones. Here are the instructions for the crochet ones I used for my snowmen.
Small-size Snowman: Start with an MR and make 10 HDC into the ring. Fasten off.
Large-size Snowman: Start with a MR, and make 10 DC into the ring. Fasten off.
Leave a longer tail for sewing, or use a hot glue gun. Make two pieces for each size.
MOUTH: with black color yarn and tapestry needle.
Using your tapestry needle, make one line as a mouth next to the carrot nose. When you are done, try to move the yarn ends to the top part of the head. This way, the hat will cover the ends, and they will not be visible.
More free Christmas pattern you would like
- Christmas Tree Gnome- free crochet pattern
- Crochet Christmas stocking- “Alpine”
- Crochet Mini stockings ornament for Christmas
- Crochet Gnome Ornament for Christmas- the Mini Christmas Tree
- Easy crochet DIY Christmas baubles-free pattern
Invitation to our Facebook group
You are welcome to share your projects made by our patterns with the community and us. Moreover, we are thrilled to see your creations, and you are very welcome to share them on our FACEBOOK PAGE HERE or our FACEBOOK GROUP or on INSTAGRAM by using the hashtag #passionatecrafterr.
Save this tutorial to your Pinterest boards so that you can come back to it later.
We’d love to hear your feedback. Drop a comment below and tell us your thoughts! And don’t forget to follow us on your favorite social platform!