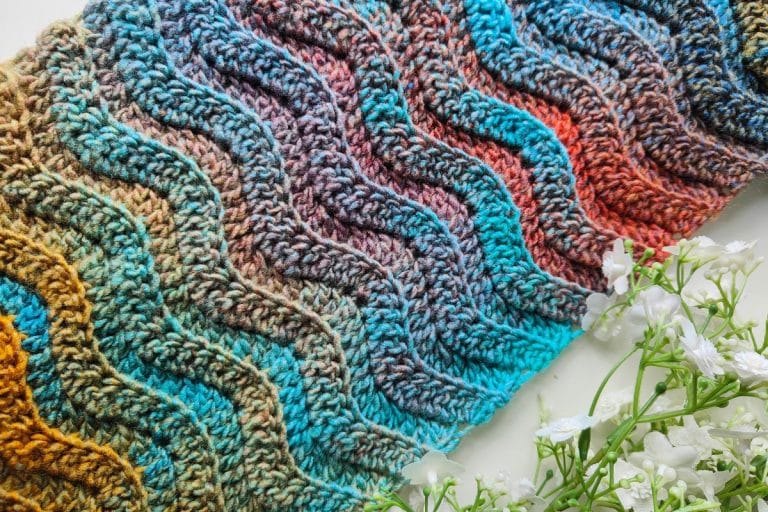
If you love a super textured, squishy stitch that adds depth and warmth to your crochet projects, you’re going to adore this mini cable stitch! This stitch creates beautiful, subtle cables using a combination of front post double crochet (FPDC) and regular double crochet stitches. The result is a stunning woven-like texture that’s perfect for blankets, scarves, and other cozy projects.

I’ve used this stitch to create the gorgeous Lavender baby blanket. It’s soft, warm, and has just the right amount of stretch, making it ideal for little ones or anyone who loves a plush, textured design. The pattern works up beautifully with solid or variegated yarns, highlighting the intricate details of the cables.
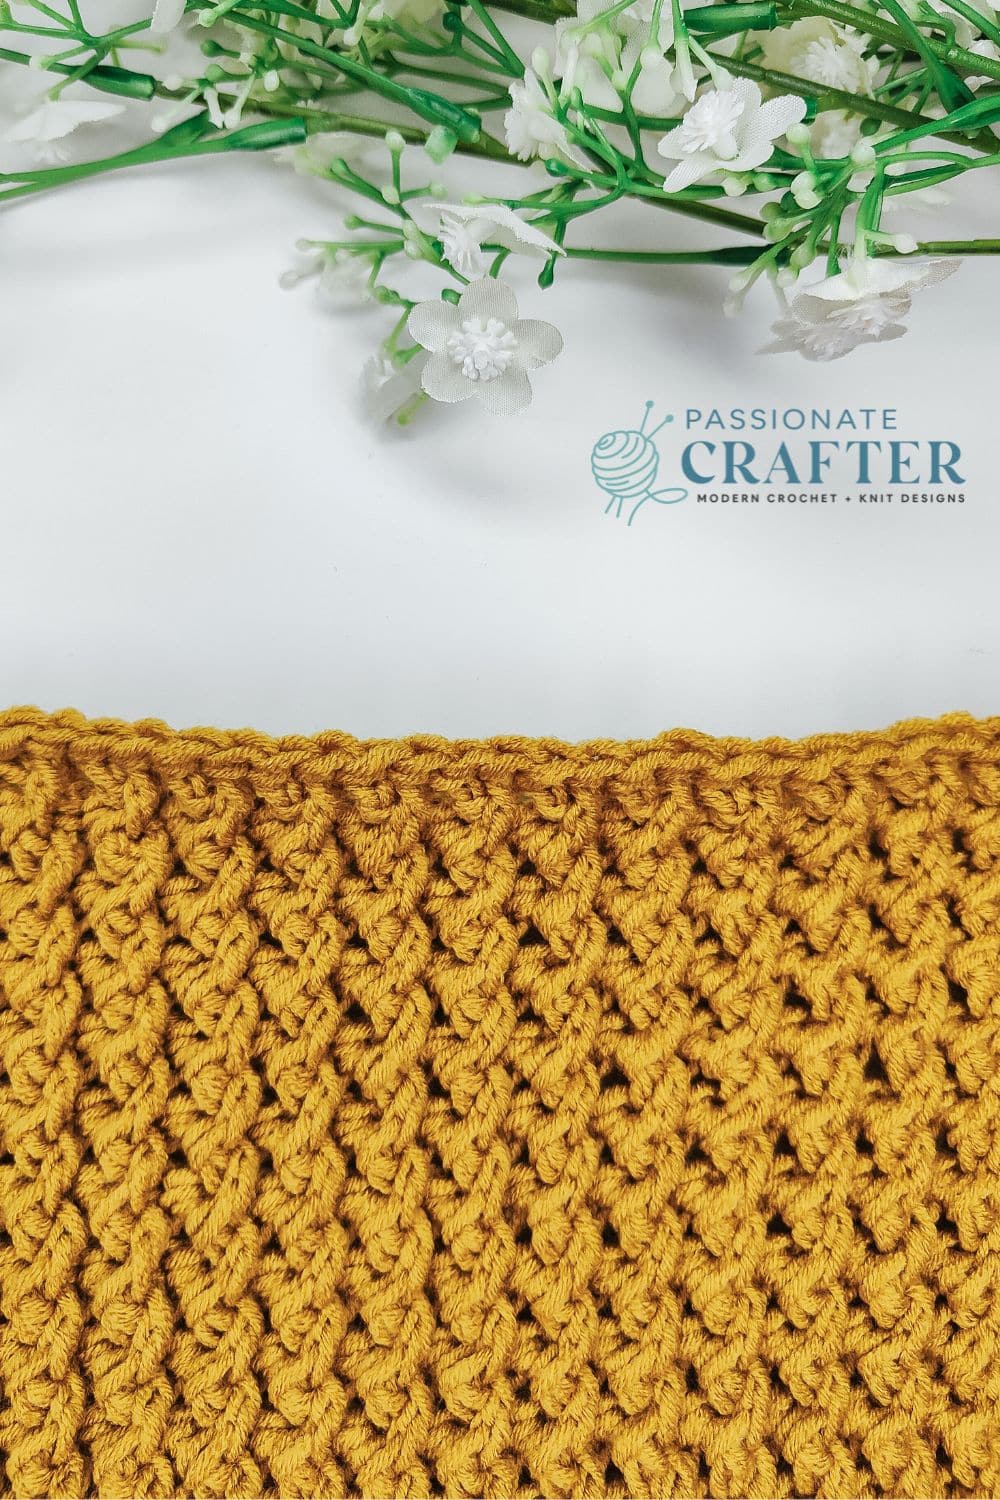
To help you master this stitch, I’ve put together a step-by-step photo tutorial along with a full video tutorial. Whether you prefer to learn by following pictures or watching the technique in action, I’ve got you covered! The stitch pattern is easy to memorize, making it a relaxing and rewarding project for both beginners and experienced crocheters.
So grab your favourite yarn and hook, and let’s get started! Check out the tutorial below and see how this mini cable stitch can elevate your next crochet project.
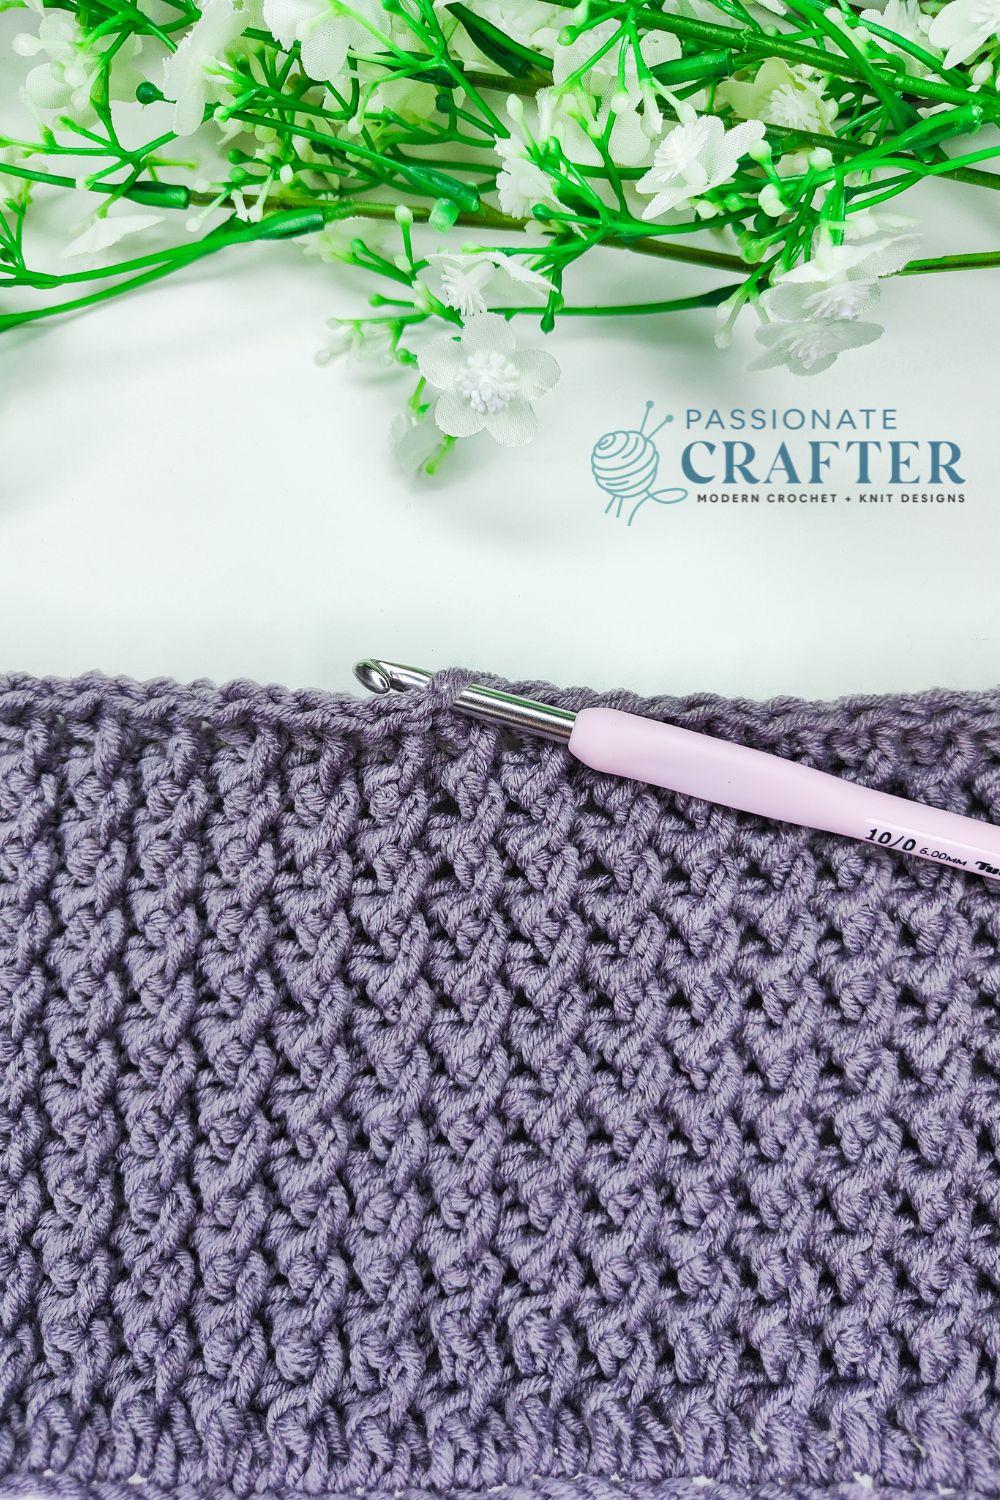
Materials needed:
- For the swatches I used 6 mm crochet hook
- The yarn I used is Lion brand Color Theory Yarn 100% Acrylic, 100gr/3.5 oz, 225m/246yds which is 4 Medium / Worsted yarn weight. But you can use any yarn you have in your stash.
- scissors
- yarn needle
Abbreviation:
DC- double crochet
SS- slip stitch
sk- skip
FPDC- front post double crochet
** – repeat the stitches in the **indicated times
the number in the () at the end indicates your final stitches for the row
ch(s)- chain (s)
FO- fasten off
rep- repeat
st(s)- stitch(es)
ch(s)- chain(s)
Special stitches:
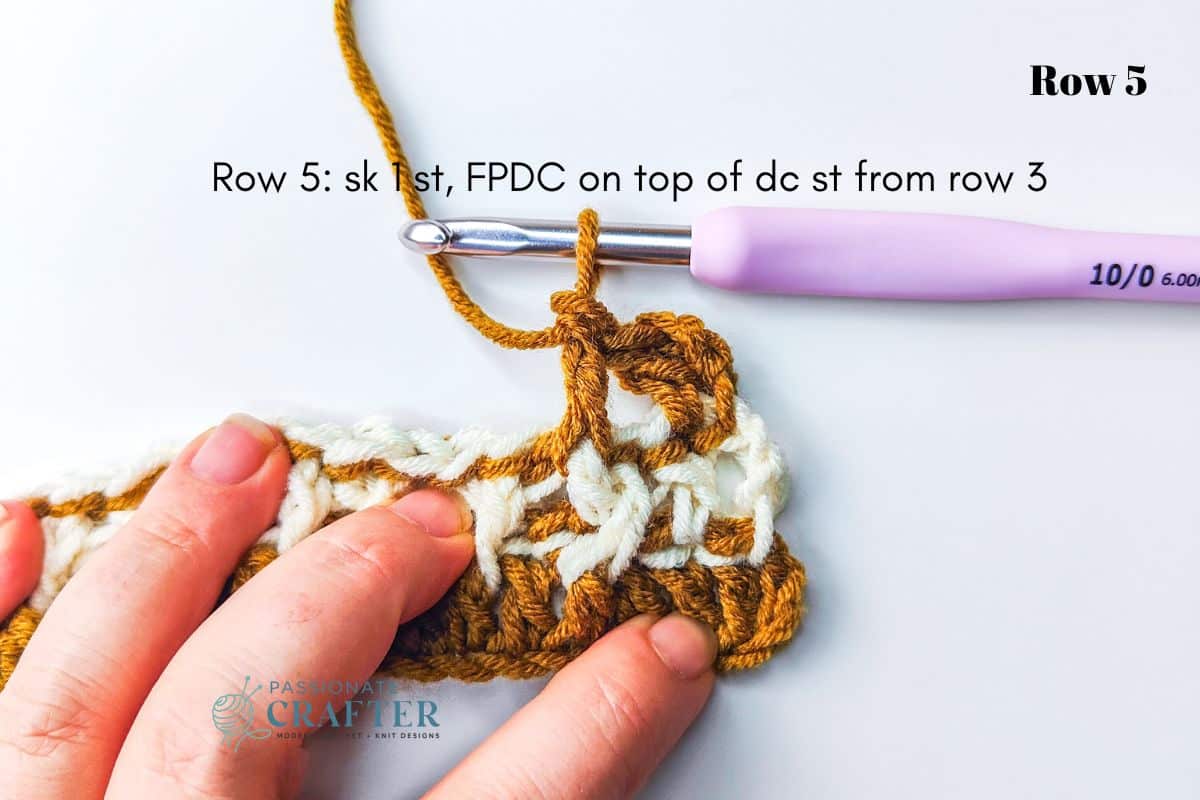
FPDC- front post double crochet: Yarn over (yo) and insert your hook from front to back between the posts of the first and second double crochet of the row below, and then from back to front again between the posts of the second and third stitches. The hook should now be positioned horizontally behind the double crochet you’re working around. Yarn over and draw the yarn around the post of the stitch. You now have three loops on the hook. Yarn over and draw the yarn through the 2 loops on the hook twice.
Video tutorial
For all the visual learners who prefer a step-by-step video tutorial here it is. In the tutorial I explain every step to crochet this beautiful, textured and fun crochet stitch.
The twisted front post double crochet stitch
The pattern is multiple of 2 stitches. So if you want to make a blanket or something else, chain a number which can be devided by 2.
Work the swatch using a 6 mm / J size crochet hook
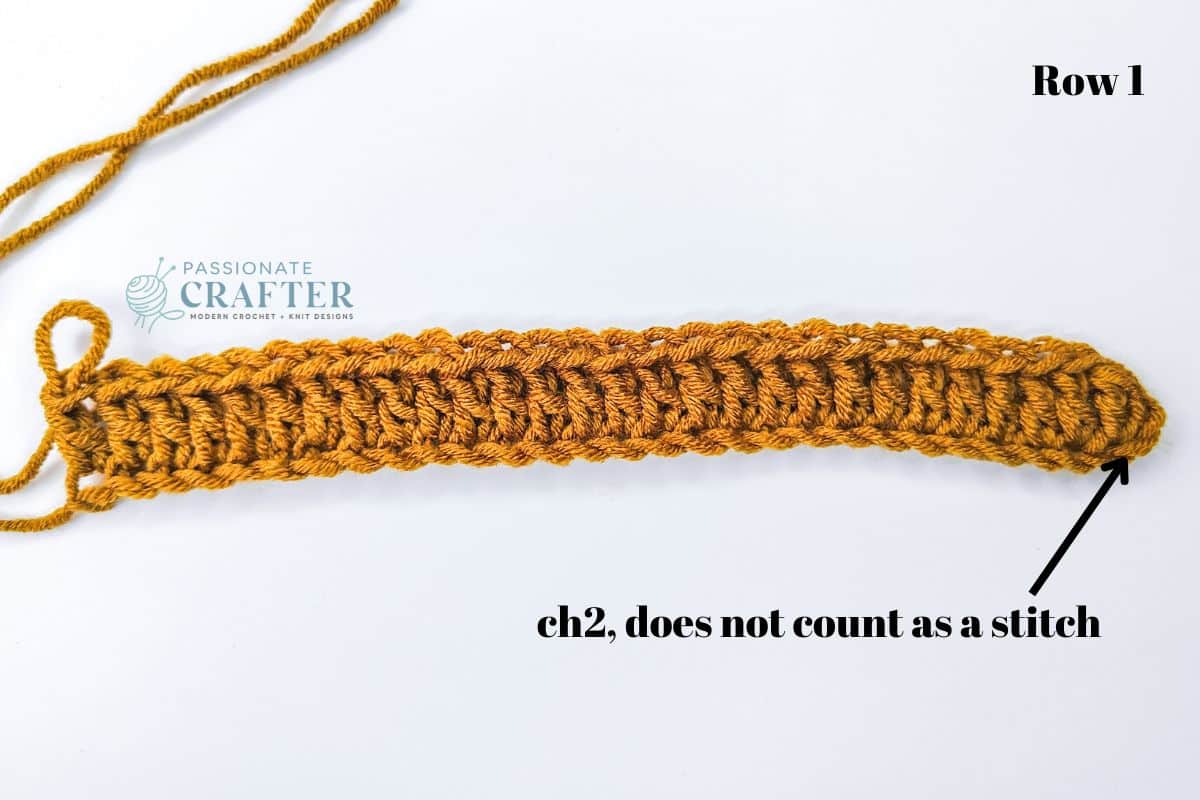
Row 1(RS): Ch30, dc in 3rd ch from the hook, dc across, turn ( 28 sts ) (ch2 at the beggining does NOT count as a stitch)
Row 2(WS): ch1, sl.st in first, sl.st in each st across, turn ( 28 sts )
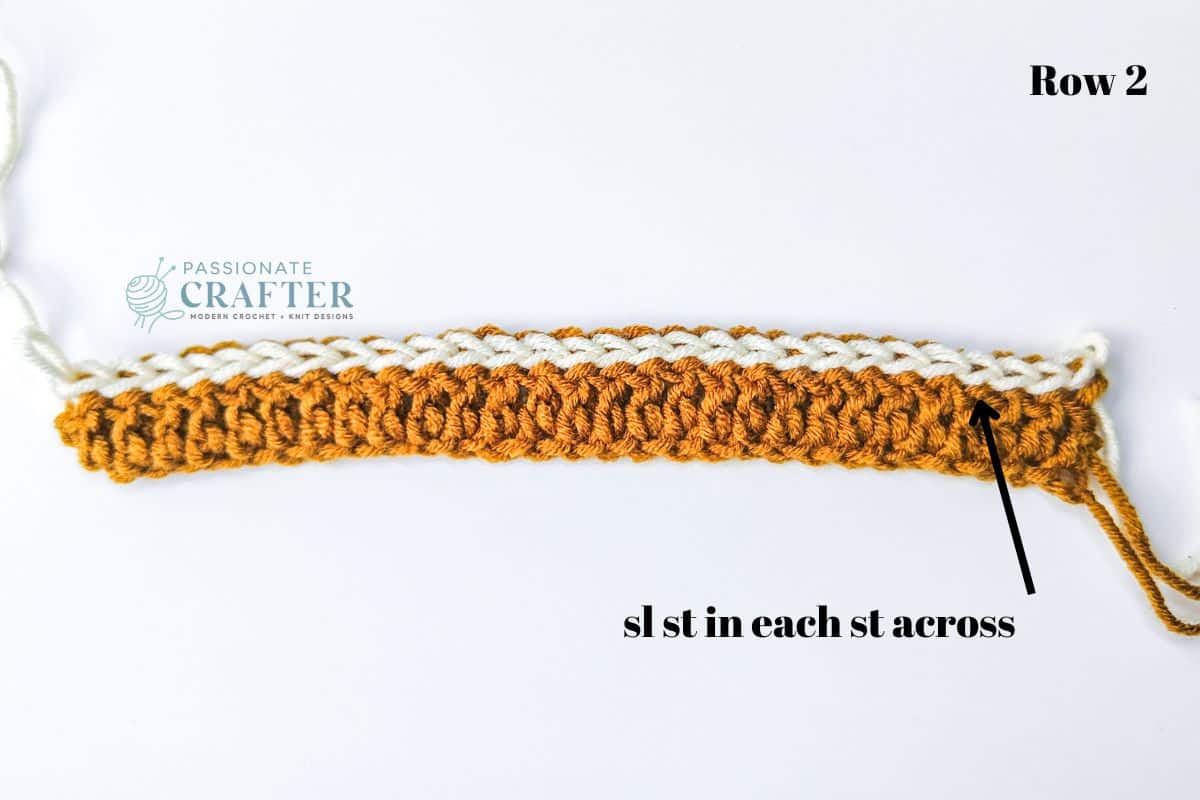
For row 3 and each right side row we will work on top of the stitches from one row below, NOT on top of slip stitches we worked in the previous row. See pic below.
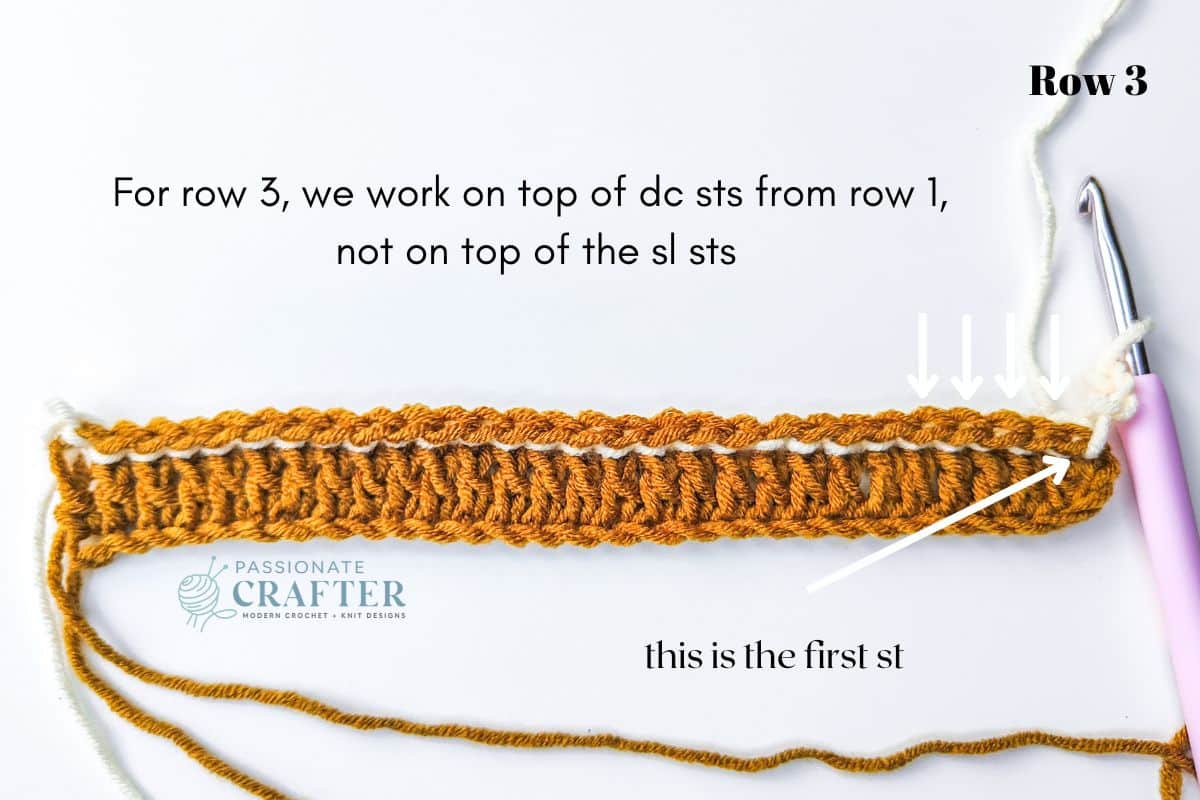
Row 3(RS): ch3( counts as the fisrt dc here and throughout the pattern ), 1dc in next st,
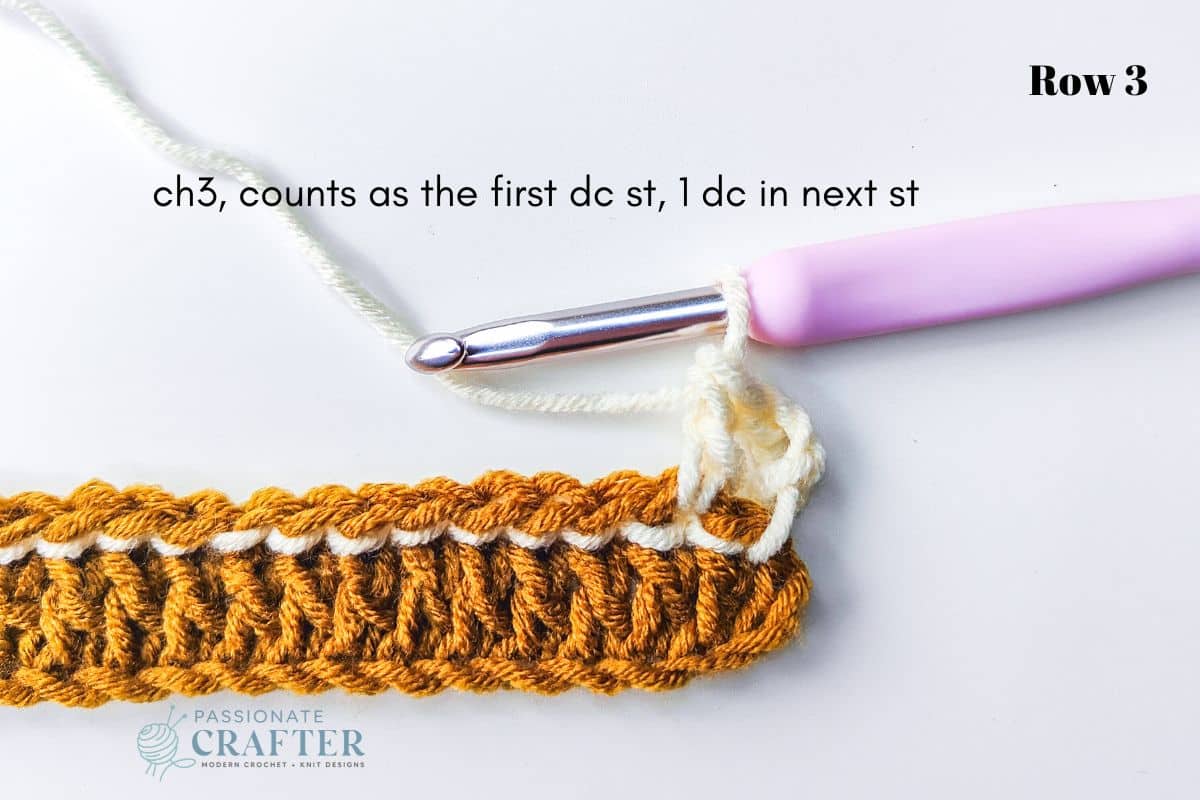
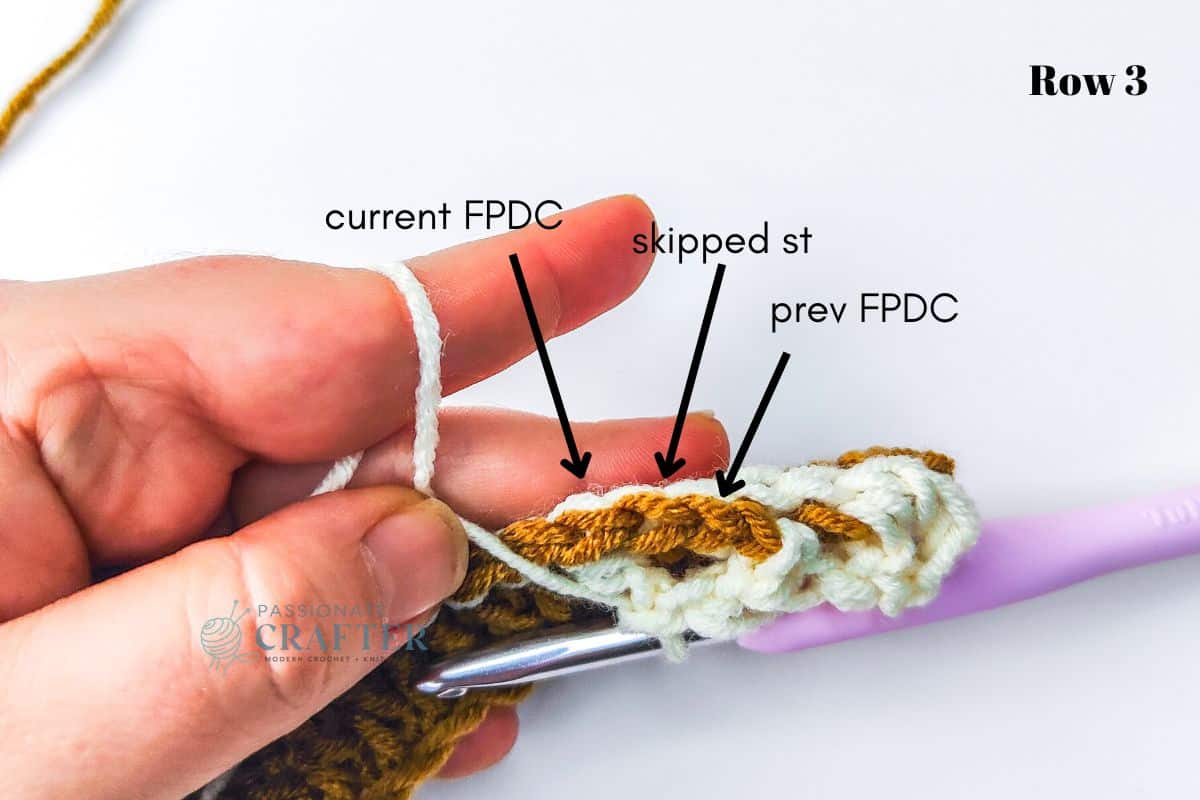
* sk1, FPDC in next st,
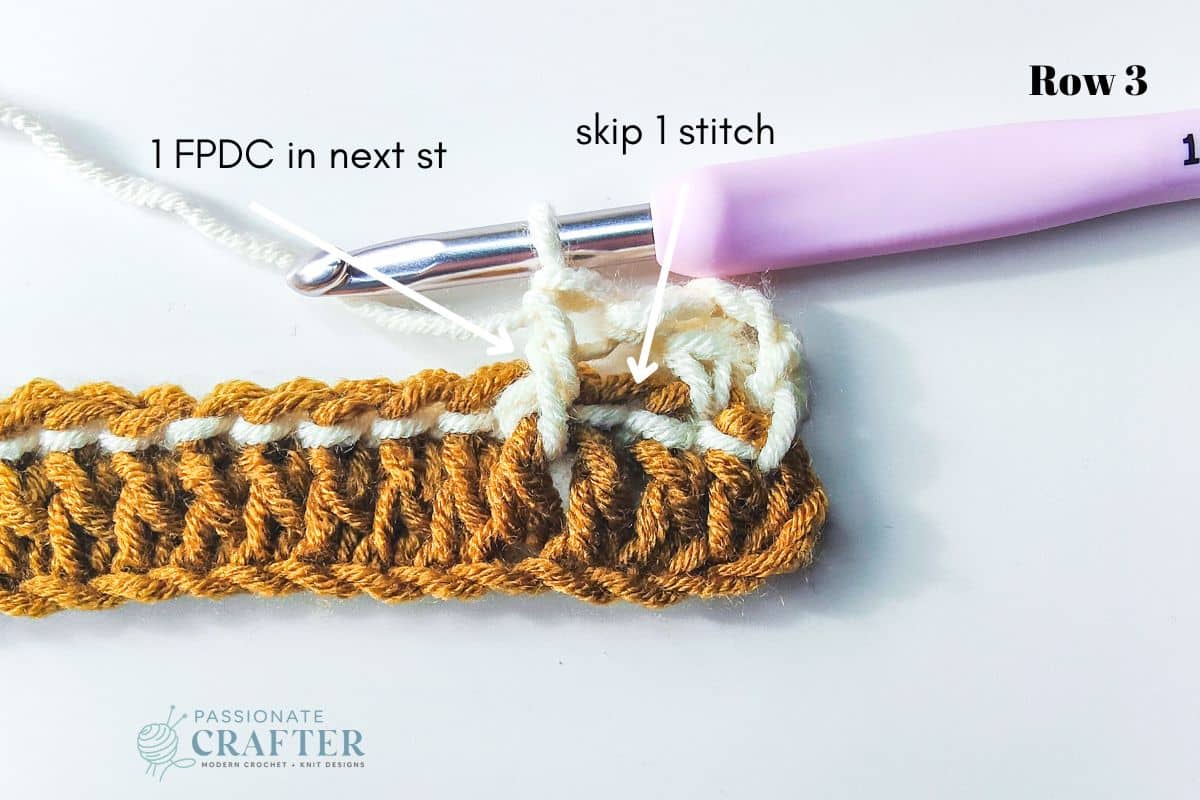
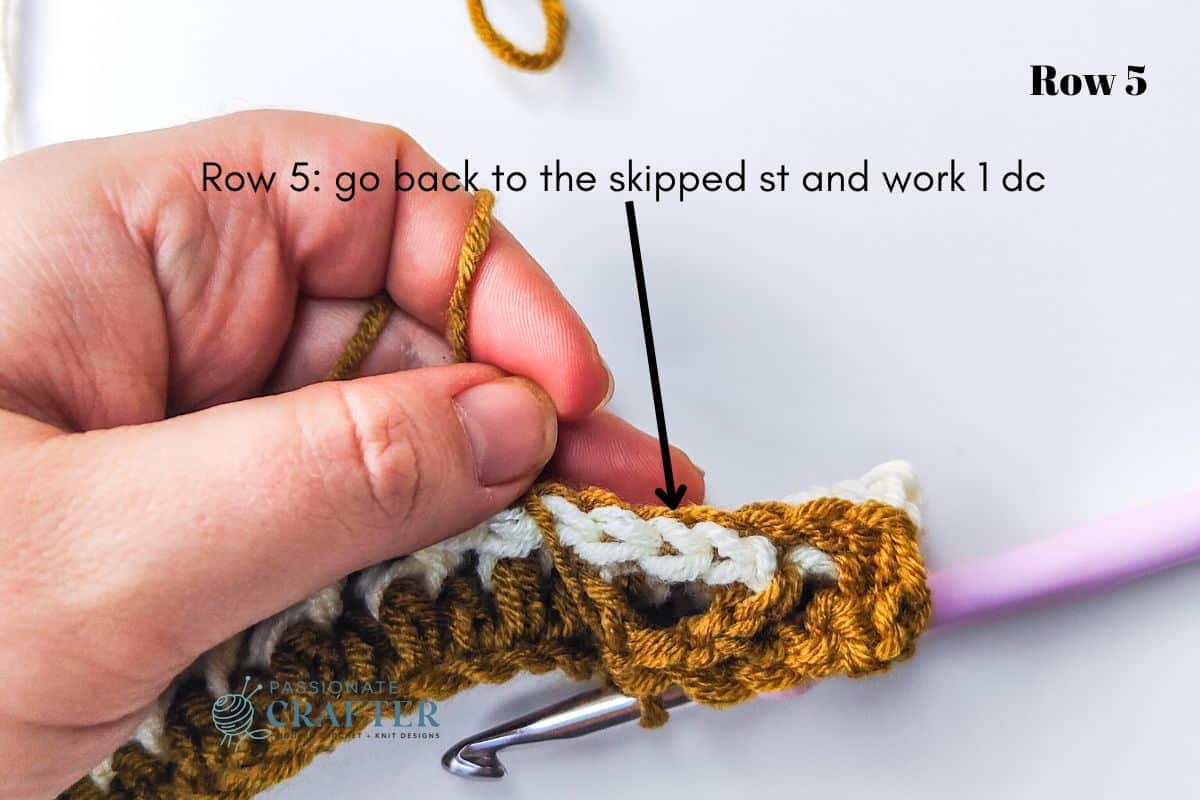
This is the stitch we skipped,
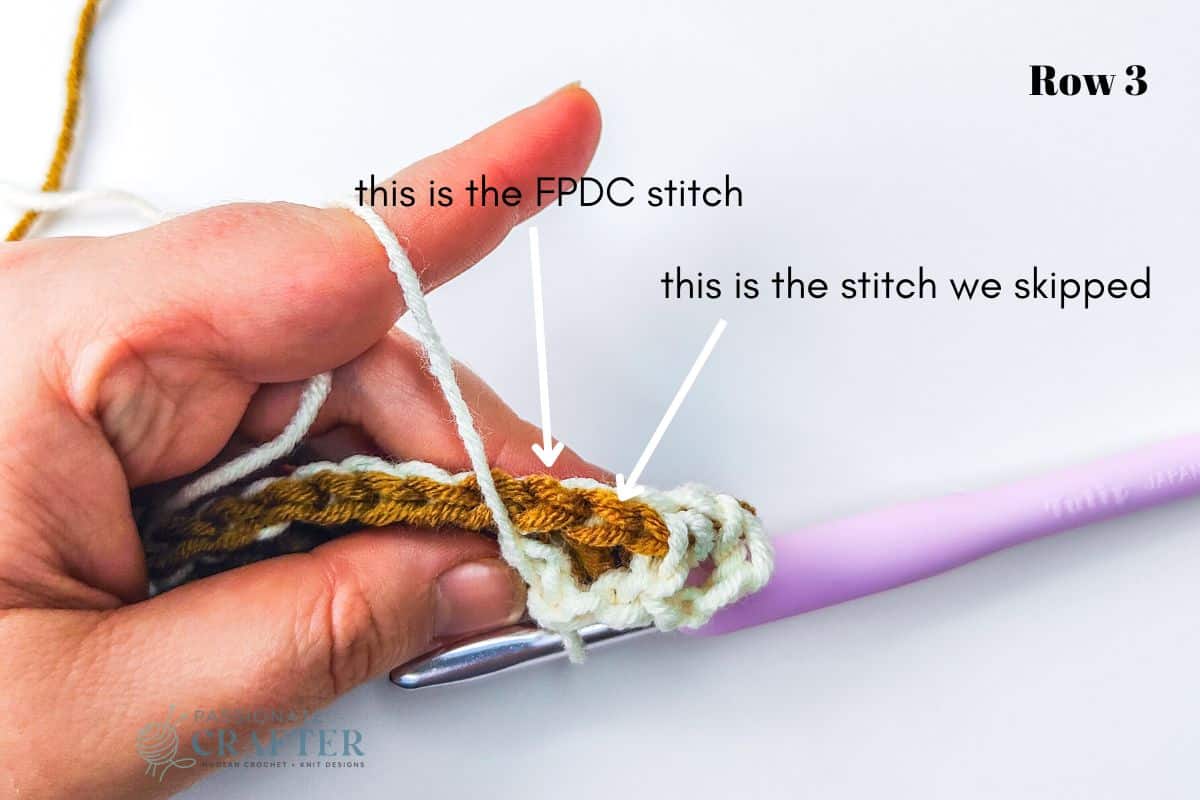
now go back to the stitch we skipped and make 1dc * rep till last 2 sts, 1dc in next 2 sts, turn (28 sts)
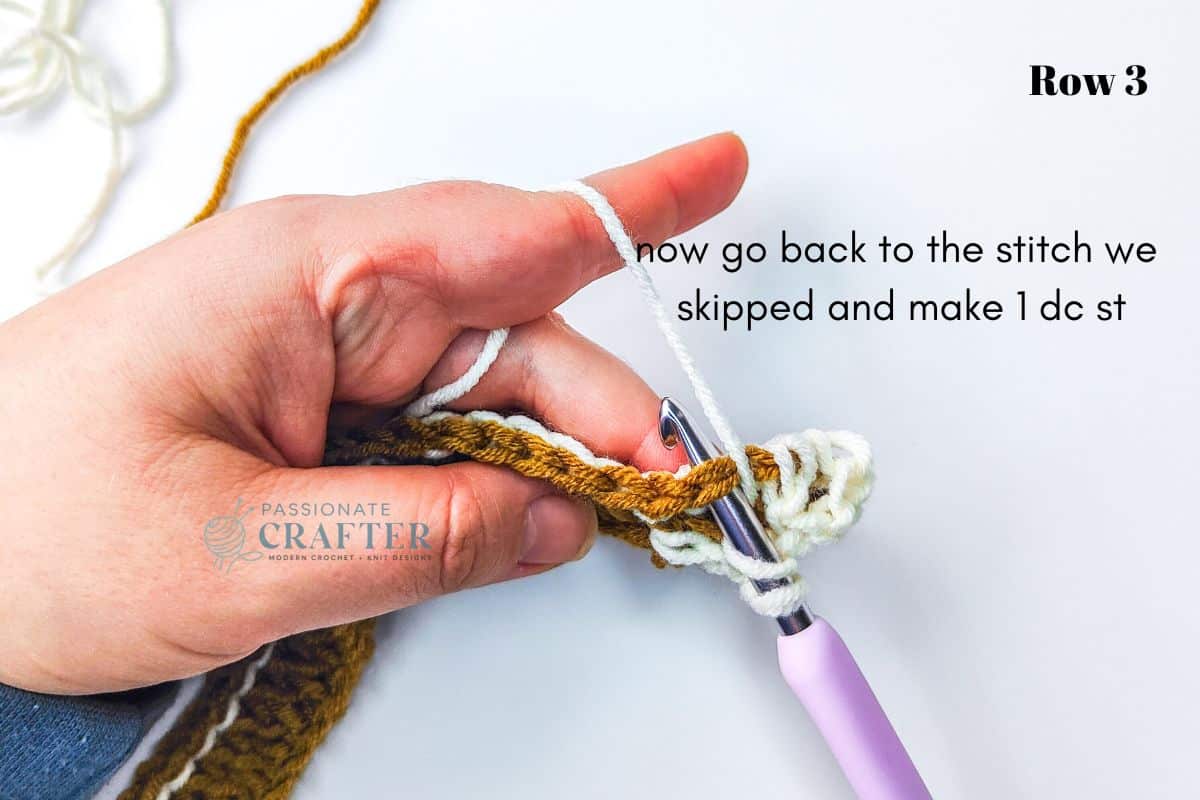
here is how it will look after the first repeat of FPDC and dc stitch for row 3
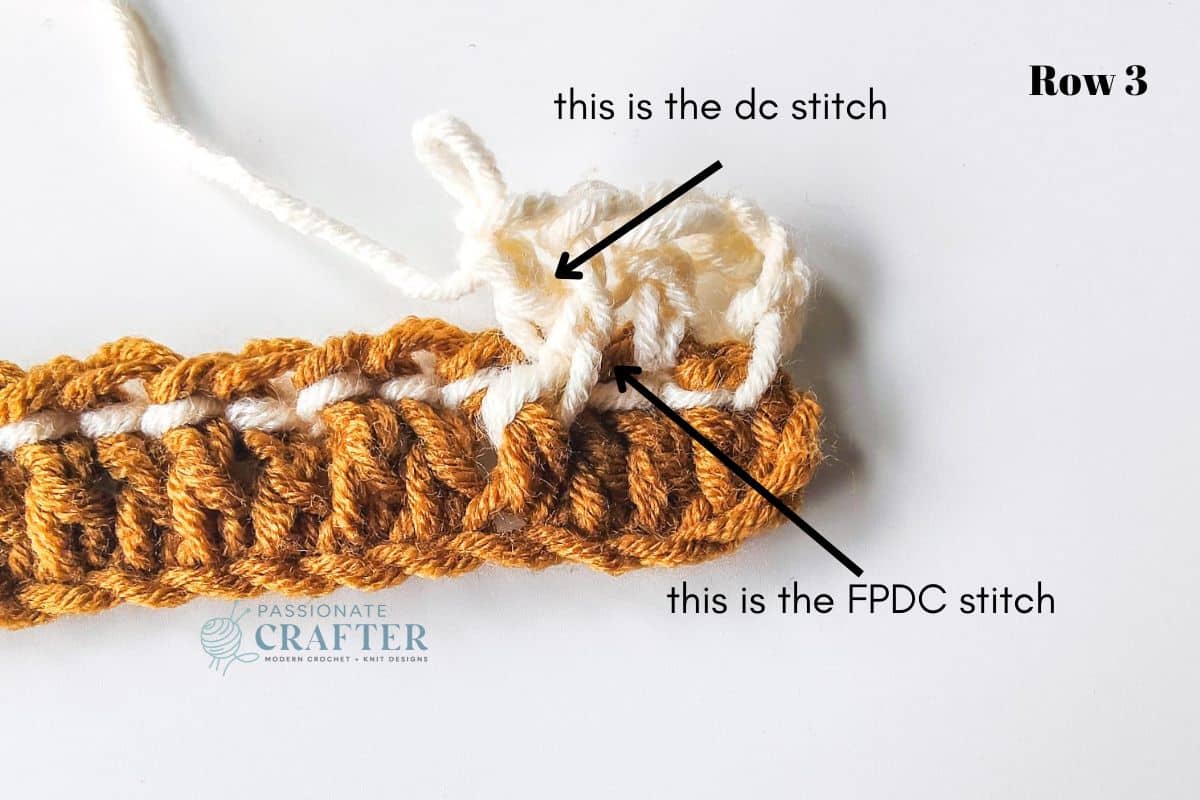
And here is a picture showing you where to work the next FPDC and dc stitch for row 3
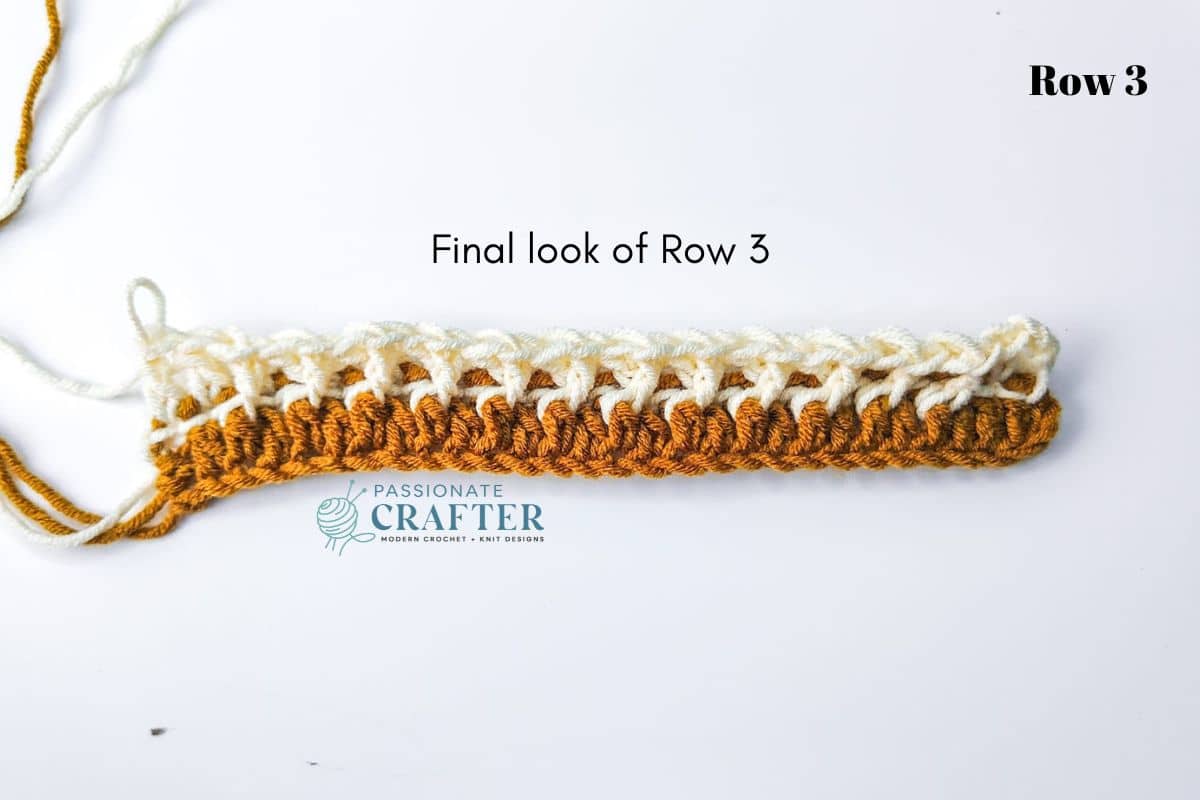
Final look of row 3
Row 4(WS): ch1, sl.st in first, sl.st across, turn (28 sts)
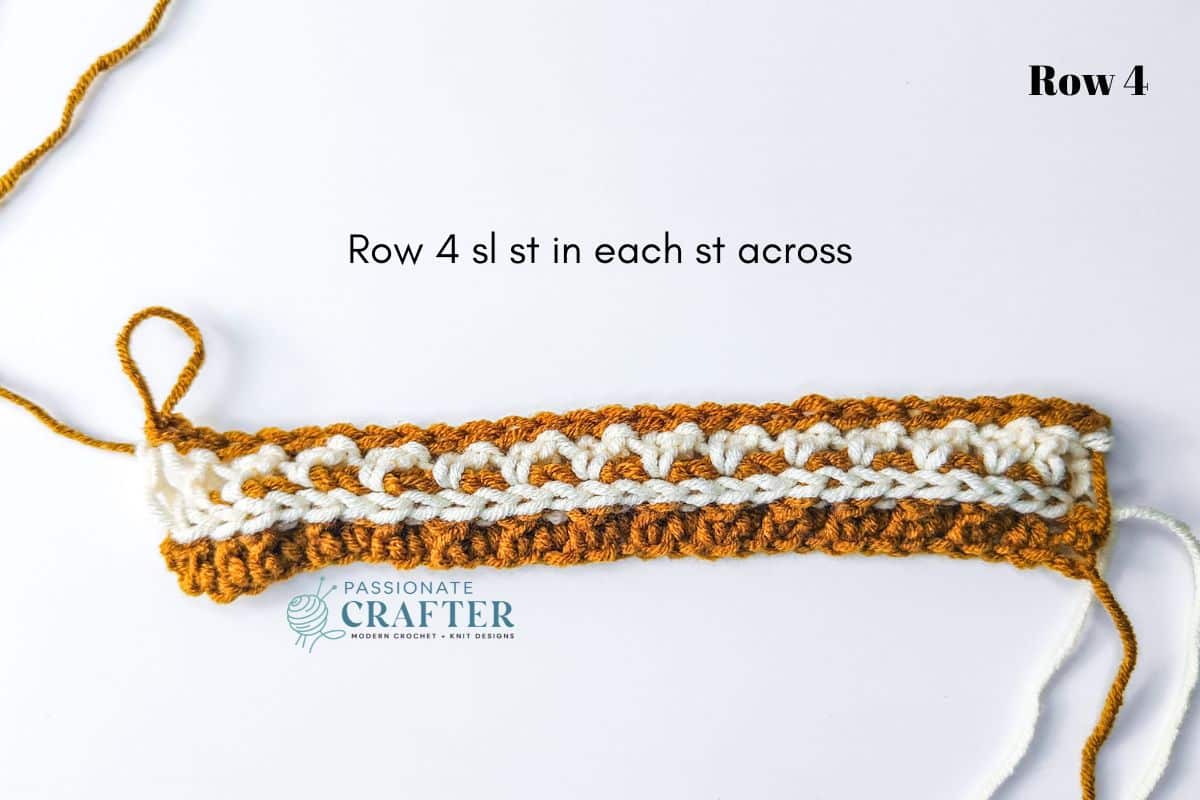
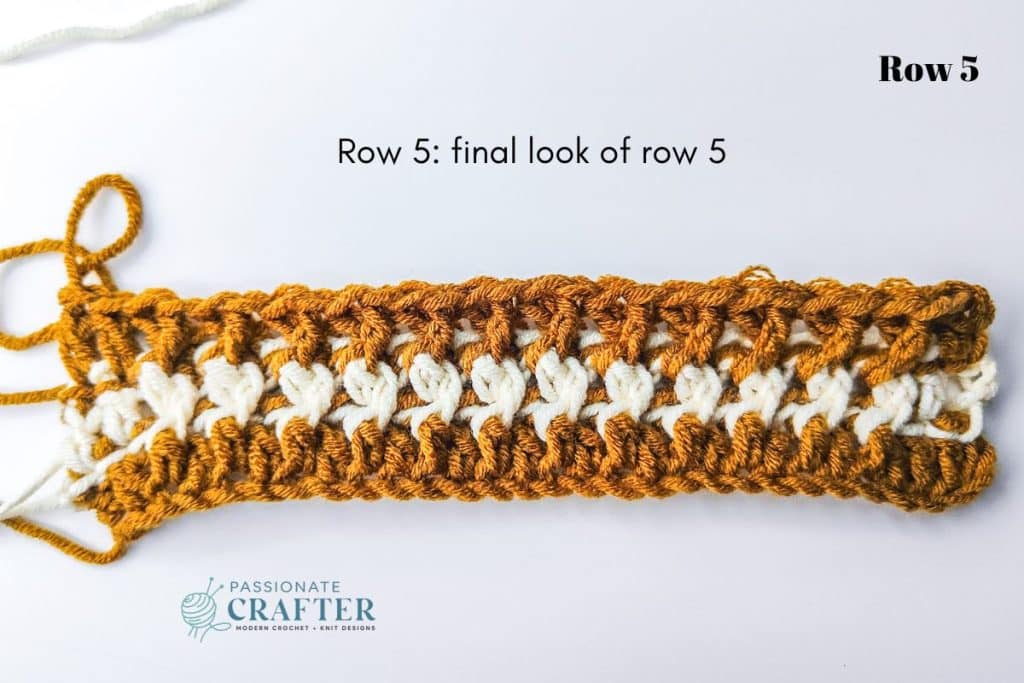
Row 5(RS): Ch3, 1 dc in next st,
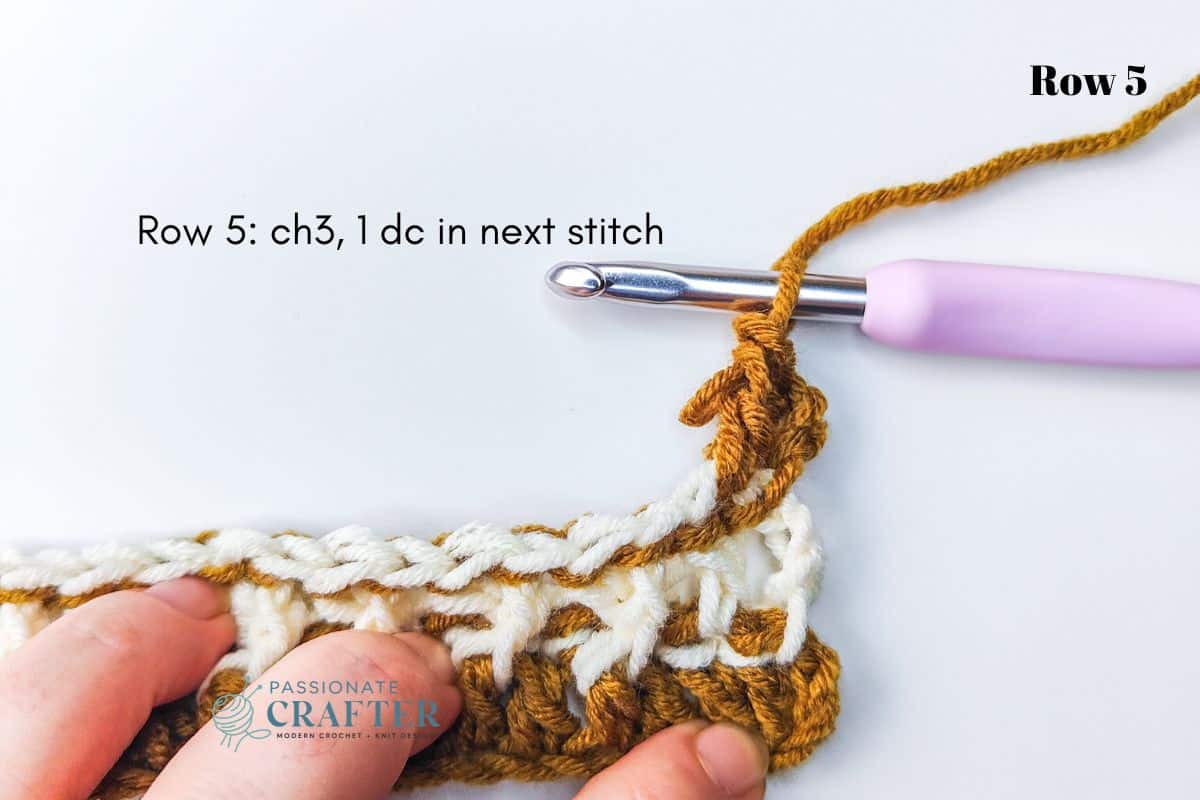
* sk1, FPDC in next st,
go back to the stitch we skipped and make 1dc * rep till last 2 sts,
1dc in next 2 sts, turn (28 sts)
Final look of row 5
Repeat rows 4 and 5 till the desired length. Try to finish your project with the slip stitch row, so it will not curl as much as without it. For blankets my suggestion is to crochet a border for a nice polished final look.
Happy crocheting!
Don’t forget to pin this for later!
More Crochet Stitches to try out


Invitation to our Facebook group
You are welcome to share your projects made by our patterns with the community and us. Moreover, we are thrilled to see your creations, and you are very welcome to share them on our FACEBOOK PAGE HERE or our FACEBOOK GROUP or on INSTAGRAM by using the hashtag #passionatecrafterr.
Save this tutorial to your Pinterest boards so that you can come back to it later.
We’d love to hear your feedback. Drop a comment below and tell us your thoughts! And don’t forget to follow us on your favorite social platform!