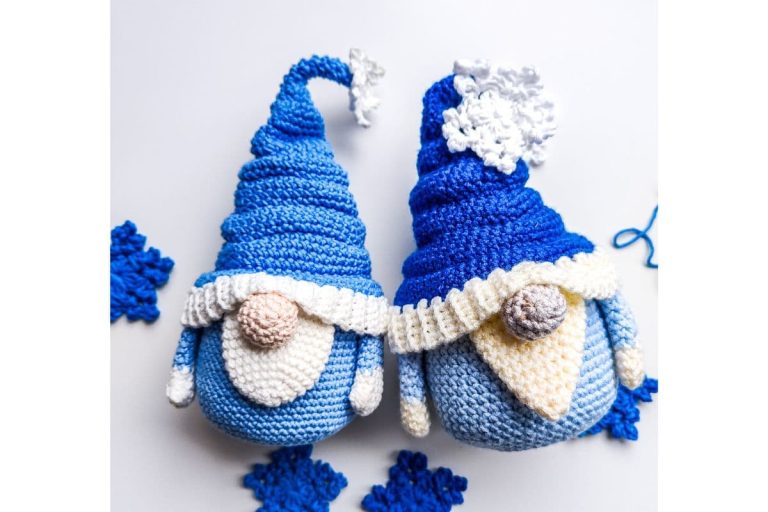
Back-to-school season just got a lot cuter! Meet the Crayon Gnome, a fun and colorful addition to our school-themed gnome collection. Inspired by the popularity of last year’s Pencil Gnome, this new design brings another bright classroom essential to life—perfect as a handmade gift for teachers, students, or anyone who loves gnomes and creativity.
Whether you’re celebrating the start of the school year, planning thoughtful teacher appreciation gifts, or just want to add a splash of whimsy to your home or classroom décor, the Crayon Gnome is the perfect project!

Easy Crochet Crayon Gnome Pattern
As I saw all the adorable Pencil Gnomes shared by fellow crocheters in our Facebook group, I knew I had to add a Crayon Gnome to the crew! The creativity and color combinations everyone used were so inspiring, it sparked the idea for this cheerful, crayon-shaped companion.
For my version, I went with light and dark purple, but you can easily make it your own—swap the colors to match your favorite shades, school theme, or classroom décor. Want to make a rainbow set? Go wild! This gnome is designed to be fun, personal, and completely customizable.
More back-to-school crochet gnome free patterns
This Crayon Gnome joins the fun alongside:
Together, they make an adorable set that celebrates learning, creativity, and handmade love. Great for decorating a classroom, gifting a favourite teacher, or building your own themed gnome army!

Finished size
23 cm using 2.75 mm or 27 cm using a 3.5 mm crochet hook
Skill level
Easy/ Advanced Beginner
Gauge
5 sts x 6 rows = 2.5 cm/ 1 inch in single crochet stitch
Yarn requirements
You can crochet this gnome using yarn from your stash! We tested two versions and loved them both:
- Yarn options:
- Hobbii Rainbow Cotton 8/6 with a 2.75 mm hook
- Premier Basic DK with a 3.5 mm hook
Both versions created a crisp, colorful finish with excellent stitch definition. The pattern is flexible, so use whatever DK or light worsted yarn you have on hand!
Nj used sport/ fine weight yarn- Premiere Basic DK 100% Acryl 100 g, 280 m in colors beige, light purple, dark purple, white and 3.5 mm crochet hook. For mine version of the Crayon gnome I used Hobbii Rainbow cotton 8/6, 100% Cotton, 50g/105 m with a 2.75 mm hook and the same colors.

Crochet Hook Size Required
Crochet hook size 2.75 or 3.5 depending of the yarn you are going to use.
Materials Needed for the Crayon Gnome
- poly fiberfill for stuffing
- tapestry needle
- stitch marker or piece of yarn
Abbreviation
Pattern written in US Crochet Terms
- sc- single crochet
- sl st- slip stitch
- ch- chain
- inc- increase (make 2 SC in same stitch)
- dec- decrease ( work 2 SC stitch together)- use invisible decrease unless noted
- MR- magic ring
- ()– repeat the stitches in the () indicated times
- FO- fasten off
- FLO- front loop only
- BLO- back loop only
Special stitches
How to yarn under method for amigurumi: Insert your hook in the next stitch, grab your yarn, but keep the working yarn under your hook and pull through ( 2 loops on the hook ), grab your yarn, but keep the working yarn over your hook and pull through.
Construction of the Crayon Gnome
The Crayon Gnome is crocheted top-down. We start from the top of the hat and continue to the body. Later we will sew the nose, beard and the hands.

Copywrite
The Beaded Bucket Bag pattern and its contents are the property of Passionatecrafter LTD and are protected by copyright laws. This pattern may not be copied, shared, distributed, or reproduced in any form without prior written permission, except for sharing links on social media. Unauthorized use of this pattern may result in legal action. This free crochet pattern is intended for personal use and viewing on the blog only. By accessing it, you agree to these terms. For any questions regarding use, please contact Passionatecrafter LTD.
Thank you for respecting my work and creativity!
How to Unlock Exclusive Content on Our Blog
Accessing exclusive content is easy! Simply click the box below, and the Grow.me app will appear, prompting you to enter your email and create a password. Once your account is set up, you can log in anytime to view exclusive content on my blog. Just be sure to switch to the login screen when entering your credentials.
If you ever forget your password, click the “Forgot Password” link and follow the steps to reset it. Please note that I don’t have access to Grow accounts and cannot assist with password recovery, so be sure to store your login details securely.
Thank you for subscribing and being part of my crochet journey! I hope you enjoy the exclusive content and find inspiration for your next beautiful crochet project.
Pattern notes
- The pattern is worked in continuous/ spiral rounds. Do not join your rounds with a sl st.
- Use a stitch marker or piece of yarn to mark the first stitch. Move the marker after completing the round.
- For my amigurumis I use the @Yarn Under@ method.
- Use safety pins to secure your pieces before sewing.
- For my amigurumis I am using the magic ring/circle to start. See tips below.
- The magic circle, also known as the crochet magic ring or adjustable loop, is perfect for creating a neat, secure beginning for any project worked in the round. See a step-by-step photo tutorial here.
- Or watch how I make a magic ring in my video tutorial.
- Alternate beginning to magic ring– chain 2 and make n-number of stitches in 2nd chain from your hook.

Crochet Crayon Gnome Pattern
Starting from the hat
-with dark purple color
Rnd 1: MR of 6 sc (6)
Rnd 2: 6 sc (6)
Rnd 3: 6 inc (12)
Rnd 4-5: 12 sc (12) [2 rounds]
Rnd 6: ( sc, inc ) x6 (18)
Rnd 6-7: 18 sc (18) [2 rounds]
Rnd 8: (1 sc, 1 inc, 1 sc) x6 (24)
Rnd 9: 24 sc (24) [2 rounds]
Rnd 10: (3 sc, 1 inc) x6 (30)
Rnd 11: 30 sc (30)
Rnd 12: (2 sc, 1 inc, 2 sc) x6 (36)
Rnd 13: 36 sc (36)
Rnd 14: (5 sc, 1 inc) x6 (42)
Rnd 16: (3 sc, 1 inc, 3 sc) x6 (48)
Rnd 15: (11 sc, 1 inc) x4 (52)
Rnd 16: 52 sc (52)
The next round is worked in BLO. Only next round!
Rnd 17: 52 sc (52)
Rnd 18-23: 52 sc (52) [5 rounds]
Attach light purple and continue with it. Do not FO dark purple.
Rnd 24-25: 52 sc (52) [2 rounds]
Switch to dark purple
Rnd 26: 52 sc (52)
Switch to light purple
Rnd 27-29: 52 sc (52) [3 rounds]
Switch to dark purple
Rnd 30-33: 52 sc (52) [4 rounds]
FO dark purple and continue with light purple.
Continue on the hat’s brim. The next round is worked in FLO.
Rnd 34: (3 sc, 1 inc) x13 (65)
Rnd 35: 65 sc (65)
Rnd 36: (4 sc, 1 inc) x13 (78)
Rnd 37: 78 sc (78) FO.
Continue on the body with light purple color.
Rnd 35: Go back to round 34 and insert your hook in any back loop stitch, pull a loop, sc in same, 51 sc (52)
Rnd 36-46: 52 sc (52) [10 rounds]
Switch to dark purple
Rnd 47-49: 52 sc (52) [3 rounds]
Switch to light purple.
Rnd 50-51: 52 sc (52) [2 rounds]
FO light purple and switch to dark purple.
Rnd 52-55: 52 sc (52) [4 rounds]
Rnd 56: (11 sc, 1 dec) x4 (48)
The next round is worked in BLO. Only the next round!
Rnd 57: (4 sc, 1 dec) x8 (40)
Rnd 58: (3 sc, 1 dec) x8 (32)
Rnd 59: (2 sc, 1 dec) x8 (24)
Rnd 60: (1 sc, 1 dec) x8 (18)
Rnd 61: 8 dec (8)
FO. Close the gap with a needle.
Crayon gnome’s beard
-with white colour
Rnd 1: MR of 6 sc (6)
Rnd 2: 6 sc (6)
Rnd 3: 6 inc (12)
Rnd 4: (5 sc, inc) x2 (12)
Rnd 5: (6 sc, inc) x2 (14)
Rnd 6: (7 sc, inc) x2 (16)
Rnd 7: (8 sc, inc) x2 (18)
Rnd 8: (9 sc, inc) x2 (20)
Rnd 9: (10 sc, inc) x2 (22)
Rnd 10: (11 sc, inc) x2 (24)
Rnd 11-16: 24 sc (24) [6 rounds]
FO. Leave a longer tail for sewing.

Crayon Gnome’s nose
-with beige colour
Rnd 1: MR of 8 sc (8)
Rnd 2: 8 inc (16)
Rnd 3-6: 16 sc (16) [4 rounds]
Stuff the nose a little.
Rnd 7: 8 dec (8)
FO. Close the gap opening using
tapestry needle. See TIPs on page 2.
Leave a longer tail for sewing.
Crayon Gnome’s hands
-with beige colour
Rnd 1: MR of 5 sc (5)
Rnd 2: 5 inc (10)
Rnd 3-5: 10 sc (10) [3 rounds]
FO beige colour, attach light purple color
Rnd 6-16: 10 sc (10) [11 rounds]
FO. Leave long tail for sewing.
Let’s connect, follow us on our social media for more inspiration
How to assembly your gnome
Use safety pins to place your pieces. Once you like the placement sew them onto the body.
First take the beard and sew it right below the brim.
Secondly, take the nose and sew it onto the beard.
now take the hands and sew them on both sides. Leave 4-5 stitches between the beard and the hands.
Save this tutorial to your Pinterest boards so that you can come back to it later.
We’d love to hear your feedback. Drop a comment below and tell us your thoughts! And don’t forget to follow us on your favorite social platform!
Invitation to our Facebook group
You are welcome to share your projects made by our patterns with the community and us. Moreover, we are thrilled to see your creations, and you are very welcome to share them on our FACEBOOK PAGE HERE or our FACEBOOK GROUP or on INSTAGRAM by using the hashtag #passionatecrafterr.
More Gnome Patterns
Check all the free crochet gnomes on the blog. We have a huge selection of more 60+ free crochet gnomes!